Page 1 of 1
STEP BY STEP POT STILL BUILD.
Posted: Sun Jul 12, 2009 12:54 am
by shifty
This site has a wealth of knowledge but because of it's size i kind of had trouble finding the pictures i was after when deciding to have a go at building my first pot still.
( im not very smart but i can lift heavy things! ) So after finally coming to grips with how they work i set about building one, taking a few step by step pictures along the way thinking it may be of help to some other noobs like myself. The only thing is, because i am quite new to this highly addictive hobby, i may not have built the best pot still going around so for the pro's out there, please feel free to fill me in on where i went wrong or could have done things better....
A breakdown of the condenser....
Reduction end caps.....
Inner pipe is 1/2 inch, outer is 1 1/4 inch......2 foot long..
Assembling the condenser....

Water flow cooling pipes....
Good clean up for the soldering....

And there you have it....
Now onto the main arm...
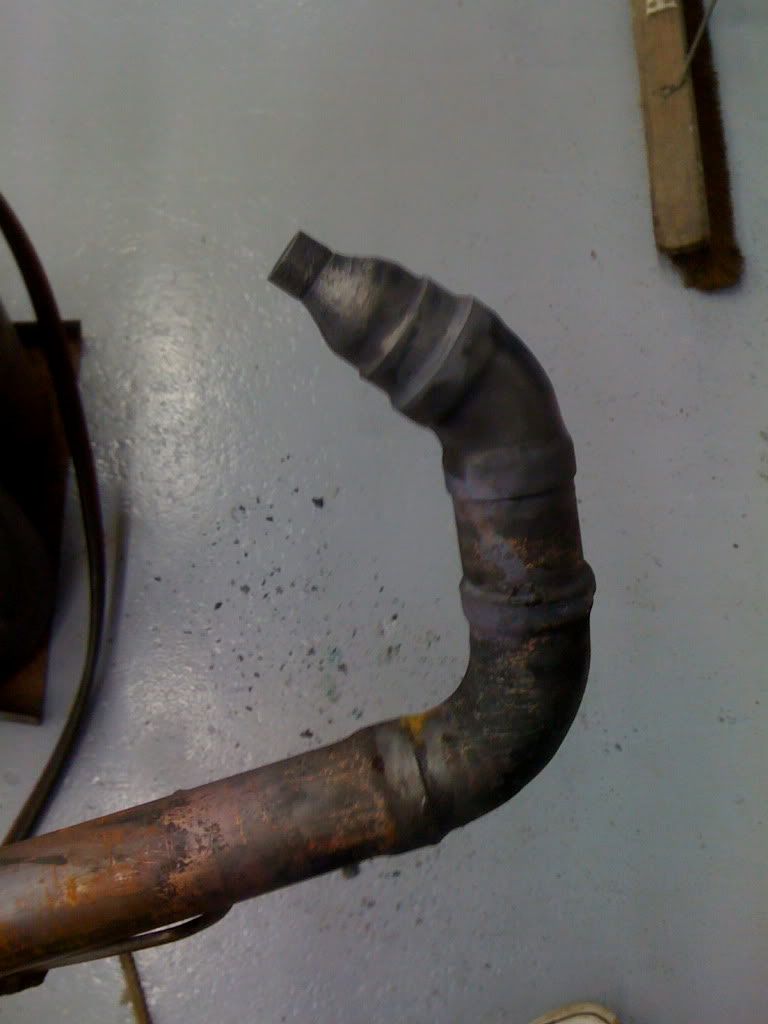
Fitting the lid. It feels kind of thin and weak so i think ill get a new lid made from 4mm thick stainless down the track...
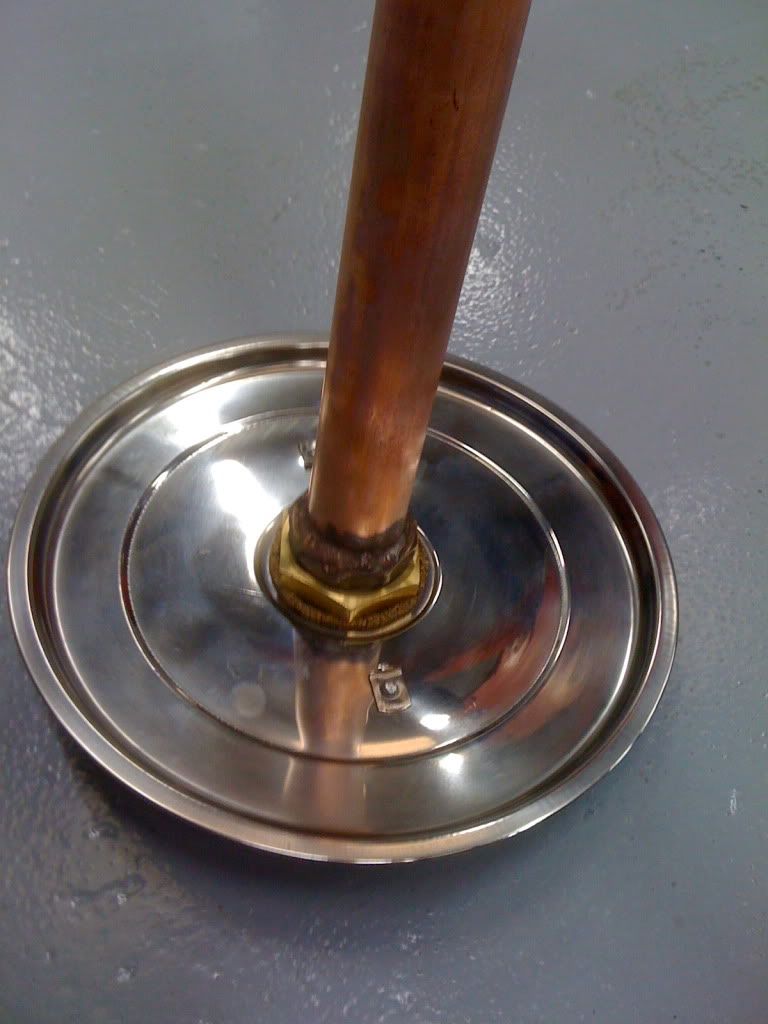

And there you have it. One pot still... Errrr, hope it works ok..

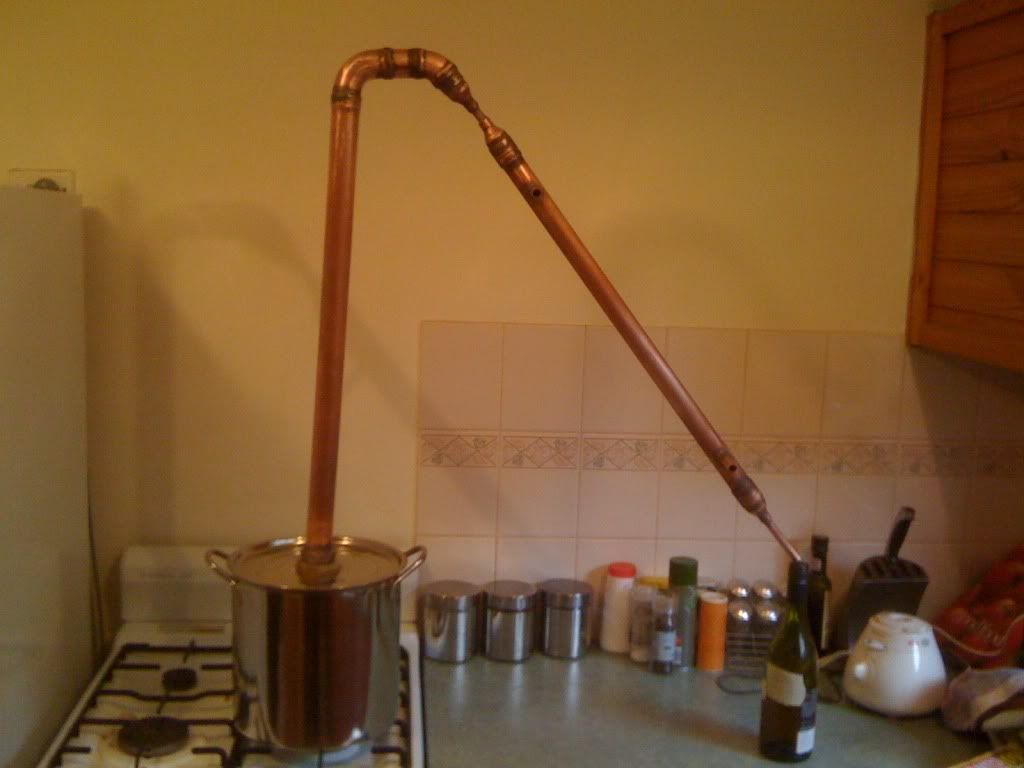
now all i need to do is get a ujsm on the go and im away....
Re: STEP BY STEP POT STILL BUILD.
Posted: Sun Jul 12, 2009 1:26 am
by HookLine
Looking good.
Re: STEP BY STEP POT STILL BUILD.
Posted: Sun Jul 12, 2009 2:29 am
by stillvodka
Is that copper phosphorus rod your using, How are they to use ? I have used practically everything else, apart from them.
Re: STEP BY STEP POT STILL BUILD.
Posted: Sun Jul 12, 2009 3:00 am
by MOUSE
I found it easier to use "end feed reducing tees"
for my condenser.
Re: STEP BY STEP POT STILL BUILD.
Posted: Sun Jul 12, 2009 3:24 am
by shifty
stillvodka wrote:Is that copper phosphorus rod your using, How are they to use ? I have used practically everything else, apart from them.
I have absolutely no idea what you mean!

This is only the second time ive ever soldered. I can use an oxy and i can mig weld but before this ive never soldered. I just asked the dude at the plumbing joint for lead free silver solder....
Id have to say though, i found it quite easy to use...
Re: STEP BY STEP POT STILL BUILD.
Posted: Sun Jul 12, 2009 3:27 am
by shifty
MOUSE wrote:I found it easier to use "end feed reducing tees"
for my condenser.
They would be perfect. I have basically no idea whats out there... I was just kind of winging it...
Re: STEP BY STEP POT STILL BUILD.
Posted: Sun Jul 12, 2009 4:22 am
by HookLine
You can get those reducing Ts at Bunnings (in 3/4" x 1/2"). Cheap too.
Re: STEP BY STEP POT STILL BUILD.
Posted: Sun Jul 12, 2009 5:11 am
by LWTCS
I use those reducing Ts for (almost) all my stuff.
But thats because the butt joints kill me.
The 2 inch Ts are a little spendy though.
Aside from the lean on your column, I think your work looks damn nice.
Re: STEP BY STEP POT STILL BUILD.
Posted: Sun Jul 12, 2009 7:25 am
by stillvodka
shifty wrote:stillvodka wrote:Is that copper phosphorus rod your using, How are they to use ? I have used practically everything else, apart from them.
I have absolutely no idea what you mean!
This is only the second time ive ever soldered. I can use an oxy and i can mig weld but before this ive never soldered. I just asked the dude at the plumbing joint for lead free silver solder....
Id have to say though, i found it quite easy to use...
Yes, looking at your picture, it certainly looks like it, it don't look like silver solder to me, should imagine how thick that rod your using, would cost quite a few bob for silver solder rods.
Nice Job your your doing there.
Re: STEP BY STEP POT STILL BUILD.
Posted: Sun Jul 12, 2009 2:31 pm
by shifty
.
Aside from the lean on your column, I think your work looks damn nice.[/quote]
Cheers... I think that lean is just because the lid is flimsy and thin. Plus it's just too heavy on one side. I think ill make some sort of stand where the goodness comes out...
Re: STEP BY STEP POT STILL BUILD.
Posted: Sun Jul 12, 2009 2:35 pm
by Hawke
Really doesn't matter on a potstill, as long as it goes up, then down. (Without a change in direction somewhere in between.)
Re: STEP BY STEP POT STILL BUILD.
Posted: Sun Jul 12, 2009 7:03 pm
by drunk2much
Great feed on building a condesor. This is just how i built all of my condensor for my stills but, did you think of using Brass barbs for the water inlet and outlet just grind the threads down and solder them in. that way you dont allways have to tighten hose clamps (so i Assume)
Re: STEP BY STEP POT STILL BUILD.
Posted: Mon Jul 13, 2009 2:57 pm
by LWTCS
I use a 5/8 barb with 5/8 hose and never need a hose clamp.
No real water pressure running through the coolng lines. Water rolls in then out nice and easy.
Re: STEP BY STEP POT STILL BUILD.
Posted: Mon Jul 13, 2009 3:18 pm
by olddog
I have fitted compression connectors to my input/output connections, then I have snap on garden hose connectors fitted to the theaded fittings, its just a case of snap on, snap off, when assembling or disassebling. No leaks whatsoever.
Re: STEP BY STEP POT STILL BUILD.
Posted: Tue Jul 14, 2009 12:57 am
by shifty
olddog wrote:I have fitted compression connectors to my input/output connections, then I have snap on garden hose connectors fitted to the theaded fittings, its just a case of snap on, snap off, when assembling or disassebling. No leaks whatsoever.
Any chance i could get a photo of these connectors so i can try and get my hands on em? Sounds like a neat way of doing em...
Re: STEP BY STEP POT STILL BUILD.
Posted: Fri Jul 17, 2009 7:45 pm
by violentblue
MOUSE wrote:I found it easier to use "end feed reducing tees"
for my condenser.
yup these are the easiest way to do it that I've found.
Re: STEP BY STEP POT STILL BUILD.
Posted: Sat Jul 18, 2009 6:11 am
by Husker
Nice build. I really like this design.
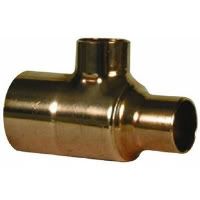
The one thing I would recommend, is to use 2 90's, with a short piece between them. Then you can put that lyne arm at any angle you want, and not have to have such a tall column (cut down on a little of your weight.
For the 2 90's, the first would attach to the column, and come off at, errm, 90

This first 90 can even be a 90 reducer. Say, 90° 2" to 1.5" or so. Then attach a short piece of tube to this 90's out. On the end of that tube, put another 90. On this 90, you can twist it to get the proper angle you want. You should have your condenser done first, so you can line things up, and get proper height.
I could not find the 'exact' picture I wanted (to explain), but I think this one will get the idea across:

NOTE, I also recommend the reducing T's for building a lebig condenser if you are going that route. You were able to get good butt joins, but many noob solder'ers will not be able to do that, or have a hell of a time getting things all sealed. The T's remove that problem, and simply soft solder will seal them up just fine.
H.