Page 1 of 2
Uncle Remus' apple/alder wood smoked barley whiskey
Posted: Tue Oct 17, 2006 6:26 pm
by Uncle Remus
This really is a first time recipe. That is the smoking of the grain part, the rest will be my regular whiskey mash and distilling. If you so choose Tater you can move this post to research and theory. Anyway here we go:
PART #1 Smoking
Ok here is a tray that will fit in my lil' ole smokehouse. It's about 18"x24" and about 3.5" deep. It's got window screen on the bottom and I've filled it with rolled barley. Probably 9-10 lbs.
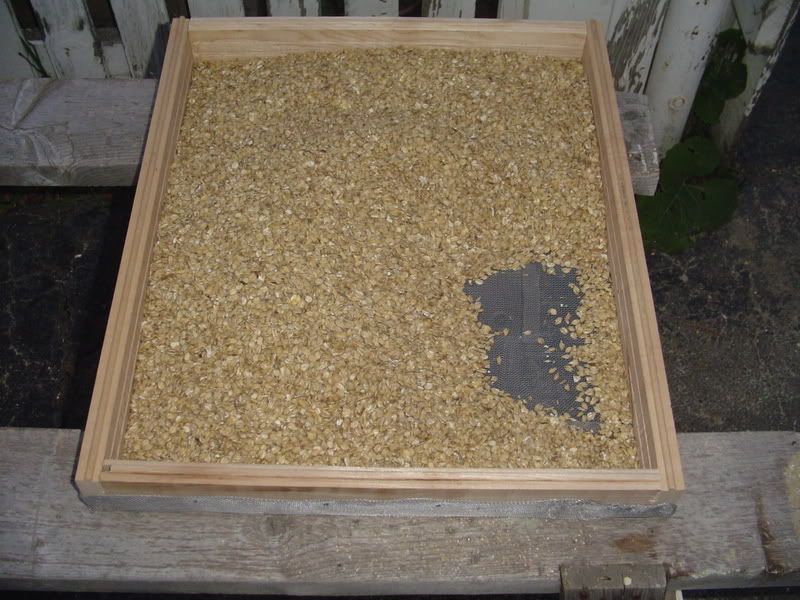
Next I take the garden hose and lightly spritz the grain. I'm talking get it damp, not sop and wet.

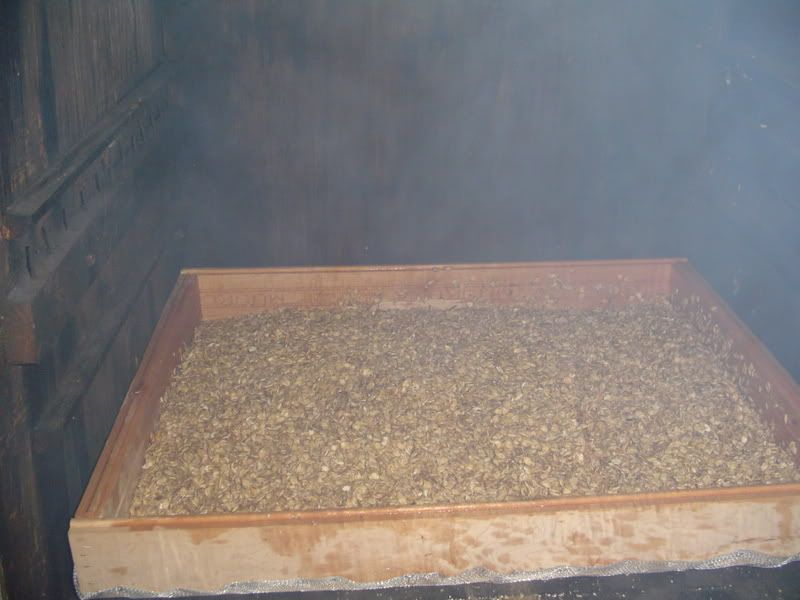
Now I put it in my li' ole smokehouse.

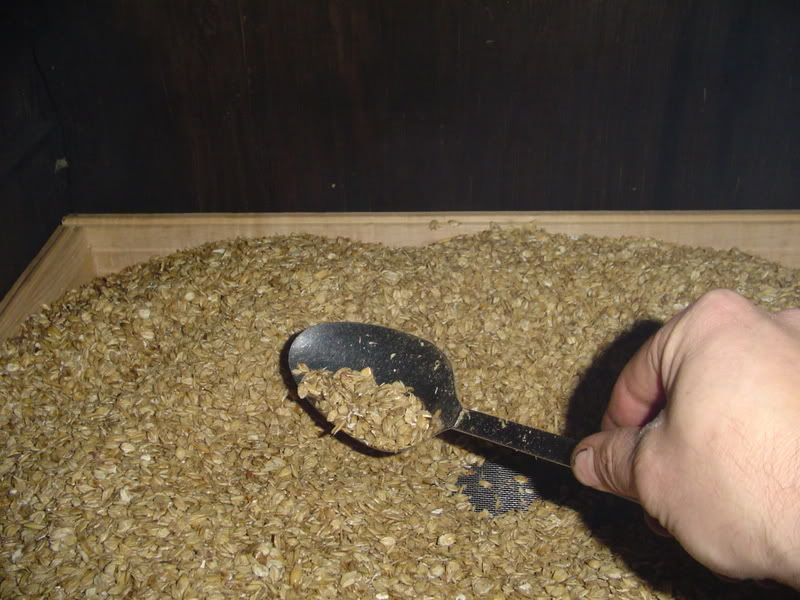
Give the grain a little stir once in a while.
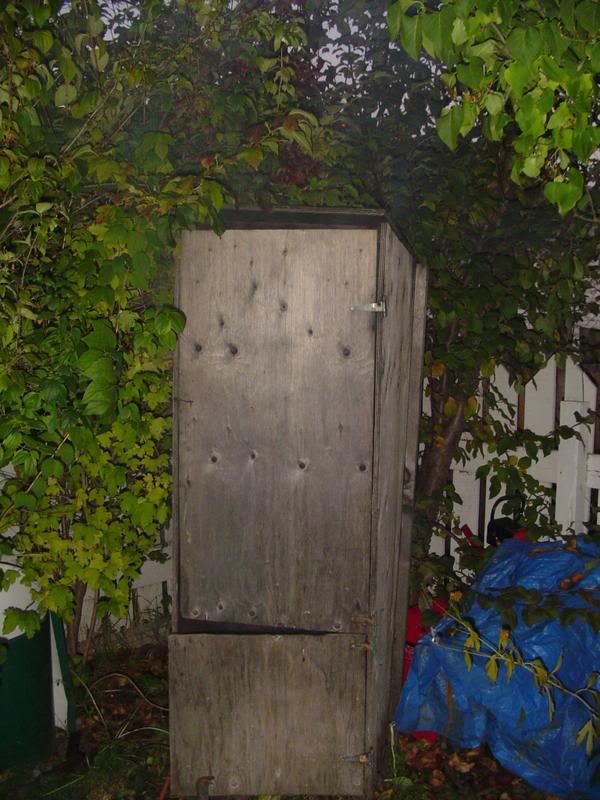
Here's my lil' ole smoker in action
I'm writing this post as I'm smoking up the barley. I got about another 10 lbs i'm gonna throw in after this batch. I will smoke each batch about 2 hrs.
....Stay tuned more to come in a few days or so when I make the mash.
Posted: Tue Oct 17, 2006 10:02 pm
by Bujapat
Very interesting UR!
How do you smoke : what's burning, how, and in what? I imagine you've some kind of steel pot on the ground in the smoke house to keep the burnin' material...
Posted: Wed Oct 18, 2006 2:49 am
by vinifera
Very interesting indeed! I have whisky plans but intend to use peat instead. Don't know what differnece it makes but I like to get close to some Isley style scotch.
Posted: Wed Oct 18, 2006 6:28 am
by Uncle Remus
I have a propane burner in the bottom of the smokehouse. Actually it is the same burner I use for heating my boiler. My smoker had it's own burner before but it rusted out.
I have a stainless steel pot on the burner with a lid. Inside the pot I have a mixture of apple wood and alder cut into very small pieces.
Alder is a hardwood, it is more like brush than a tree actually, it can grow to maybe 20cm in diameter. It grows everywhere around here. Everyone uses it to smoke meat and fish with. It's also excellent to chip up and throw in the barbecue, especially if your cooking salmon.
I thought about peat too. The only kind of peat around here is at garden supply places. It's like dirt, I don't know if it be the same as the peat the Scotts use to dry their malt.
If nothing else this whiskey should be unique.
Posted: Wed Oct 18, 2006 1:03 pm
by vinifera
Don't know about your peat but the garden peat (untreated) here should be perfect for this. The Swedish whisky Mackmyra is made with Swedish peat.
But indeed your whiskey is unique. Hope it tastes good as well and not just unique.

Posted: Wed Oct 18, 2006 3:12 pm
by hornedrhodent
AFAIK the peat from garden suppliers in Australia is actually coconut fibre. It probably wouldn't taste right.
Re: Uncle Remus' apple/alder wood smoked barley whiskey
Posted: Wed Oct 18, 2006 3:25 pm
by hornedrhodent
="Uncle Remus
Now I put it in my li' ole smokehouse.
Is that flame the smoke catching fire?
Does it go out when the door is closed and the air supply is reduced?
Posted: Wed Oct 18, 2006 3:45 pm
by Uncle Remus
It was probably a small chunk of wood that missed the pot and is burning up on the burner.
Posted: Thu Oct 19, 2006 2:55 am
by golden pond
Remus, I think you're needing peat MOSS, is kind of like sod, it's moss with a layer of root material.
Posted: Sun Oct 29, 2006 9:14 pm
by Uncle Remus
PART 2 THE MASH:
Like a dummy I forgot to bring my camera so no pics of the mashing. But anyway this is what I did:
Grain Bill:
15 lbs of smoked rolled barley
3 lbs of rolled corn
3 lbs of ground pale ale barley malt
-In the big ole' mash pot I heated 40 litres of water to 74 deg C.
-When water was up to temperature I stirred in the 15 lbs of smoked grain and 3 lbs of corn.
-Kept the heat on this mixture till it reached 74 deg C again (adding the grain cooled the water a few degrees)
-When the mash hit 74 deg C I shut off the heat and put the lid on the big ole' pot.
-Let this mixture gradually cool to 67 deg C stirring every once in a while. It took about 1 1/2 hours to cool this much.
-Added the 3 lbs of malt and about 8 grams of alpha amylase enzyme. Stirred well and put lid on and let sit for 2 hours for starch conversion.
-After 2 hours the temp was about 55 deg C. Took the mash pot outside and put in the snow to cool (yes snow we got our first storm of the year today and it dropped about 6"....brrrrr!)
-When temperature was low enough 35 degrees or so I threw in the yeast, which is a culture I've been saving for several generations of whiskey now. I also added about 8 grams of gluco amylase enzyme.
The SG reading of this mash was 1.045 a potential of about 6% av but I think it will be a bit higher after the gluco amylase works on the grain for a while. This is my first attempt at mashing grain with enzymes, so far so good so it seems.
More to come later...when I do the distilling, hopefully I won't foget the camera and I will probably be using my new pot still. My old pot still works great, but I'm always trying to build a better mouse trap
Posted: Sat Nov 11, 2006 10:03 am
by Uncle Remus
Part 3 THE DISTILLING:
I'm gonna take this opportunity to introduce you to and show off my new pot still. Everyone meet
Layla This is her first run with a new recipe. I'm very pleased with the way she performed to say the least

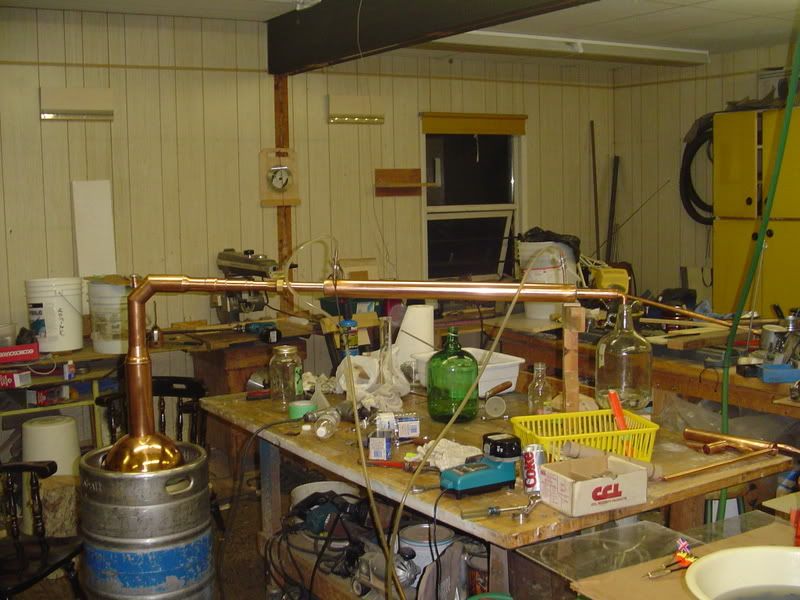
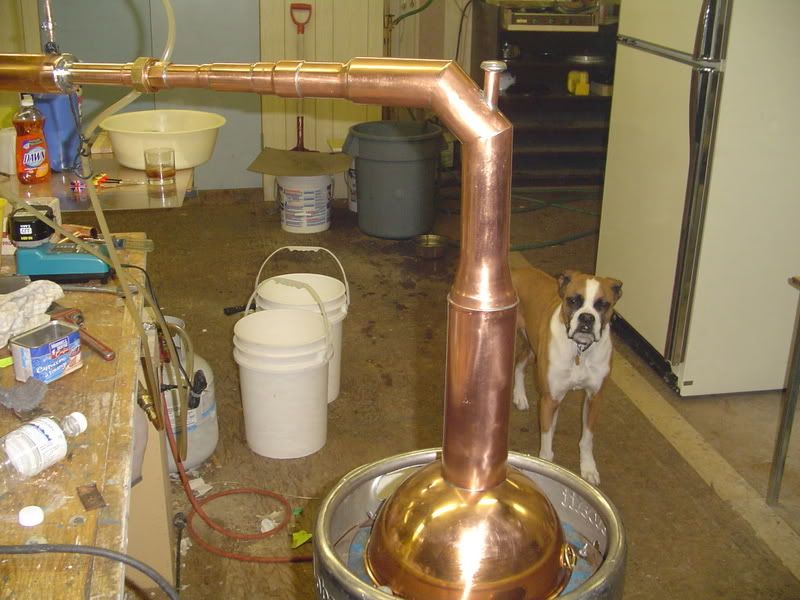
Layla is the one stitting on top of the keg

Attatched to the top of the bowl is 3'' copper. Above that it's necked down to 2" till it rounds the
corner, then it reduces it's way down to 1" and then couples to the condensor.
My thoughts were it would run faster by being reduced gradually and with more of a rounded corner rather than a 90 degree one. More vapour flow with less restrictions = faster production.
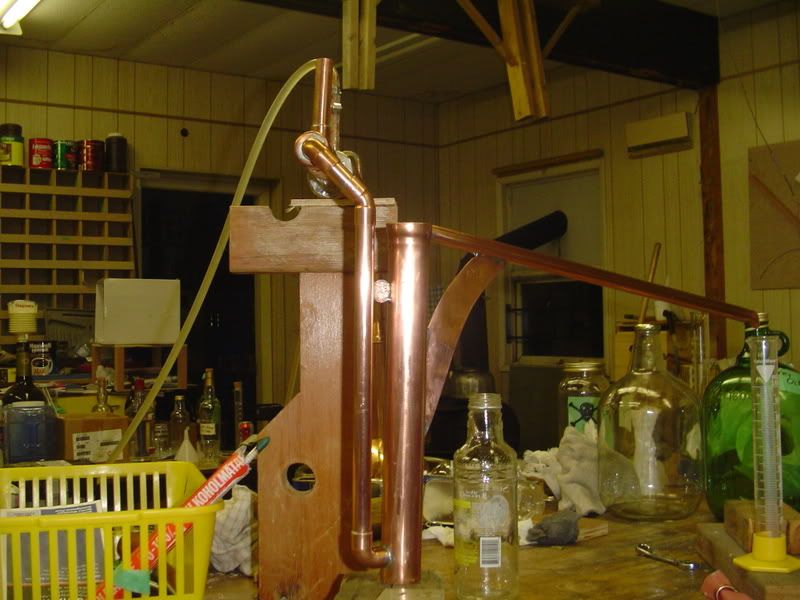
This is gonna be on the business end of Layla soon. A continuious AV% checker / parrot beak. I just have it dry fitted here, I have some soldering left to do on it. Next time I do a run I should have it ready.
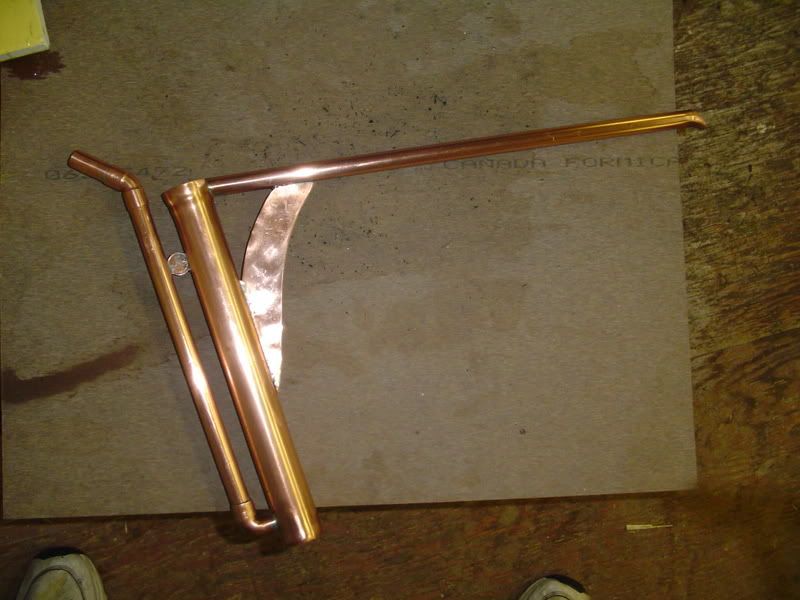
Heres another pic of the parrot beak. The Canadian penny is an option
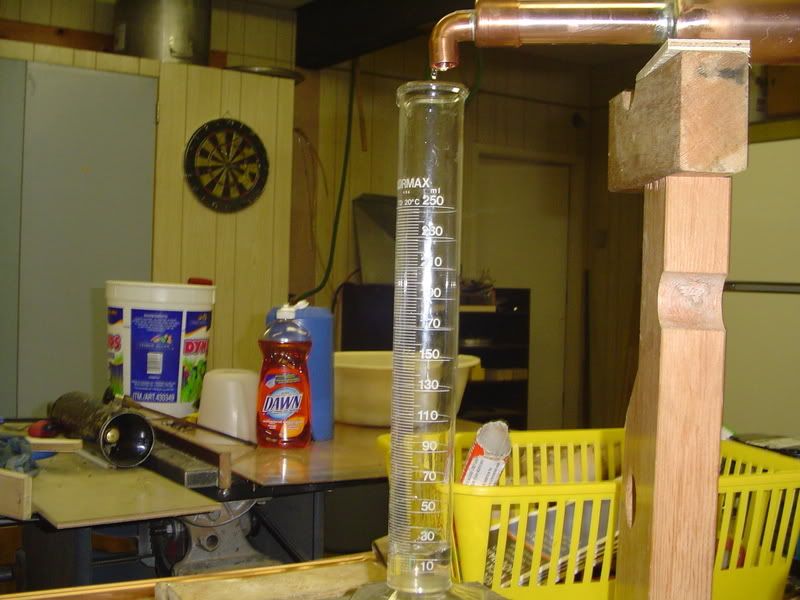
Ok here's the start of the strip run. I have about 40 litres of wash in the boiler that is only 6-7% av. The first drips are coming off. I took 50mls and put in in the Coleman lamp jar. If this was a higher %av wash I would be taking more. I did one %av check after the foreshot and the distillate was about 50-55%. I stripped a total of about 6 litres of low wines from this wash. I ran it right down till the head temperature reached 220 deg F. This strip run took less than 3 hours, considerably faster than my other pot still.
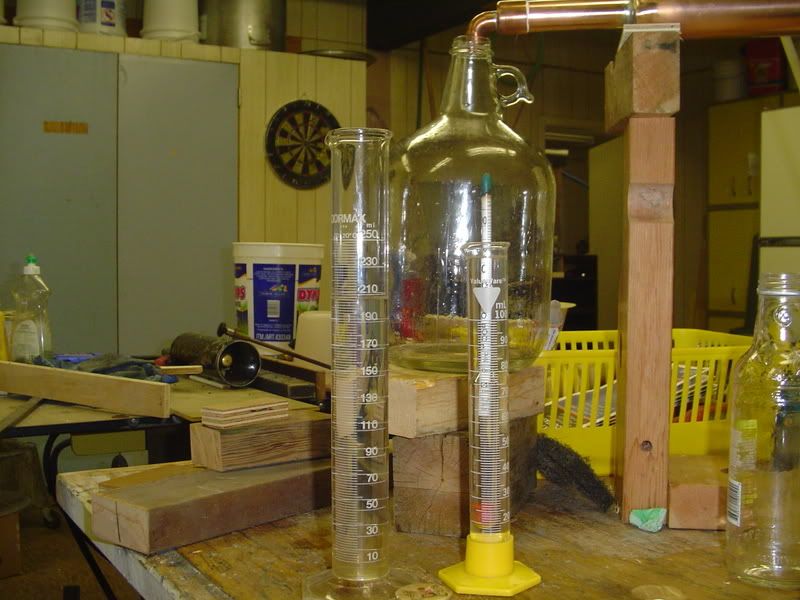
Moving right along to the spirit run. Here is where I made my heads cut. I went by smell and feel and ended up taking 210ml for heads. I did a av% check right after the cut and the distillate was coming off at 78-79%.
The total spirit run took about an hour.
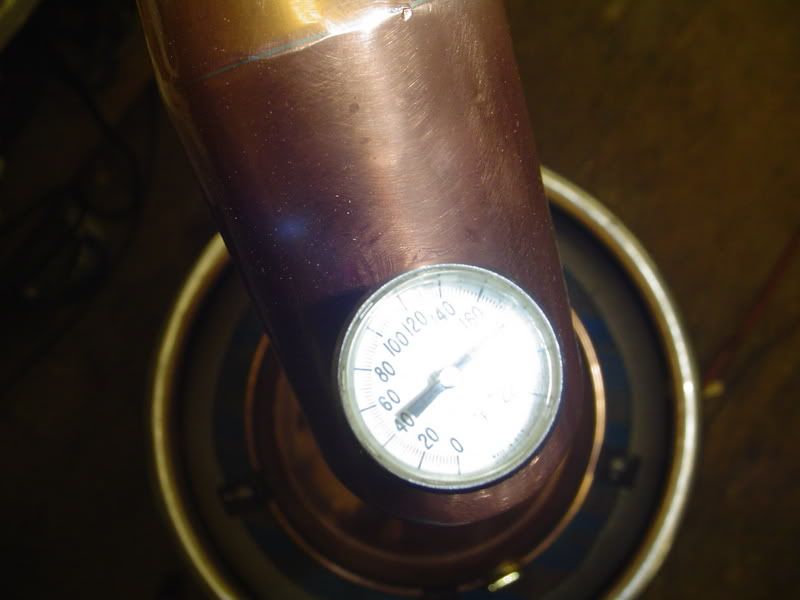
Here is the thermometer in the Layla's head. Note the temp is holding a steady 172 deg F. BTW this thermometer is just sitting in a 1/2 copper pipe. It is not sealed at all, there is no vapour loss here because the vapour has a much easier path toward the condensor.

Here is my tails cut. Again I went by smell and taste. The av% right here is 40 %. After this I cranked the heat a bit and collected about 300mls more and shut it down.

The average av% of the product measures 65%. I ended up with about 2.5 litres of product and only about a half litre of feints.
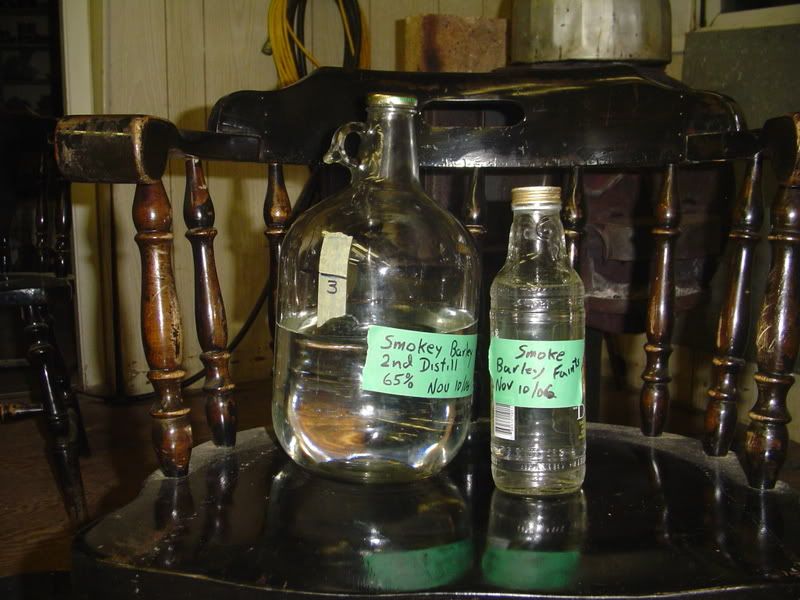
The fruits of my labour
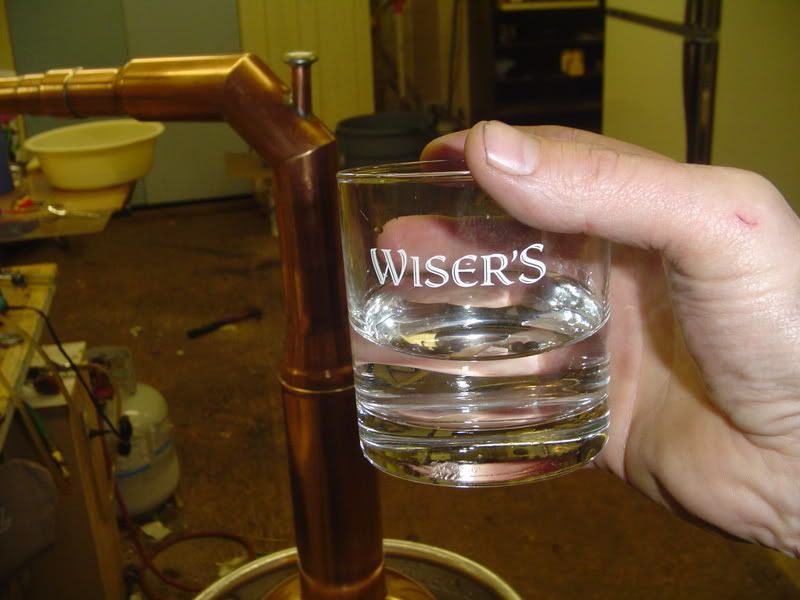
....and here's the good part, about 1 finger of whiskey and 1 finger of water. Here's to Layla (oh she's gonna treat me well!

) ...and here's to a successfull new whiskey recipe. Very nice drink, nice smokey flavour and really smooth, even just white like this, it's gonna be nice after it's slept on the oak for a while. ...And cheers to you all on this board...hope I never annoyed you too much blowin' my own horn and all

Posted: Sat Nov 11, 2006 10:15 am
by speedfreaksteve
That potstill makes me drool. It's a thing of beauty! I have a keg the same sized just sitting here empty, now you've got me thinking!
Also I now know that I'm not the only one that's a slob when it comes to leaving crap their workbench.
I have a few annoying questions for you though:
-where did you get the copper bowl? I want one.
-what does the taste of that compare to. I know its unique, but what would be the closest thing to it?
-what's the best type of source to get activated charcoal in quantities?
Posted: Sat Nov 11, 2006 10:16 am
by sherriff Buffoerd pusser
Uncle Remus yall do some nice damn work your new still looks great.congrats on still and drink you produceded.
Posted: Sat Nov 11, 2006 10:59 am
by FAROM
@ Uncle Remus
Ciao, Can you tell me the diameter of the column and the height kindly, actually to the point of the thermometer? Thanks., ciao
p.s.
Excuse me for my bad English
Posted: Sat Nov 11, 2006 11:39 am
by masonjar
Wow, look at those solder joints! Did you grind them down? That's a spectacular looking still. Hats off to you!
By the way, your thermometer says ~178F but your caption says 172F.
Posted: Sat Nov 11, 2006 12:08 pm
by Uncle Remus
Steve I bought the bowl on ebay. It's a nice heavy guage copper. It's old, but in perfect shape. Probably was a chocolate makers bowl.
The whiskey right now has what I would call a bit of a earthy taste, quite grainey, but this mellows in a short time. I think after it's been oaked for a while it will be like a smokey scotch without the peatey flavour (if that makes sense.)
FAROM the pipe above the bowl is 3 inch. The next section is 2inch that I expanded to 3 inch on one end. The overall height is probably around 60 cm- it's been quit a while since I built the head so I don't remember the exact measurement.
When you solder your joints if you give them a fast wipe with steel wool while their still hot, it makes them a lot neater. I did polish any excess off with a Rolloc disk (much like a piece of brillo pad) in a die grinder.
Thanks for the kind compliments guys
Uncle Remus' apple/alder wood smoked barley whiskey
Posted: Sat Nov 11, 2006 12:19 pm
by birdwatcher
Congratulations; beautiful!
Tell me how you get your copper so nice a shiny. I would like to do the same to my stills.
Cheers,
G
Posted: Sat Nov 11, 2006 12:38 pm
by FAROM
Compliments for your cleverness in to work the copper, needle' always to like to see burdens well done jobs. Do I give you tell me as you have done to expand the pipes from 2 inch to 3 inch, what material uses for to braise? Excuse me for the too questions.
Posted: Sat Nov 11, 2006 2:28 pm
by Uncle Remus
Fine steel wool first and then a product called Never Dull. Never Dull is a chrome polish, its like cotton baton, comes in a can, just rip off a piece and add some good ole elbow grease. After I got it shine up nice I sprayed it with some clear laquor to keep it from oxidizing.
Farom, I first heat the copper on the end with an acyteline torch. Get the copper red hot and then dip it in water to cool it fast. Then I put it in a hydraulic press with a metal cone, slowly press the cone int the pipe. You can ony go a little at a time and then the copper work hardens. You then must heat and quench it in water again. You can really make copper stretch if you take your time.
I only used lead free solder on all the joints.
Posted: Sat Nov 11, 2006 4:33 pm
by level Joe
Damn Uncle Remus!
Youre gonna need that dog to guard Layla
.
VERY NICE!
Posted: Sat Nov 11, 2006 4:35 pm
by speedfreaksteve
Uncle Remus wrote:Steve I bought the bowl on ebay. It's a nice heavy guage copper. It's old, but in perfect shape. Probably was a chocolate makers bowl.
Thanks for the idea! Just bought a set of 3 copper bowls on ebay for cheap! At least one them should be big enough to convert my keg to a pot still.
Now any tips on how to cut a hole in the bottom of the bowl and in the keg. Also I guess I'll have to braise the column to the bowl?
Posted: Sat Nov 11, 2006 5:32 pm
by Uncle Remus
Thanks for the idea! Just bought a set of 3 copper bowls on ebay for cheap! At least one them should be big enough to convert my keg to a pot still.
Now any tips on how to cut a hole in the bottom of the bowl and in the keg. Also I guess I'll have to braise the column to the bowl?
Right on...When I bought mine I had to find one to fit the hole, 10.5 inch in diameter...It took me about a week but I got one, I paid a little more than I wanted to but???
I used a 3'' hole saw in a drill press to cut the hole in in the bowl which I would highly recommend using. The screw up factor is much lower. You can buy em individually. I borrowed one, but if i couldn't have I'd of bought one. They look like this:

The keg I cut the hole with a sabre saw with a metal blade in it. It cut like cheese.
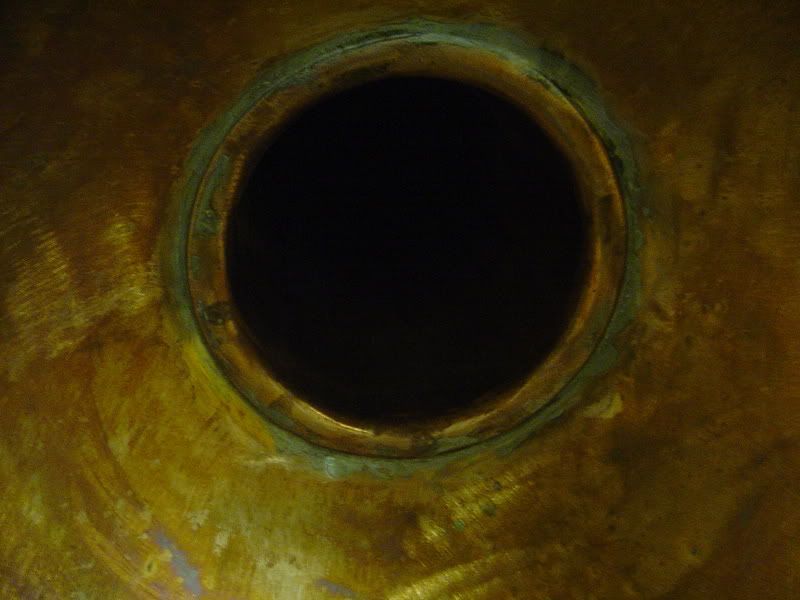
The bowl to column connection is copper to copper so I just used lead free solder. I annealed and pressed out a small flange on the pipe. It really wasnt hard to do. The inside looks like this: Poor pic but you get the idea.
Good luck!
Uncle Remus' apple/alder wood smoked barley whiskey
Posted: Sun Nov 12, 2006 6:41 am
by birdwatcher
Good day Uncle Remus,
Thanks for the info. With your talent, I was wondering what you're doing in North B.C.
You should be in Ft. McMurray. They need you.
Have a good day,
G
Posted: Sun Nov 12, 2006 10:41 am
by Uncle Remus
Actually I'm in southern BC. I've worked up north and did the camp thing for several years, not in the oil patch but hardrock mining. The money is good but the lifesyle sucks. I decided I'm never gonna be rich anyway so I'm not gonna whore myself out anymore and give up my present lifestyle if I don't have to. I make enough for a comfortable living and for the most part do all the things I wanna do. What more do I really need? Life's too short, there are too many fun things to do besides chasing the almighty dollar.
Uncle Remus' apple/alder wood smoked barley whiskey
Posted: Sun Nov 12, 2006 1:38 pm
by birdwatcher
I'm with you completely. You only come through once, so enjoy your life.
There ain't no saddle bags on your coffin.
G
Posted: Mon Nov 13, 2006 3:10 pm
by possum
Cheers UR.....that layla shure is pretty.
Posted: Tue Nov 14, 2006 12:47 am
by Big J
The still looks great

Thanks for sharing all the pics and the details of your process as well. I'm sure the whiskey tastes fantastic.
Question: I see that you ferment on the grain, so do you distill on the grain too or do you lauter/strain it in some way first? If you do lauter/strain, how do you do it? If you distill on the grain do you have any problems with burning the mash in the still?
Cheers,
J
Posted: Tue Nov 14, 2006 10:41 am
by Uncle Remus
No only liquid in the boiler. I did try on the grain once in a double boiler setup. I was pleased with the product, but it was a slow process and I burned way too much propane. One day i wll work on a more efficient system and try again.
Posted: Thu Nov 16, 2006 5:05 am
by hornedrhodent
="Uncle Remus"
No only liquid in the boiler. I did try on the grain once in a double boiler setup. I was pleased with the product, but it was a slow process and I burned way too much propane. One day i wll work on a more efficient system and try again.
I use a double boiler because I was using firewood, but it was too difficult to maintain uniform heat input for a reflux still, so I now use a charcoal powered burner made of brake drums blown with a 12V cooling fan.
It works well but I need some sort of controller for the fan so I dont have to keep turning it on and off manually. I'm thinking of using the cooling water temperature to control it.
I'll put up some piccies when I learn how to re-size them so they wont overflow the screen.
Posted: Thu Nov 16, 2006 7:55 am
by junkyard dawg
I used a ceiling fan rheostat to control the fan on my forge. also, duct tape over the air intakes when I need to run it at low temps.