4" column build

Vapor, Liquid or Cooling Management. Flutes, plates, etc.

Moderator: Site Moderator

mash rookie
Angel's Share
Angel's Share
Posts: 2228
Joined: Tue Dec 07, 2010 8:20 am
Location: Pacific Northwest

Re: 4" column build

Post by mash rookie »

Does this mean that flutes have a hard time separating the heads from the run and the result would be smearing into the hearts making it hard to get real smooth product? I haven’t seen this discussed before and if it has please point me there. Trying to avoid that BITE!!!!!


WIski,
I dont want to clutter Navy Vets thread, but no. Any column with a reflux condenser will do a god job of concentrating heads if left in full reflux for a reasonable time. Including Flutes.
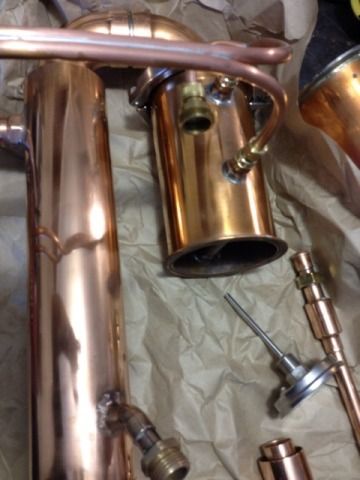
Flutes will not make neutral. There is not enough plates to allow for fraction separation even with the best effort at maintaining equilibrium. Heads can be taken and water removed for a high ABV but tails will come through with hearts. They are a great one run and done whiskey or Rum still.

Check out my thread here. PM me if you have more questions and I will explain or give you more to read. http://homedistiller.org/forum/viewtopi ... =1&t=35332
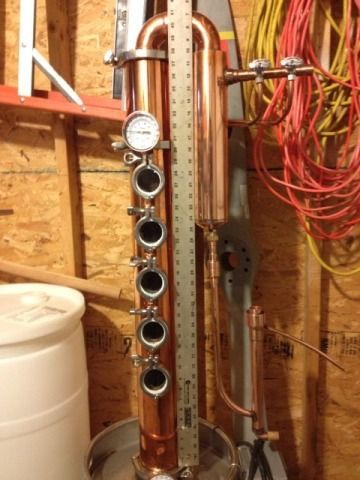
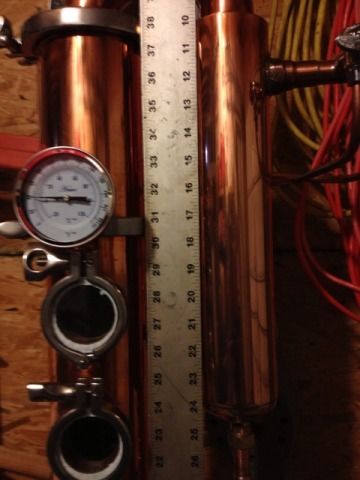
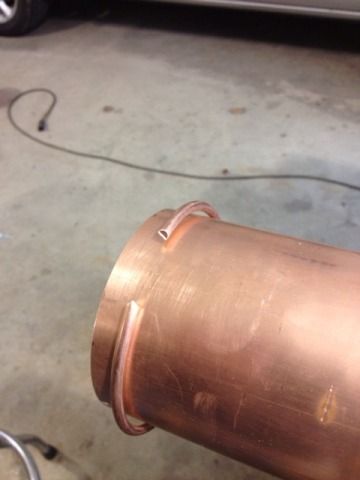
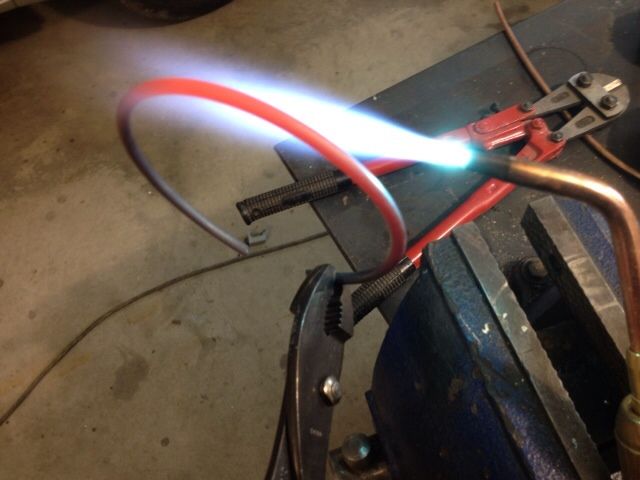
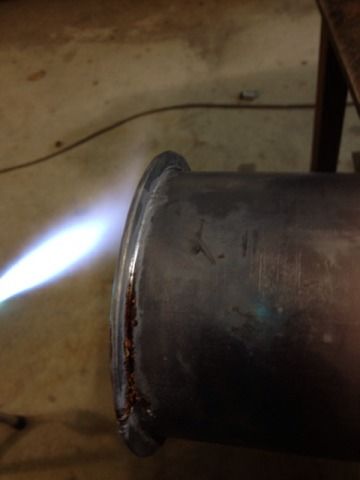
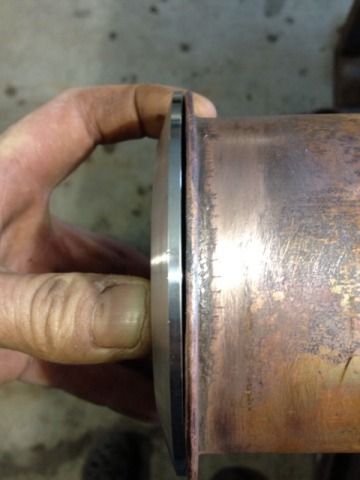
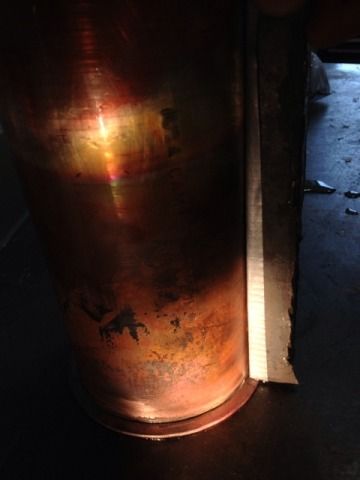
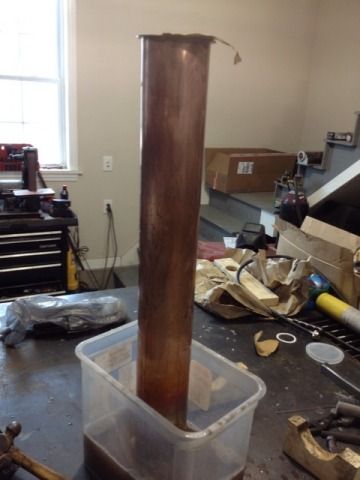
Bitchin rig NV :thumbup:
Navy vet
Bootlegger
Posts: 115
Joined: Wed Mar 27, 2013 6:37 am
Location: NorthEast US

Re: 4" column build

Post by Navy vet »

mash rookie wrote:Your down comer height above the plate looks a little high. You only need 1/4"-3/8" to establish a minimum liquid bed. Once you see her in action you will understand. Plates will hold much more than that. I have learned that caps are not necessary at the bottom if tubes terminate below liquid level. I have been putting mine 1/8" off the plate recently with no caps.

It really is a pretty rig Navy vet. If you have seen any of my builds you know I like them shinny! Feel free to PM me if you have any questions you have not found answers for.
MR
Thanks for you help! I will ajust my down comer height, cups are soldiered in so I will keep them. What level should the plate be under the site glass? I put mine at 1/2" figuring 3/4" down comer would give 1/4" of liquid on the glass. It's a snap to ajust the height.
Never enough time to do it right, always enough time to do it over....
mash rookie
Angel's Share
Angel's Share
Posts: 2228
Joined: Tue Dec 07, 2010 8:20 am
Location: Pacific Northwest

Re: 4" column build

Post by mash rookie »

Navy vet wrote:
mash rookie wrote:Your down comer height above the plate looks a little high. You only need 1/4"-3/8" to establish a minimum liquid bed. Once you see her in action you will understand. Plates will hold much more than that. I have learned that caps are not necessary at the bottom if tubes terminate below liquid level. I have been putting mine 1/8" off the plate recently with no caps.

It really is a pretty rig Navy vet. If you have seen any of my builds you know I like them shinny! Feel free to PM me if you have any questions you have not found answers for.
MR
Thanks for you help! I will ajust my down comer height, cups are soldiered in so I will keep them. What level should the plate be under the site glass? I put mine at 1/2" figuring 3/4" down comer would give 1/4" of liquid on the glass. It's a snap to ajust the height.
1/2 is fine. you will be watching the boiling action okay. The real value in having sight glasses is not so much to watch the boil but to be able to run as much vapor speed as possible and avoid entrainment caused by splashing against the plate above. Most just stare in enjoyment. lol
Navy vet
Bootlegger
Posts: 115
Joined: Wed Mar 27, 2013 6:37 am
Location: NorthEast US

Re: 4" column build

Post by Navy vet »

halfbaked wrote:Beautiful!
Thanks...
Never enough time to do it right, always enough time to do it over....
Navy vet
Bootlegger
Posts: 115
Joined: Wed Mar 27, 2013 6:37 am
Location: NorthEast US

Re: 4" column build

Post by Navy vet »

I made my first cleaning run last night. When I went to connect my garden hose I noticed a small problem.

Image

You guess it! I used two male ends. I had my boiler up to temp and ready to go, garden hose in my hand. AWW CRAP :wtf: At around midnight I pulled out the washer and remover the hose. To female ends, saved the day. The next morning my wife noticed the washer in the middle of the room, she asked me " what's wrong with the washer". I said just checking the hoses.

I found a deal an this tank, cut the lid and fitted a SS lid from our pots and pans cabinet. See how long it takes for her to notice its missing :D
Never enough time to do it right, always enough time to do it over....
Navy vet
Bootlegger
Posts: 115
Joined: Wed Mar 27, 2013 6:37 am
Location: NorthEast US

Re: 4" column build

Post by Navy vet »

Image
Never enough time to do it right, always enough time to do it over....
mash rookie
Angel's Share
Angel's Share
Posts: 2228
Joined: Tue Dec 07, 2010 8:20 am
Location: Pacific Northwest

Re: 4" column build

Post by mash rookie »

Navy vet wrote: I found a deal an this tank, cut the lid and fitted a SS lid from our pots and pans cabinet. See how long it takes for her to notice its missing :D
Tell her you used it to fix the clothes washer. Hero! :thumbup: (until she sees it)
Butterman
Bootlegger
Posts: 132
Joined: Wed Jan 09, 2013 7:28 am
Location: Seattle

Re: 4" column build

Post by Butterman »

Very pretty and nice build.
When I get a little time I will read through the entire post. (bookmarked)

Butterman
mettee
Novice
Posts: 26
Joined: Thu Apr 04, 2013 9:46 pm

Re: 4" column build

Post by mettee »

You covered it all, this thing looks amazing. Reading through this made me decide to build a reflux plate still like this one. If you get time or feel like it I would not mind seeing some more pictures. I like how you did the sight glasses, I am tossing around ideas on how to do mine when I do it.
Navy vet
Bootlegger
Posts: 115
Joined: Wed Mar 27, 2013 6:37 am
Location: NorthEast US

Re: 4" column build

Post by Navy vet »

mettee wrote:You covered it all, this thing looks amazing. Reading through this made me decide to build a reflux plate still like this one. If you get time or feel like it I would not mind seeing some more pictures. I like how you did the sight glasses, I am tossing around ideas on how to do mine when I do it.

Thanks for the feed back :wave: I made the sight glasses as cheaply as I could. I went to the dump and got an old window, used the glass to make my lenses. I did spring for a small circle cutter from Amazon, that works great. The 2" santary clamps were only $8.00 each. I made the main body from 2"M (thinner then L) cut about 2" long. Heated it red hot then quenched it. That makes the copper really soft to work with, made a small jig on the anvil end of my vice and used a small ball peen hammer and formed the flange. Kinda time consuming. Next time I might solider #4 copper wire to the end and sand flat.
Made another jig to use a 4" hole saw to cut the contour. Soldiered it to my column from the inside,plenty of flux till it just wetted out. 1 7/8 hole saw to make the hole in the column. Clean up with dremmel. If you would like specific pictures just let me know. :D

Navy vet.
Never enough time to do it right, always enough time to do it over....
Stainless dude
Rumrunner
Posts: 593
Joined: Wed Jan 16, 2013 8:33 pm
Location: Pacific Northwest US

Re: 4" column build

Post by Stainless dude »

Great thread navy, thanks for sharing.. :D
Navy vet
Bootlegger
Posts: 115
Joined: Wed Mar 27, 2013 6:37 am
Location: NorthEast US

Re: 4" column build

Post by Navy vet »

I have a 3' section of 4' copper L pipe leftover. I'm gonna follow Mash rookies advice and just pack it with SS scrubbies for vodka. Posted pictures of my 30 gal wash and fermenter on Birdwatchers thread, page 83. Can't wait to see what this column is gonna look like altogether. :D
Never enough time to do it right, always enough time to do it over....
mettee
Novice
Posts: 26
Joined: Thu Apr 04, 2013 9:46 pm

Re: 4" column build

Post by mettee »

Navy vet wrote:
mettee wrote:You covered it all, this thing looks amazing. Reading through this made me decide to build a reflux plate still like this one. If you get time or feel like it I would not mind seeing some more pictures. I like how you did the sight glasses, I am tossing around ideas on how to do mine when I do it.

Thanks for the feed back :wave: I made the sight glasses as cheaply as I could. I went to the dump and got an old window, used the glass to make my lenses. I did spring for a small circle cutter from Amazon, that works great. The 2" santary clamps were only $8.00 each. I made the main body from 2"M (thinner then L) cut about 2" long. Heated it red hot then quenched it. That makes the copper really soft to work with, made a small jig on the anvil end of my vice and used a small ball peen hammer and formed the flange. Kinda time consuming. Next time I might solider #4 copper wire to the end and sand flat.
Made another jig to use a 4" hole saw to cut the contour. Soldiered it to my column from the inside,plenty of flux till it just wetted out. 1 7/8 hole saw to make the hole in the column. Clean up with dremmel. If you would like specific pictures just let me know. :D

Navy vet.
Exactly my plan for my sight glasses, plus what you did looks fantastic. I like the industrial look of the clamps, not to mention the serviceability.

I saw in another thread that the guy made a tool steel plate that clamps the pipe, he let .500 hang out and he hammered that over to make his flange. He said the flange was very flat, and I figured the fixture would make it easier...well you get the idea enough of that. Info on this page if you have not seen it: http://homedistiller.org/forum/viewtopi ... l#p7058249

I need to start gathering copper, if anyone has a good source let me know :)

How well does your dephlag keep up as its sized? Would you have made it bigger or different at all?
tickle
Novice
Posts: 29
Joined: Sat Aug 11, 2012 3:31 am

Re: 4" column build

Post by tickle »

hell yeah I want pics! :thumbup:
Navy vet
Bootlegger
Posts: 115
Joined: Wed Mar 27, 2013 6:37 am
Location: NorthEast US

Re: 4" column build

Post by Navy vet »

mettee wrote:
Navy vet wrote:
mettee wrote:You covered it all, this thing looks amazing. Reading through this made me decide to build a reflux plate still like this one. If you get time or feel like it I would not mind seeing some more pictures. I like how you did the sight glasses, I am tossing around ideas on how to do mine when I do it.

Thanks for the feed back :wave: I made the sight glasses as cheaply as I could. I went to the dump and got an old window, used the glass to make my lenses. I did spring for a small circle cutter from Amazon, that works great. The 2" santary clamps were only $8.00 each. I made the main body from 2"M (thinner then L) cut about 2" long. Heated it red hot then quenched it. That makes the copper really soft to work with, made a small jig on the anvil end of my vice and used a small ball peen hammer and formed the flange. Kinda time consuming. Next time I might solider #4 copper wire to the end and sand flat.
Made another jig to use a 4" hole saw to cut the contour. Soldiered it to my column from the inside,plenty of flux till it just wetted out. 1 7/8 hole saw to make the hole in the column. Clean up with dremmel. If you would like specific pictures just let me know. :D

Great jig, I guess for me,if I were going to make a bunch if columns I'd build it. Mines a one off. Hammering the #4 wire into a flange was pretty easy, took about 30 min, and attached with Sil-Fos 5, hammered flange against a flat piece of steel to finish.
As for my dephleg, it worked great. Ran wide open during cleaning run, I played with going from off to full flow. Made my parrot dry right up. 30 seconds to start showing signs at my parrot after ajustment. Got some sweet feed for sacrificial run in a few days.

No leaks during my cleaning run.

Navy vet.
Exactly my plan for my sight glasses, plus what you did looks fantastic. I like the industrial look of the clamps, not to mention the serviceability.

I saw in another thread that the guy made a tool steel plate that clamps the pipe, he let .500 hang out and he hammered that over to make his flange. He said the flange was very flat, and I figured the fixture would make it easier...well you get the idea enough of that. Info on this page if you have not seen it: http://homedistiller.org/forum/viewtopi ... l#p7058249

I need to start gathering copper, if anyone has a good source let me know :)

How well does your dephlag keep up as its sized? Would you have made it bigger or different at all?
Never enough time to do it right, always enough time to do it over....
mettee
Novice
Posts: 26
Joined: Thu Apr 04, 2013 9:46 pm

Re: 4" column build

Post by mettee »

Very exciting. I cant wait to get started on mine. I am going to try and bring this still in at some what of a decent budget, I know it will never happen :)

I have a lot of copper parts to source, and collect and I hope I can find them all fairly easily...that is really my big worry. I want my main stack to be L size and the rest can be what ever I can find I think, who knows, I have a lot to learn.

I am going to get the same controller that you have with the 5500w camco curved element, from what I can tell it will work well.

This will be a nice piece to display in the house, a good conversation starter 8)
mettee
Novice
Posts: 26
Joined: Thu Apr 04, 2013 9:46 pm

Re: 4" column build

Post by mettee »

Oh, and almost forgot....would you mind providing some overall dimensions for your setup? Like dephlag height and tube size? Overall column height?

I am just trying to get an idea for a few things like where it will fit, and how much material I will need.
Navy vet
Bootlegger
Posts: 115
Joined: Wed Mar 27, 2013 6:37 am
Location: NorthEast US

Re: 4" column build

Post by Navy vet »

Finding 4" copper pipe can be a bit of a challenge. You can get it on line and pay all the money( last resort).What I did was start by calling the larger local plumbing and heating outfits. Ask if they have any shorts of 4" copper, DWV (drain, waste, vent) as well as type M or L will work just fine. When these company's buy copper pipe for a job,they have to buy the hole stick and always have leftover. A four foot' section of 4" copper pipe is really only worth the scrap copper price to them because it's unlikely they will find a job needing it. If you offer them something between what they paided and scrap, it's a great for both of us.
As they say on (Amercian Pickers)." Once you have broken the ice" ask to rummage in their pipe rack and scrap barrel. you should fined almost everything you need.
I paided $20 a foot for a 6' section of 4'L. $15 a foot for 3" L. three feet. I got all my 3/4 and 2" out of the scrap barrel for FREE!! :D ( If it's for free! It's for me!) 8) 8)

On initial phone call the question always comes up. " what are you going to do with this pipe". I NEVER give my true answer, I tell them I'm a hobbie coppersmith and I use this scrap copper to create sculptures.
That's not to far from the truth. I think they just want to be sure it's not going to there competitor.

I also find 3' sections of 3/4 pipe on old water heaters at the dump. Most plumbers don't bother removing the drain pipe off the TP valve. Use the pipe it's self to unscrew the TP valve, no tools needed. Aww crap! Come to think of it! I could have grabber the heater element for free. :evil:
Last edited by Navy vet on Sun Apr 07, 2013 12:23 pm, edited 3 times in total.
Never enough time to do it right, always enough time to do it over....
Navy vet
Bootlegger
Posts: 115
Joined: Wed Mar 27, 2013 6:37 am
Location: NorthEast US

Re: 4" column build

Post by Navy vet »

Image
Never enough time to do it right, always enough time to do it over....
Navy vet
Bootlegger
Posts: 115
Joined: Wed Mar 27, 2013 6:37 am
Location: NorthEast US

Re: 4" column build

Post by Navy vet »

Image

I hope this will give it some scale.
Never enough time to do it right, always enough time to do it over....
Navy vet
Bootlegger
Posts: 115
Joined: Wed Mar 27, 2013 6:37 am
Location: NorthEast US

Re: 4" column build

Post by Navy vet »

Image

My rig is really a compromise of all the reading on HD. Plate height was 4" apart for some, 5" for others. Mine. 4 1/2".
The dephleg, 4 1/2 shotgun, but I put it a larger pipe section, room for thermometer on the bottom and essence bundle on top. Product condenser is over kill at 12" shot gun( 7, 1/2" pipes) I'm not a rookie fabricator but I have absolutely no distilling experience and my rig stands untested with the exception of a cleaning run.
I'm confident it will perform but I'm not the expert.

The heat from my cleaning run has put a nice honey patina on it. :D
Never enough time to do it right, always enough time to do it over....
Navy vet
Bootlegger
Posts: 115
Joined: Wed Mar 27, 2013 6:37 am
Location: NorthEast US

Re: 4" column build

Post by Navy vet »

This is a tutorial of how I made flanges for my 4" column, I found the idea on this site.

Image

#4 solid copper wire from Lowe's wrapped around the pipe to start the shape. Notice I cut it quit a bit short, it stretches when you work it.


Image

Heating it up to annelle the copper and make it soft.

Image

First round of hammering it flat. It work hardens after the first pass and must be reheated and quenched.
Image

Second pass, taking shape. Reheat.

Image

Getting closer. Take your time.

Image

Test fitting.

Image

Even with cutting the ring short, looks like I still need to trim.

Image

Tacked it on with Sil-fos 5. Straitened it as I go, the heat will cause things to twist a bit.

Image

Finished brazing the flange

Image

I'm using a 4" santary cap to check the diameter and seal, looks a little wavy.

Image

I'm using a piece of scrap that I put duct tape on so not to scratch the pipe. Lightly hammering vertically, sliding on the pipe as a guide I hammer the flange flat as well as work hardening the flange a bit.


Image

That's better.

Image

Wet sanding in container of warm soapy water. 400 grit, 1000, then 1500.

Image

A trip across my buffing wheel and nice and shinny! 8) fine steel wool works nice also.
I hope this was helpful.
Last edited by Navy vet on Sun Apr 07, 2013 12:30 pm, edited 1 time in total.
Never enough time to do it right, always enough time to do it over....
Navy vet
Bootlegger
Posts: 115
Joined: Wed Mar 27, 2013 6:37 am
Location: NorthEast US

Re: 4" column build

Post by Navy vet »

I'm going to pack this section with SS scrubbies, it will send my rig up 98 inches total height. :shock:
Never enough time to do it right, always enough time to do it over....
mettee
Novice
Posts: 26
Joined: Thu Apr 04, 2013 9:46 pm

Re: 4" column build

Post by mettee »

Navy vet wrote:Finding 4" copper pipe can be a bit of a challenge. You can get it on line and pay all the money( last resort).What I did was start by calling the larger local plumbing and heating outfits. Ask if they have any shorts of 4" copper, DWV (drain, waste, vent) as well as type M or L will work just fine. When these company's buy copper pipe for a job,they have to buy the hole stick and always have leftover. A four foot' section of 4" copper pipe is really only worth the scrap copper price to them because it's unlikely they will find a job needing it. If you offer them something between what they paided and scrap, it's a great for both of us.
As they say on (Amercian Pickers)." Once you have broken the ice" ask to rummage in their pipe rack and scrap barrel. you should fined almost everything you need.
I paided $20 a foot for a 6' section of 4'L. $15 a foot for 3" L. three feet. I got all my 3/4 and 2" out of the scrap barrel for FREE!! :D ( If it's for free! It's for me!) 8) 8)

On initial phone call the question always comes up. " what are you going to do with this pipe". I NEVER give my true answer, I tell them I'm a hobbie coppersmith and I use this scrap copper to create sculptures.
That's not to far from the truth. I think they just want to be sure it's not going to there competitor.

I also find 3' sections of 3/4 pipe on old water heaters at the dump. Most plumbers don't bother removing the drain pipe off the TP valve. Use the pipe it's self to unscrew the TP valve, no tools needed. Aww crap! Come to think of it! I could have grabber the heater element for free. :evil:

Heck yes, you have the idea I was looking for. I will have to call some companies here locally when I get some time. I am sure they will help out, and be glad to make some money on scrap. Great idea. I have a friend that is a plumber, he was my best idea until that one. I would like to make the main column out of "L", I think it will just add to the stills quality.
mettee
Novice
Posts: 26
Joined: Thu Apr 04, 2013 9:46 pm

Re: 4" column build

Post by mettee »

Nice pictures, those are helpful. I love the work and craftsmanship you put into it, I think that is why I gravitate to this still. I also like a lot of other ideas and features I have seen from people, and I want to make them a part of my still, like you have here in yours.

Is this added 4 inch section necessary? Its for vodka right? I wont be making vodka, but I am just curious.
mettee
Novice
Posts: 26
Joined: Thu Apr 04, 2013 9:46 pm

Re: 4" column build

Post by mettee »

Have not seen the term "essence bundle" yet, whats that?

And I assume your top most plate is 4.5 inches below the bottom of the dephlag? I am guessing you have to mimic the spacing all the way up?

Not to hijack your thread, but tell me what you think.

I have the ability to have some copper cut via water jet fairly cheap. I am thinking that when I make my flange I will make that jig I showed you from the other thread. That will make the bend easy to make and hammer over with less chance of accident. So what I would do, is take a copper ring, about the same size of the flange, and place it behind my flange before I hammered it over. Then I would slide the ring down on top of the flange and hard solder it to the flange making it double thick. That way the flange is flat, and strong. What do you think?

I don't have a torch at the moment, so I may have to do this with a cheap torch from lowes or something. I may be able to borrow one. But I don't think I will be able to heat and pound out flanges.
Navy vet
Bootlegger
Posts: 115
Joined: Wed Mar 27, 2013 6:37 am
Location: NorthEast US

Re: 4" column build

Post by Navy vet »

mettee wrote:
Navy vet wrote:Finding 4" copper pipe can be a bit of a challenge. You can get it on line and pay all the money( last resort).What I did was start by calling the larger local plumbing and heating outfits. Ask if they have any shorts of 4" copper, DWV (drain, waste, vent) as well as type M or L will work just fine. When these company's buy copper pipe for a job,they have to buy the hole stick and always have leftover. A four foot' section of 4" copper pipe is really only worth the scrap copper price to them because it's unlikely they will find a job needing it. If you offer them something between what they paided and scrap, it's a great for both of us.
As they say on (Amercian Pickers)." Once you have broken the ice" ask to rummage in their pipe rack and scrap barrel. you should fined almost everything you need.
I paided $20 a foot for a 6' section of 4'L. $15 a foot for 3" L. three feet. I got all my 3/4 and 2" out of the scrap barrel for FREE!! :D ( If it's for free! It's for me!) 8) 8)

On initial phone call the question always comes up. " what are you going to do with this pipe". I NEVER give my true answer, I tell them I'm a hobbie coppersmith and I use this scrap copper to create sculptures.
That's not to far from the truth. I think they just want to be sure it's not going to there competitor.

I also find 3' sections of 3/4 pipe on old water heaters at the dump. Most plumbers don't bother removing the drain pipe off the TP valve. Use the pipe it's self to unscrew the TP valve, no tools needed. Aww crap! Come to think of it! I could have grabber the heater element for free. :evil:

Heck yes, you have the idea I was looking for. I will have to call some companies here locally when I get some time. I am sure they will help out, and be glad to make some money on scrap. Great idea. I have a friend that is a plumber, he was my best idea until that one. I would like to make the main column out of "L", I think it will just add to the stills quality.
Don't fall in love with L pipe, I wasn't my first choice. A thicker wall pipe won't make better whiskey,or shine up better. What it will do is extend your distilling time as you have to heat up a larger mass. It will be difficult to form a flange, you will need to heat it up cherry red and quench to annelle the copper, you made need to do this several times. I worry that the jig could slip and put deep unsandable scratches in the pipe. If your able to complete the flange, a doubler is over kill. The copper will be work hardend and is very strong. Remeber, no PSI in the pipe, it just needs to support itself.

"essence bundle" is my made up term for what ever kind of spice I want to stick in a coffee filter a place in the vapor path.
I don't like gin so I hate to call it a gin basket.

Yes I'm gonna also make Vodka, I made my plate tree removable so I can distill from pot mode( no plate tree at all ) to all five or how many I want.

You can make the flanges I made and hard solider with a MAP torch from lowes, just use a 4" hose clamp to hold the ring on and solider all at once.
Never enough time to do it right, always enough time to do it over....
mettee
Novice
Posts: 26
Joined: Thu Apr 04, 2013 9:46 pm

Re: 4" column build

Post by mettee »

Don't fall in love with L pipe, I wasn't my first choice. A thicker wall pipe won't make better whiskey,or shine up better. What it will do is extend your distilling time as you have to heat up a larger mass. It will be difficult to form a flange, you will need to heat it up cherry red and quench to annelle the copper, you made need to do this several times. I worry that the jig could slip and put deep unsandable scratches in the pipe. If your able to complete the flange, a doubler is over kill. The copper will be work hardend and is very strong. Remeber, no PSI in the pipe, it just needs to support itself.

"essence bundle" is my made up term for what ever kind of spice I want to stick in a coffee filter a place in the vapor path.
I don't like gin so I hate to call it a gin basket.

Yes I'm gonna also make Vodka, I made my plate tree removable so I can distill from pot mode( no plate tree at all ) to all five or how many I want.

You can make the flanges I made and hard solider with a MAP torch from lowes, just use a 4" hose clamp to hold the ring on and solider all at once.
Very good advice, I was thinking that I would look for M and then you wrote that so that is what I will do, and if I cant find that I will get DWV. I will have to also think a little bit more about the jig portion of the flange fabrication. I was thinking about the additional double thick flange because I was unsure if the thickness of the main column would be enough to make compression with the tri-clamp. The stainless ones are pretty thick.

I think I need to start gathering material and that will help me get a much better idea of what I need to do. Having the clamps and material in hand will help a bunch.

Thanks for the help NV
mettee
Novice
Posts: 26
Joined: Thu Apr 04, 2013 9:46 pm

Re: 4" column build

Post by mettee »

NV, I am thinking away right now... and a little confused.

Would you mind explaining your water flow through your system and the thought process behind it?

Is the product condenser typically the part that is kept the coolest? Is it not on full blast the entire run? And you adjust the dephlag to start and stop reflux correct? I am so new to this, and I have not found any of this basic dummy stuff explained on the site.

ETA: I have been doing some late night research, and I think I get it now. I think I figured out how to control it.
Post Reply