Page 3 of 17
Re: Goofy things I do
Posted: Tue May 26, 2015 4:21 am
by cranky
Bushman wrote:I'm a little confussed Cranky, if all your plate downcomers are located in the center how does it drop to the next lower plate without going all the way down? Most downcomers that I've seen are offset from one side of the plate to the other.
image.jpg
I have 2 trains of thought there. A spout off the downcomer that will direct the falling liquid off to one or two sides or a bowl type thing like an upside down umbrella that will hopefully evenly distribute it around. I have decided I will also make a domed umbrella type cap on top of the downcomers that will also deflect falling fluid away from the center and prevent it from being able to fall directly down the tube. I can try to play around with PSP tonight and maybe make an illustration of that or take a picture. Its clear in my mind if not in my words. It will be something similar to what, I think, Rad did with his double cup setup.
Re: Goofy things I do
Posted: Tue May 26, 2015 6:24 am
by frodo
a trap primer distribution fitting is shaped like a cone..water drips onto the cone and is seperated
into 2or 4 outlets. approx 3'' tall,,,3'' round
Re: Goofy things I do
Posted: Tue May 26, 2015 7:13 am
by White_Lightning_Rod
Cranky what size are you using for your downcomers 1/2" I have a 2 1/2" OD glass flute section that I made perf plates for. I used 1/2" for the downcomers, I didn’t center them but I used a section of 3/4 copper tube with a flat piece soldered to the bottom to make a cup for my downcomer trap cups, you could do something similar but make the bottom of the cup larger than the diameter of the 3/4 and then bend the excess down in an umbrella shape to divert the falling liquid out to the edges to avoid dripping in the downcomers below. Here is a rough paint drawing of what I’m thinking if this makes sense. I think it will also stick with your creative make-it-yourself ways.
Also I used 1/16" holes, the same number and spacing as you have and that has been working well for me. I think the 3/32 won’t make a big difference over the 1/16".
- downcomer trap.jpg (14.02 KiB) Viewed 3209 times
Re: Goofy things I do
Posted: Tue May 26, 2015 7:23 am
by White_Lightning_Rod
To explain the drawing a little better going from the top down you have your downcomer tube, a short section of tube that is larger than the diameter of the downcomer, the bold line is a round piece soldered to the bottom of the larger tube that creates the bottom of the cup, if you use 3/4 for the cup I think that circle would work as 1.25" diameter then the .25" that extends out around the bottom of the cup could be bent down like an umbrella. Or maybe just left flat would work the same.
Re: Goofy things I do
Posted: Tue May 26, 2015 7:45 am
by Haus
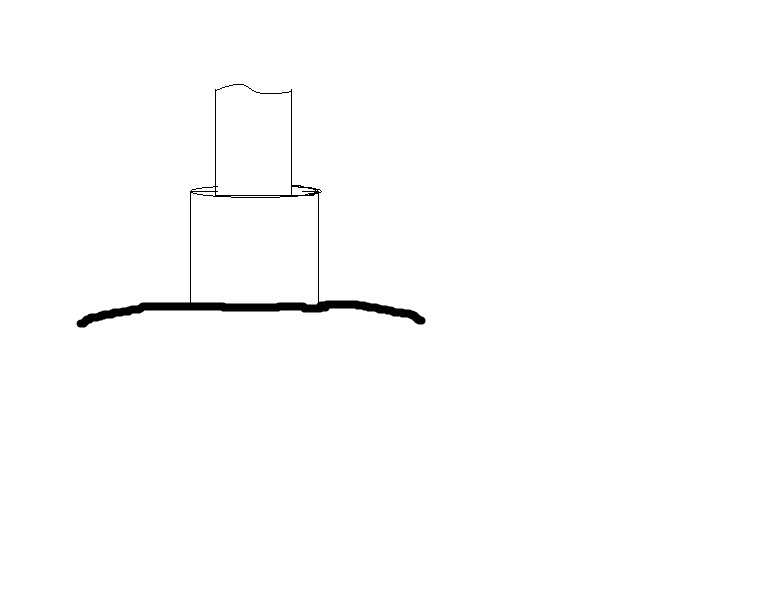
Could you get away with this? Use the capped off middle upright as a support only and alternate elbows on each plate.
Re: Goofy things I do
Posted: Tue May 26, 2015 8:08 am
by White_Lightning_Rod
Elbows do not create a liquid trap, the plate would constantly drain and would never load.
Re: Goofy things I do
Posted: Tue May 26, 2015 8:35 am
by frodo
is this what you mean by load up
Re: Goofy things I do
Posted: Tue May 26, 2015 8:22 pm
by cranky
Wow, I wasn't quite expecting people to show up and actually start posting, I thought my little thread was going largely unnoticed. Here is what I wrote earlier today.
So working on my design things have a tendency to evolve as I do them. I do the same thing when working on our house, it drives the wife nuts because I have trouble drawing things out on paper and following those plans to the letter because my projects constantly evolve. It helps me to write these things down as the ideas get processed which is what I'm tending to do on this Thread.
Today I made the domed caps for the downcomers and worked out the design for the return inlet holes. As I was doing that I was thinking about the trap part of the downcomers. Originally I was going to add a piece of the 1/2" tube I cut 1/4 off and was going to solder that to the side of the down tube to serve as the trap. I saw that on somebody's rig but don't recall whose but eventually I decided that while I liked the look of it this wasn't any different or better than using a standard cap like everybody else uses. Then I started thinking about making a small bowl to serve as a trap but as I messed around with the umbrella parts I found that while it would work I didn't really like it, it was just too symmetrical. Then I started thinking about my answer to Bushman this morning and started thinking about taking the cut pieces of tube and adding 2, one pointing in each direction. So with this in mind I started playing around with the 5 pieces I had cut the other day and I had an epiphany. I realized that with the way I had cut them I could space 4 of them around the down tube, slide them down a bit to allow fluid to pass, add a bottom plate and a spout off each individual tube and I have a really nice looking trap that can flow as much as the down tube can handle and direct fluid outward away from the center down tubes and prevent uneven heating of the glass which could be a serious problem with something made out of mugs.
So Here are the pictures of today's experiments in Magic Muggles Flute building.
Re: Goofy things I do
Posted: Tue May 26, 2015 8:32 pm
by cranky
White_Lightning_Rod wrote:Cranky what size are you using for your downcomers 1/2" I have a 2 1/2" OD glass flute section that I made perf plates for. I used 1/2" for the downcomers, I didn’t center them but I used a section of 3/4 copper tube with a flat piece soldered to the bottom to make a cup for my downcomer trap cups, you could do something similar but make the bottom of the cup larger than the diameter of the 3/4 and then bend the excess down in an umbrella shape to divert the falling liquid out to the edges to avoid dripping in the downcomers below. Here is a rough paint drawing of what I’m thinking if this makes sense. I think it will also stick with your creative make-it-yourself ways.
Also I used 1/16" holes, the same number and spacing as you have and that has been working well for me. I think the 3/32 won’t make a big difference over the 1/16".
downcomer trap.jpg
Yes the downcomers are 1/2". I was originally thinking along those lines and I do have some 3/4 pipe but the more I think about it and the recent passing of Mash Rookie the more I want to go ahead and put extra effort into the functional art of my interpretation of the design he began.
Re: Goofy things I do
Posted: Tue May 26, 2015 8:48 pm
by cranky
Haus6565 wrote:Could you get away with this? Use the capped off middle upright as a support only and alternate elbows on each plate.
frodo wrote:is this what you mean by load up
There are certain inherent problems with glass and in particular these glass mugs. If this were just a regular glass tube the conventional method of making downcomers might work well, however since these mugs converted to glass tubes taper then have a thick glass bottom. Uneven heating could cause serious problems because of the Coefficient of expansion of the glass. This is why I am trying to keep the falling liquid away from the glass or at the very least as evenly as possible in all directions. I honestly doubt it would actually result in a problem but you can never be too careful. The other consideration of course is to keep the falling liquid as far away from the downcomer as possible to allow thorough mixing of the liquid going down with the vapor going up before it goes down the next tube. It is a balancing act that I am slowly working out and appreciate everybody's input and help in doing so.
Re: Goofy things I do
Posted: Wed May 27, 2015 1:27 am
by googe
Looking good cranky!, I put a copper tee on top of my centre downcomer plate when I made some, worked good and very easy. The little hats on yours will look good!. Good luck, looks like your having fun

.
Re: Goofy things I do
Posted: Wed May 27, 2015 4:24 am
by cranky
googe wrote:Looking good cranky!, I put a copper tee on top of my centre downcomer plate when I made some, worked good and very easy. The little hats on yours will look good!. Good luck, looks like your having fun
.
Thank you googe. This has been a very fun project, lots of parts to figure out, lots of improvising, little bit of scrounging and I get to be creative and problem solve. I hope it all turns out as well as I think it will. I hope I understand this whole perforated plate thing enough to pull this off and get it to run right.
Re: Goofy things I do
Posted: Wed May 27, 2015 8:22 pm
by cranky
I didn't do much as far as building but I got the pieces I made the other day soldered up. so maybe my ideas can be made a little clearer. I still need to clean things up a bit and add the bottom and spouts to the trap but hope you can see where this is going.
Re: Goofy things I do
Posted: Thu May 28, 2015 6:14 am
by Brutal
I think you will need a cup at the bottom to prevent vapor traveling up the downcomer. Maybe I'm missing something or its not done yet?
Re: Goofy things I do
Posted: Thu May 28, 2015 6:26 am
by Danespirit
+1 Brutal
A simple endcap could do it.
Re: Goofy things I do
Posted: Thu May 28, 2015 7:09 am
by cranky
Brutal wrote:I think you will need a cup at the bottom to prevent vapor traveling up the downcomer. Maybe I'm missing something or its not done yet?
Not finished yet, the 4 outer tubes will get a plate soldered to the bottom to make then traps/cups.
Danespirit wrote:+1 Brutal
A simple endcap could do it.
That's the basic plan I just haven't added that yet because I need to level out the bottom so the plate will sit flush. There will also be spouts coming off each of the 4 trap tubes to try to direct the flow a bit more outward but not too much.
Re: Goofy things I do
Posted: Thu May 28, 2015 4:57 pm
by Hound Dog
I thought those tubes had to be there for a reason. I just didn't want to be the first to ask.

Diggin' the Mushroom Muggle still

Re: Goofy things I do
Posted: Thu May 28, 2015 5:31 pm
by likker liker
Very cool
Re: Goofy things I do
Posted: Thu May 28, 2015 5:58 pm
by cranky
Hound Dog wrote:I thought those tubes had to be there for a reason. I just didn't want to be the first to ask.
Diggin' the Mushroom Muggle still
Yes, if you look close you can see the 4 tubes extend below the center tube. This one is going to be the bottom one. I think the rest will probably have longer down tubes so they won't look so high in the mugs. For a while I actually thought about making the downcomers look like Russian soyuz rockets
but settled on this design for now because for me the domed caps were much easier to make than a sharp cone.
likker liker wrote:Very cool
Thank you. it is a lot of fun

Re: Goofy things I do
Posted: Thu May 28, 2015 8:37 pm
by ranger_ric
Wow Looking good Cranky, I love seeing the ingenuity and creativity of my fellow HD'ers!!
Re: Goofy things I do
Posted: Fri May 29, 2015 5:51 am
by likker liker
Re: Goofy things I do
Posted: Fri May 29, 2015 6:32 am
by Odin
Amen!
Odin.
Re: Goofy things I do
Posted: Fri May 29, 2015 3:11 pm
by cranky
Artisan repurposer I'll give you. Master Still Builder? Hardly, but thank you for the complements. I'm glad other people can see the beauty in the goofy things I do.
Re: Goofy things I do
Posted: Fri May 29, 2015 3:18 pm
by jedneck
Looks good cranky. Makes me wanna get off my ass and get started on Fido-bot, a tribute to MR's irobot
Re: Goofy things I do
Posted: Fri May 29, 2015 6:44 pm
by cranky
jedneck wrote:Looks good cranky. Makes me wanna get off my ass and get started on Fido-bot, a tribute to MR's irobot
I thought about that one when I found a bunch of stainless steel bowls at goodwill really cheap. I bought a bunch and considered doing the same with them but the muggles has always spoken to me, I guess because I have always been a glass person. Many years ago I almost took the same path as Mash Rookie to learn to be a hot glass artist but one thing led to another and I took a different path in life. Sometimes I regret it but I have learned a lot about glass over the years which is partially why I am comfortable with glass.
All of that said, here is today's progress.
Here you can see the various mushroom caps. It took most of my free time today to cut the oval holes in the tubes and work out the spouts for the traps. I also cut the 16 remaining up tubes and bottom caps.
here you can see the one set of spouts I actually liked although they were rather difficult and time consuming to make and then solder into place. I also got the bottom of the trap soldered on so all that's lacking now is some final shaping and clean up, at least on this one.
Re: Goofy things I do
Posted: Sat May 30, 2015 5:34 am
by likker liker
Lookin good
Re: Goofy things I do
Posted: Mon Jun 01, 2015 6:06 pm
by cranky
There is an ancient Chinese curs that says "May you live in interesting times"
Well it's been interesting times here in my little world. To say it's been a bad week would be an extreme understatement

but I managed to get a little more work done on the Magic Muggles Flute (MMF for short). I got all the pieces soldered on the prototype and have gotten it cleaned up for the most part. Here are the pictures of that.
a couple posts above you can see what this looked like when it was just tack soldered together, before it was trimmed, wired together and re-soldered. Then I did a final soldering and it looked like this
Today I managed to find a little time to do some clean up, and now it looks like this
Re: Goofy things I do
Posted: Mon Jun 01, 2015 6:53 pm
by cranky
I also managed to get all the outside tubes soldered on the other 4 down tubes and began making the spouts to match the prototype. It is a lot of work to make 16 more of those things and I'm not really sure I'm all that pleased with the look. It isn't really bad but I just don't know. So I started playing around and this happened
Which got me started thinking.
Sometimes I shouldn't be allowed to think because now I'm thinking about that mini foundry Bearriver mentioned a while back and I'm thinking I could make one of those, make some molds melt down some of this scrap copper I've been making and make the traps look something like this
I really shouldn't be allowed to think sometimes.
For another little peek into the madness of my method, I am so happy with what I made for the base of the neutralizer so I decided to duplicate it with the MMF It began with a 2" copper coupling, which of course is too big to be used for the keg coupling so it needed to be narrowed down. I did this by first annealing the coupling, then cutting slits in the coupling and squeezing the cut fingers together then cutting the slits again so it was narrower when squeezed together. Then I took it and placed it in a keg neck of the keg that didn't have any ears sticking in and whacked it with a big hunk of 4x4 that was handy, which narrowed it down to fit the keg. On the last one I just soldered the slits closed and soldered on an easy flange. This time I plan on bending the fingers to make a flange and soldering on a plate underneath to make the flange to guarantee stability when It's done since this thing will be quite heavy when it's done.
For the top I cut a slightly undersized hole and used a socket and arbor press to make a flange that goes inside the coupling.
Here are the pictures of the progress there so far.
Re: Goofy things I do
Posted: Wed Jun 03, 2015 2:57 pm
by cranky
I got a little more done over the past couple days, not a whole lot but here it is.
This first pic is the new base made from a 2" coupling narrowed down by cutting slits as shown above. Then I measured and marked a line with a pair of calipers and used some duck bill pliers to bend the the ears to make a flange. I then pulled everything tightly together using a couple strands of .032 safety wire. You can also see the new version of the easier to make spouts in that picture. I have begun talking a bit with Bearriver about the idea of casting parts out of copper to make some pretty cool features at a later date but that is a much later date. For now the wife says "You're not doing another thing until I get a new front porch!" So I will need to get that done soon so I can continue to play with the toys.
 Viewed 3002 times")
These next 2 show the bent tabs and the slits soldered closed. I usually use paste flux but the last time I did this I found that liquid flux works much better so I used liquid flux to accomplish this. If you look close you can see the safety wire keeping things from flexing from uneven heating while soldering and keeping everything as tight as I could get it.
Next I placed the flange on a piece of of copper cut into a circle and soldered the 2 together and using the solder to fill in the gaps between the fingers.
The plan for next week it to try to finish the spouts and hopefully get some more solder because I ran out once again

and solder the the top piece onto the bottom. That will finish everything up to the reflux condenser/dephlegmater. I wanted to go with a Dad300 style condenser which could actually fit inside the top mug allowing me to actually watch it condensing rather than just watching it pour out of the shotgun condenser but I have the materials to make a duplicate of the previous shotgun style dephleg I used for the neutralizer and the only corrugated SS tubing I can find at a reasonable price has a yellow coating on it that is proving to be a bit difficult to remove so I guess I'm probably going to go the shotgun route.
Re: Goofy things I do
Posted: Thu Jun 04, 2015 3:35 am
by Danespirit
Cranky...as i understand you an Bearriver have been throwing around the idea of casting with copper..

I've done some myself, mostly aluminium for motorparts etc. ( old machines are hard to get original parts for).
Anyway, the concept is the same..just if you deal with copper, you got to have a higher temperature.
Build myself a dirt cheap burner and a homemade furnace to get me going.
It starts up on gas, and then i switch to wasteoil.
Argh...yes i know..it's not environmently good to burn this crap, but a poor bastard like me has to get along with what he got.
I only have my hands and some ideas...so cheap is the way to go..

Unfortunatly i have no videos of it, but i found two very similar working devices on YouTube:
https://www.youtube.com/watch?v=hHD10DjxM1g" onclick="window.open(this.href);return false;" rel="nofollow
https://www.youtube.com/watch?v=fw0wjXlbz94" onclick="window.open(this.href);return false;" rel="nofollow
Made mine with two nozzles. One for gas startup, until it's on temperature and one for the oil. The principle is somewhat as the "Babbington burner".
I didn't like the idea of cooking oil on top of a hot burner, so i made it with a siphoning effect to a reservoir...safety first.
The burner runs on crude oil, old motoroil,turpentene used for a paintjob, hell almost everything liquid that can burn.
It can be made with simple materials found at a plumbingshop and on the scrapyard.
Tip: Instead of expensive casting sand i use fine sand from the beach and vegetable oil (at least this is environmently ok

).
Makes pretty good castings, even with complicated forms...ready to machine or polish.
Edit: Sorry for derailing the thread a bit...i just wanted to share this, if it can be at any help to you to see what "Goofy things" i do.