2" bubble cap still
Posted: Wed Dec 30, 2009 1:40 pm
First post from a long time lurker.
I had been using a 2" Bokabob slant plate column w/ good results. Decided to do a bit of experimenting. Here's the result of having the month of December off with nothing to do...
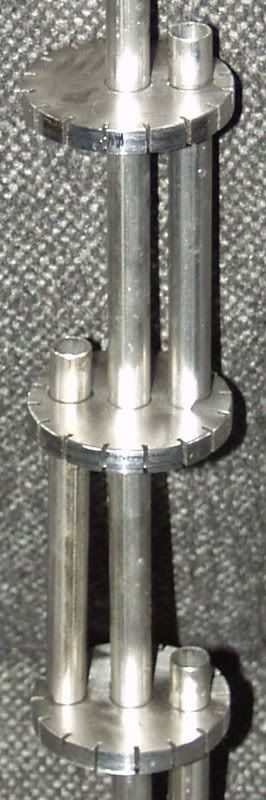
Started by cutting out 12 circles out of some flat copper. A 2-1/2" hole saw worked perfect to give me a circle w/ an OD just slightly larger than the 2" copper pipe. Drilled a 1/4" hole in the center of each.
I then drilled (4) 3/8" holes around the middle of the circle. Cut and bent 1/4" tubing to go thru the center of each circle. This is the downcomer. The tubing in bent up on the bottom to allow it to drain above it and create a trap below it that won't allow vapor to come up the tubing. I welded the tubing to the disc w/ approx. 1.5" of tubing sticking up above the disc.

I then cut 48 pieces of 3/8" OD tubing 2" long.

These were then welded on the circle w/ 1.5" of tubing sticking above the disc.

I then cut 48 pieces of 1/2" ID tubing 2" long and welded caps on the end of each.

The 1/2" pieces were placed over the 3/8" pieces of tubing already welded to the disc. The 1/2" pieces were then tacked to the disc w/ a gap at the bottom. I then cut (12) pieces of 2" tubing 5.5" long. Each disc was set on a piece of 2" tubing then welded into place. The 12 sections were welded together to form a column w/ 12 plates. The inside looks somewhat like this:


There is a 2" female threaded coupling at the bottom. A plate was welded on the top of the column. There is a piece of 1/4"tubing welded on the side at the top to allow a thermometer. Opposite of that is a 1-1/4" tubing that goes to the takeoff arm.

There is a "T" in the takeoff arm that is oriented down. The "T" is capped off on the bottom w/ a 1/4" piece of tubing welded in. This is for reflux back to the column.

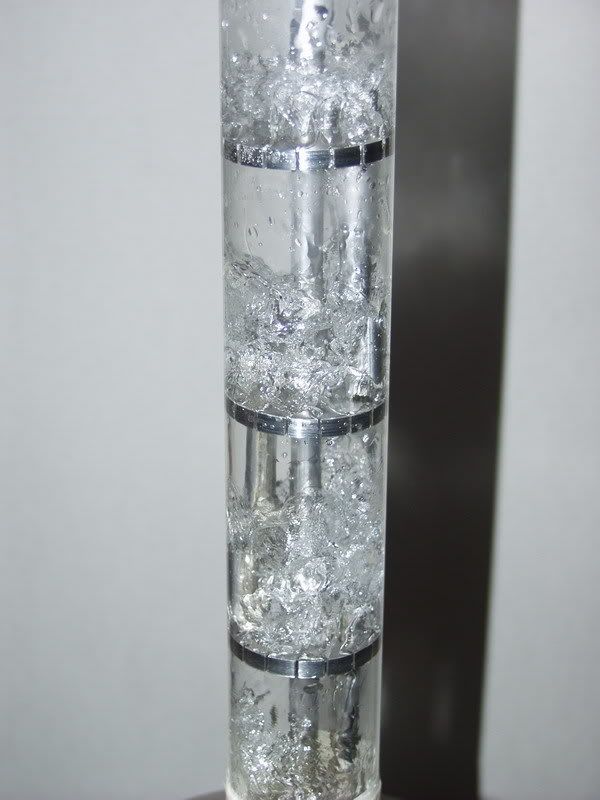
The reflux ties in on the third plate down from the top. The takeoff then 90's down and reduces down to 1/2" tubing. A 3' section of 1-1/4" tubing was welded over the 1/2" tubing to form a liebig condenser.

Welded a piece of 3/8" tubing and the 2" column to support the takeoff arm. All joints were tig welded. Polished her up and took her for a spin. Works pretty dang good! Still trying it out...will eventually see how hard I can run it.
I'm sure somebody is bound to mention this thing is dangerous because of the pressure that it will have to operate under in order to push the vapor up thru all that water. Well, I have 12 plates, each w/ 1.5" of water. That equates to an 18" column of water. The hydrostatic head of 18" of water is around 0.65 psi. It takes less than 1 psi for this column to operate. I have a 20 psi relief valve on the boiler. The boiler is rated at a max working pressure of 150 psi.
Next step is going to set her up to work under a vacuum. I put a 1/2" shark bite fitting on the end of the 1/2" tubing coming out of the liebig. The shark bite fitting goes to 1/2" npt. This allows me to hook up a garden hose to flush when done. I will also be able to run tubing to a vessel to catch the condensate. I will then hook up a vacuum pump to this vessel to operate the system under a vacuum. I also have plans to weld in pieces of 1/4" tubing at the top of each plate that will go to a 1/2" header that will allow me to drain each plate.
Wonder what I will get into the next time I have a month off...
I had been using a 2" Bokabob slant plate column w/ good results. Decided to do a bit of experimenting. Here's the result of having the month of December off with nothing to do...
Started by cutting out 12 circles out of some flat copper. A 2-1/2" hole saw worked perfect to give me a circle w/ an OD just slightly larger than the 2" copper pipe. Drilled a 1/4" hole in the center of each.
I then drilled (4) 3/8" holes around the middle of the circle. Cut and bent 1/4" tubing to go thru the center of each circle. This is the downcomer. The tubing in bent up on the bottom to allow it to drain above it and create a trap below it that won't allow vapor to come up the tubing. I welded the tubing to the disc w/ approx. 1.5" of tubing sticking up above the disc.
I then cut 48 pieces of 3/8" OD tubing 2" long.
These were then welded on the circle w/ 1.5" of tubing sticking above the disc.
I then cut 48 pieces of 1/2" ID tubing 2" long and welded caps on the end of each.
The 1/2" pieces were placed over the 3/8" pieces of tubing already welded to the disc. The 1/2" pieces were then tacked to the disc w/ a gap at the bottom. I then cut (12) pieces of 2" tubing 5.5" long. Each disc was set on a piece of 2" tubing then welded into place. The 12 sections were welded together to form a column w/ 12 plates. The inside looks somewhat like this:
There is a 2" female threaded coupling at the bottom. A plate was welded on the top of the column. There is a piece of 1/4"tubing welded on the side at the top to allow a thermometer. Opposite of that is a 1-1/4" tubing that goes to the takeoff arm.
There is a "T" in the takeoff arm that is oriented down. The "T" is capped off on the bottom w/ a 1/4" piece of tubing welded in. This is for reflux back to the column.
The reflux ties in on the third plate down from the top. The takeoff then 90's down and reduces down to 1/2" tubing. A 3' section of 1-1/4" tubing was welded over the 1/2" tubing to form a liebig condenser.
Welded a piece of 3/8" tubing and the 2" column to support the takeoff arm. All joints were tig welded. Polished her up and took her for a spin. Works pretty dang good! Still trying it out...will eventually see how hard I can run it.
I'm sure somebody is bound to mention this thing is dangerous because of the pressure that it will have to operate under in order to push the vapor up thru all that water. Well, I have 12 plates, each w/ 1.5" of water. That equates to an 18" column of water. The hydrostatic head of 18" of water is around 0.65 psi. It takes less than 1 psi for this column to operate. I have a 20 psi relief valve on the boiler. The boiler is rated at a max working pressure of 150 psi.
Next step is going to set her up to work under a vacuum. I put a 1/2" shark bite fitting on the end of the 1/2" tubing coming out of the liebig. The shark bite fitting goes to 1/2" npt. This allows me to hook up a garden hose to flush when done. I will also be able to run tubing to a vessel to catch the condensate. I will then hook up a vacuum pump to this vessel to operate the system under a vacuum. I also have plans to weld in pieces of 1/4" tubing at the top of each plate that will go to a 1/2" header that will allow me to drain each plate.
Wonder what I will get into the next time I have a month off...