Page 1 of 1
My BOKA Build. Built the jig
Posted: Mon May 26, 2014 1:23 pm
by Nutmegmooner
I have just spent an hour describing all the why's and wherefore's of coming to this point only to have my text evaporate. Not a site problem, operator error. So this time I'll make it short and sweet.
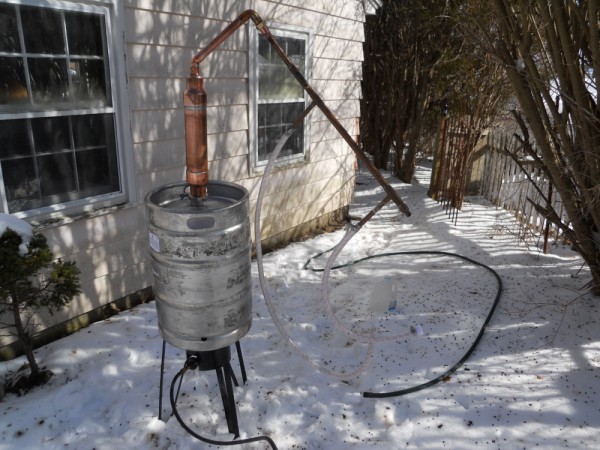
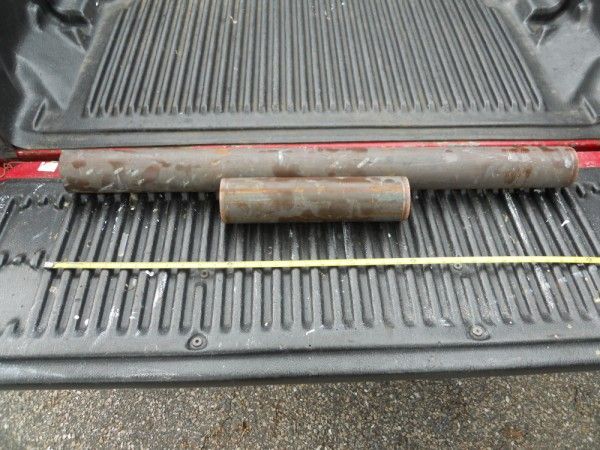
I've been pot stilling for years but want to build a 3" Boka. I have a keg and a 3' section and a 1' section of 3" copper pipe, for the price of scrap copper. Gonna use it to produce a neutral from my rum feints for gifts like Kahlua and Limoncello. I have read the entire wiki entry and the one started by Picluk. The condenser scares me a bit, (figuring the size required) but I tried one from some extra's lying around and it was okay for a first attempt. I will be trying to photo document as I go and hope it will be of help to some. Here's my 3" potstill and keg and the 3" pipe I have acquired.

=
http://s376.photobucket.com/user/Dean06 ... c.jpg.html]
Re: My BOKA Build.
Posted: Mon May 26, 2014 5:22 pm
by Hound Dog
Use corrugated stainless gas pipe for the condenser and you can't screw it up if you try. Search out DAD300 Condenser or DAD300 Special.
Re: My BOKA Build.
Posted: Tue May 27, 2014 1:30 pm
by Nutmegmooner
On second look I will use my "test" condenser but if it proves inadequate I will give Dad's method a try.
Here's the jig I made today and my head after I cut the slots. I think the head will be a slip fit onto the column and I will wait till I have the coupling soldered onto the head before I drill the hole for the takeoff. That way I can make a soldered and threaded joint for my takeoff. You can just barely see the slots in the pipe, in fact they may be a little tight for my copper sheet.
Hope my coupling comes tomorrow. Here's a question, Is 5/16 copper tubing a readily available product? As in I would prefer to not purchase on line
Re: My BOKA Build. Built the jig
Posted: Tue May 27, 2014 4:08 pm
by Hound Dog
Solder the coupling onto the column an slip the head into it. If you solder it onto the head and slip it over the column, descending condensate will leak out. I just use a slip coupling and it works fine.
Re: My BOKA Build. Built the jig
Posted: Wed May 28, 2014 1:47 am
by Nutmegmooner
Crap! First hurdle. Thanks for the warning Hound Dog. I have already cut the lower slot and it is too close to the bottom of the head to NOT solder, so I guess I'll have a one piece still at least to start. If it proves too unweildy I can always cut the column a little further down and buy another coupler and make that the slip fit.
Re: My BOKA Build. Built the jig
Posted: Wed May 28, 2014 7:08 am
by backraft
nice work, will be keeping an eye on ur build for a similar set up here
Re: My BOKA Build. Built the jig
Posted: Wed May 28, 2014 7:34 am
by Hound Dog
Just solder your plates in as planned. When you do so, lay a piece of solder on the plate on the inside and heat the outside. Solder it up and grind the outside smooth again with a sander. It will slip right back down into the coupling no fuss.
When you do it wrap a few layers of Teflon tape around it and get a great seal. In reality, I have only taken mine apart a few times.
Re: My BOKA Build. Built the jig
Posted: Wed May 28, 2014 11:04 am
by Nutmegmooner
Thanks again for the input. I guess I can try it that way, Hound Dog, but I will have to cut a channel in the coupling to allow my take-off "spout" to slip all the way down to the stop. I'll give it a go. Can always solder it later if it needs it. I was hoping to use the double thickness to allow me to thread and solder the take off. I bet it will be fine!
Re: My BOKA Build. Built the jig
Posted: Wed May 28, 2014 4:39 pm
by Hound Dog
Yep, you're right about the takeoff tube. Forgot the little detail of getting the product out! I stiffened up where my tube comes out by flaring out a slip coupling so it fit over the tube and flat against the column, tapped it in snug with a punch and soldered it. Kind if double layered both ways. It looks like you will still have an inch or so to go into the column slip joint. If it gives you trouble you can cut a slot like you suggest afterwards.
For my 3" I got a 1/2" valve off eBay for less than $30. The valve uses tubing sizes not pipe sizes

. So really it is 1/2" OD tubing, not the 1/2" ID pipe that is sold by the stick. No big deal, just one more thing to buy and size to your liebig. Unless it was just the valve I got..... None the less, get the largest valve you can because it will be the choke point for a 3". Looking at the inside of a needle valve, it is quite smaller than the opening, not like a ball valve. Don't really understand why that is.
Re: My BOKA Build. Drip plates ready to solder
Posted: Fri May 30, 2014 2:05 pm
by Nutmegmooner
Slant plates are cut out and I will try to solder tomorrow. I put a point on my lower plate and will try to bend it down after soldering. Any tips on soldering? The sheet is easy to clean but the pipe is well oxidised to say the least. I have an acetylene plumbers bottle so I'm worried about clean more than heat.
Re: My BOKA Build. Built the jig
Posted: Sat May 31, 2014 2:29 am
by Hound Dog
Anneal the tab well before you put the plate in place so you can bend it easily. Solder the bottom plate first and bend the tab before inserting the top plate and having it in your way. You might want to solder the takeoff tube in at the same time since it will need to sit right at the very bottom against the plate in that same solder joint. Fit it all together and flow all the solder in one heating.
Don't know if you are proficient at soldering. Acetylene is plenty of heat so don't burn up your flux and yes, sand off that oxidation. Once you get the bottom plate soldered in place and the tab bent, position a wet rag over the solder joint and takeoff tube so when you heat the pipe for the next plate it won't melt the job you just did, copper conducts heat pretty good.
Re: My BOKA Build. Plates are in!
Posted: Sat May 31, 2014 7:14 am
by Nutmegmooner
Soldering is done and looks to be a success! Kind of gloppy on the inside but I will probably be the only one to see it. I did a rough cleanup of the outside and bent my drip edge down. I went with a 3/8" O.D. takeoff, and I have begun to work out some details of how to fabricate an all copper needle valve. Next I will cut a groove into my slip fit coupling to allow my head to slide all the way down to the dimple. I guess if it leaks at that slip joint (which will be soldered to the column) I will first try to seal it with a little flour water mix, but I'm hoping that the vapor will already be a liquid at that point and gravity will be my friend.
Sorry for the remarkably crappy photos. I will do better next time.
Re: My BOKA Build. Built the jig
Posted: Sat May 31, 2014 7:19 am
by Nutmegmooner
Is there a way to edit the subject line so anyone who cares will be able to know that there has been some progress? I did it once by editing my original post but the edit button on that is no longer there. Hmmmm.
Re: My BOKA Build. Built the jig
Posted: Sat May 31, 2014 7:56 am
by acfixer69
PM one of the mods they can edit it for you. Nice rig

AC
Re: My BOKA Build. Built the jig
Posted: Sat May 31, 2014 12:33 pm
by Hound Dog
Looking good Nut!

I am betting you won't have any leak problems at your head.
Re: My BOKA Build. Needle valve
Posted: Sun Jun 01, 2014 10:37 am
by Nutmegmooner
I got the notch done for my coupling and I think it will work, and today I decided to build a needle valve. I started with a piece of 1" copper rod that I had in my non ferrous scrap box. A stainless 8-32x3" bolt, wingnut and locknut ($1.67) and a little lathe time and this is what I got. (kinda resembles Barbie's potstill). I counter bored the bottom for the final delivery pipe to sweat into. I also had to counter bore the top because my tap was too short. If the threads leak there is still a little resevoir before I have a problem. I think I have enough hight and the threads are quite tight. A little progress for a lazy Sunday. I will solder it next and give a leak test this P.M.
Re: My BOKA Build. Built the jig
Posted: Thu Jun 05, 2014 6:00 am
by BigSwede
That looks nice! I think your slip coupling will work well. If you have a little vapor leak, you can always wrap the bottom of the Bok head with a few wraps of teflon tape. If needed try the thicker tape meant for gas connections; it's all PTFE.
Love it when guys make their own needle valves, it shows what can be done with scrap materials. And I like the fact that the top of the needle valve appears to be higher than the top of the condensate pool on the plate, so the valve stem shouldn't see any pressure. You've got a simple needle in a seat, regulating flow by gravity.
If it doesn't flow properly, you could always drill a tiny vent in the highest part of that valve body, so long as that hole is above the condensate pool.
Re: My BOKA Build. Built the jig
Posted: Wed Jun 18, 2014 2:01 pm
by Nutmegmooner
I did the cleaning and sacrificial runs a while ago and everything went according tent]o plan . For the sac. I used a couple o' gallons of cooking wine and some old rum heads and tails. Came up to temp fast and i was able to back my heat WAY off and run in what I believe is called total reflux. No vapor out the (open) top and when I cracked the needle valve it basically put out something slightly north of 90% abv for a while. Not a long enough run to figure things out really, but she works!
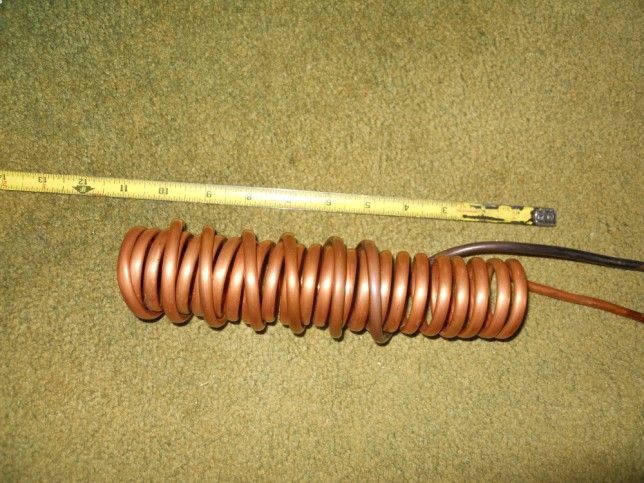
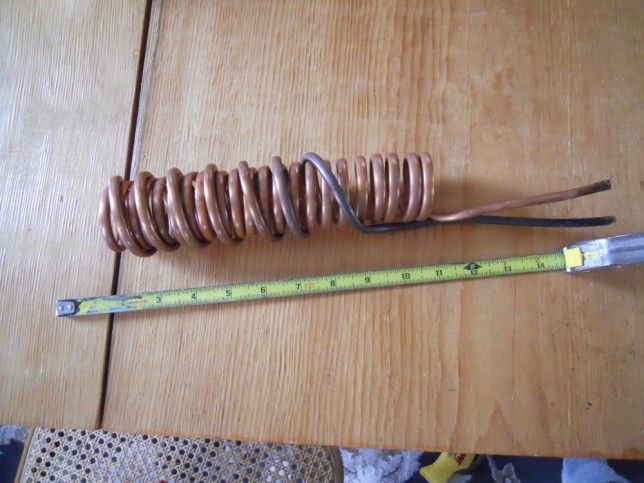
Naturally I couldn't leave well enough alone and decided to build a bigger condenser. This is what it looks like, and I think it's pretty overkill. Here's my current pondering.... Should I run the water thru the smaller inner coil first or after it has already been thru the larger outer coil? Both are about 9" long, the smaller 1/4 o.d. and the larger is 3/8. Any input is appreciated! Thanks.


