The KYChemist Pot Still Build... "Boiler #1"

Post your builds here.

Moderator: Site Moderator

User avatar
The KYChemist
Rumrunner
Posts: 733
Joined: Sat Apr 27, 2013 11:25 am
Location: The Ville

The KYChemist Pot Still Build... "Boiler #1"

Post by The KYChemist »

Well, as stated in my intro post, myself and my partner are planning a pot still build. We realise there are probably more efficient set-ups, but we want to keep it "Ol' School". We have decided to base ours off of greasydog26's build. It'll probably turn out to be almost an exact copy, with a few tweaks to make it our own. Step #1 was deciding on a volume. I decided we needed approx 7 gallons. I figured this would be a good number based on the Sweet Feed recipe. Most are getting 3.5gal out of a 5 bucket ferment. With a 3 bucket ferment, that should work out to about two 5.25gal runs... Approximately.

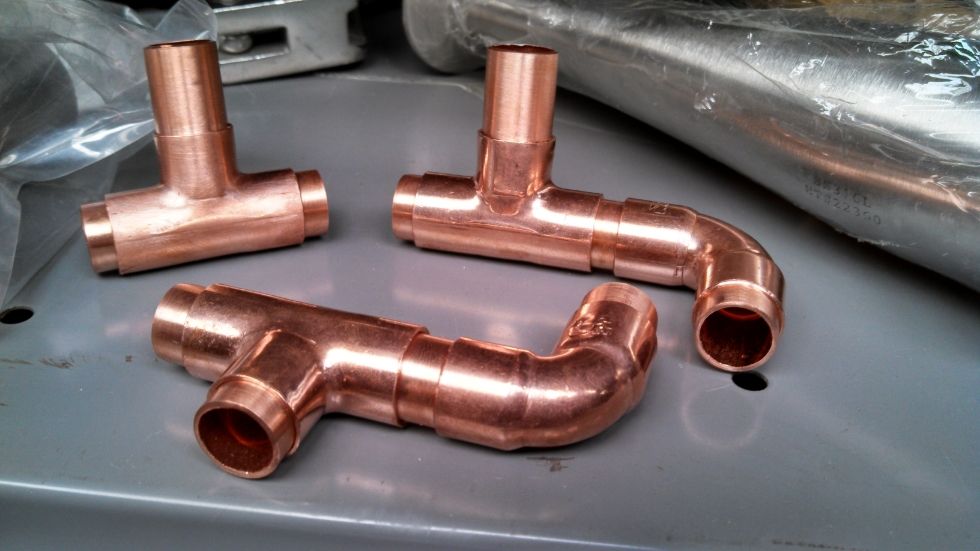
With that out of the way, next came step 2. Figuring out the dimensions of the still, to be transferred to poster board. With some rudimentary measuring, on the computer screen, I first figured out the angles of his still walls. Top was approx 32deg, and lower about 16deg. With these angles, I started plugging in numbers on three different conversion websites. One for calculating triangle side-lengths, and degrees, one for figuring the volume of a cone, and one for determining how to draw a cone on a flat surface. After 30 minutes, or so, I had my dimensions and felt like this :crazy: . High school math class flashbacks! Also, to get the volume we wanted, had to change the lower sidewalls to a 12deg angle

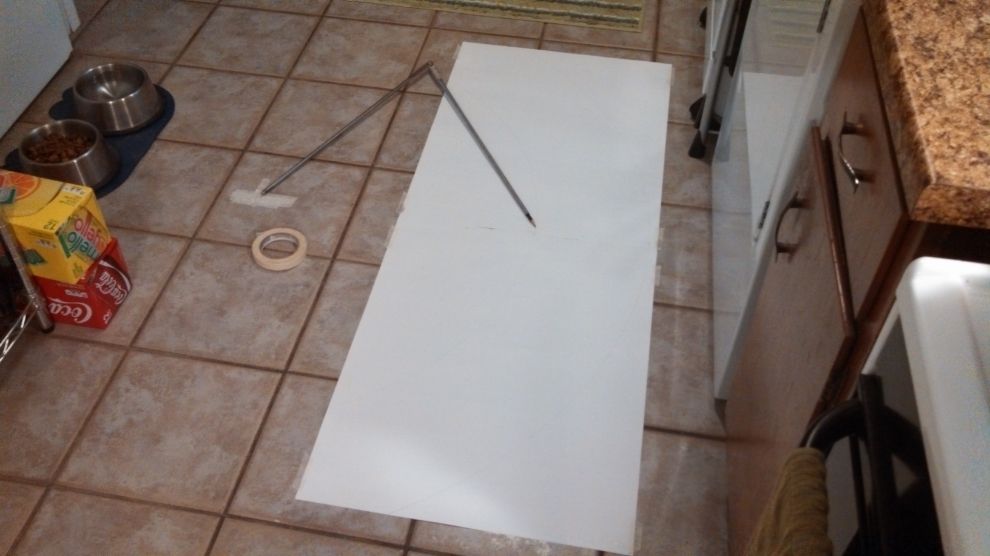
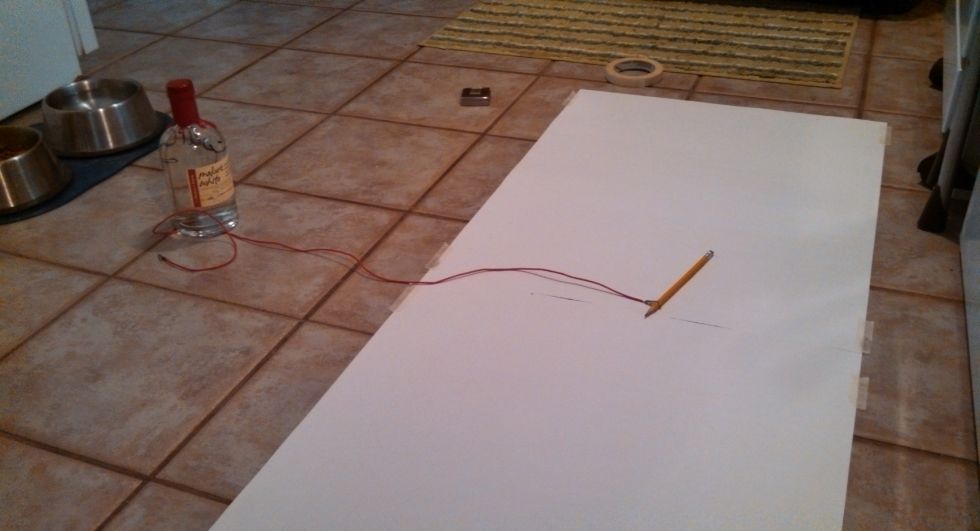
Next came the fun part. Step 3. Drawing it out on poster board is fun, but not soo much if you dont have a compass that can draw a circle with a radius of 34", which is what I needed. My first attempt was ugly, sloppy, and highly inaccurate. Ill let you, the reader, figure out why from this following picture.

Image

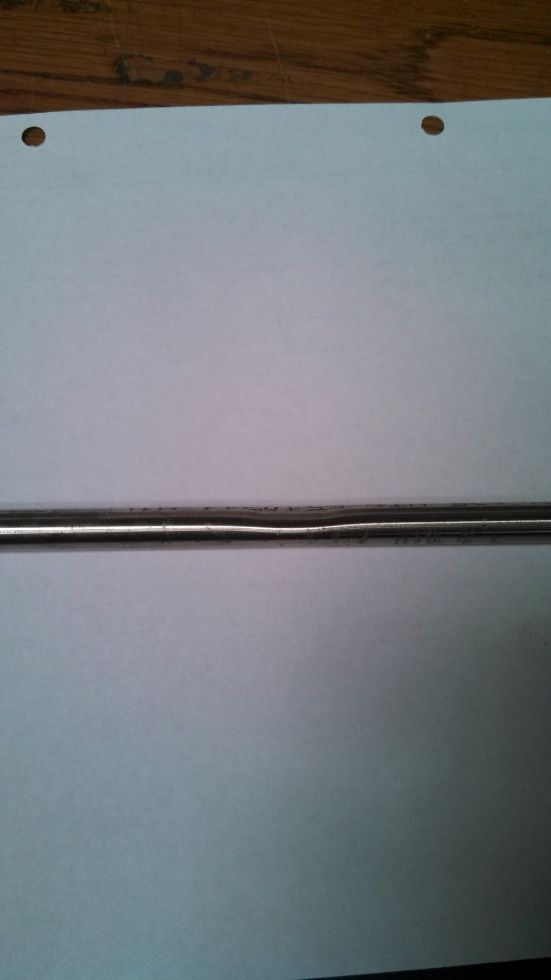
The following day at work, I decided to come up with a better mousetrap... Neccesity being the mother of invention, and all. Started with some spare 316 3/8 tubing we had laying around. I believe the overall length was 24". Maybe a little longer.
Image

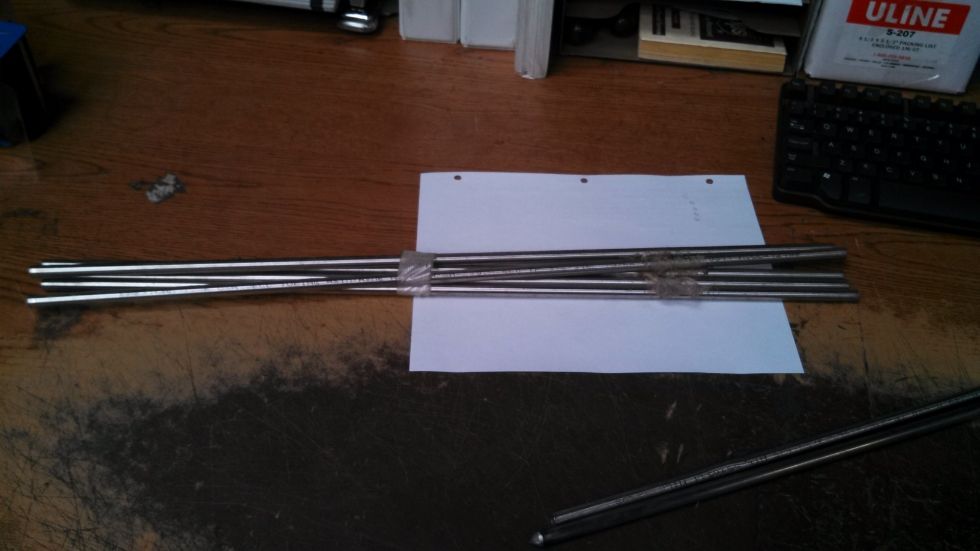
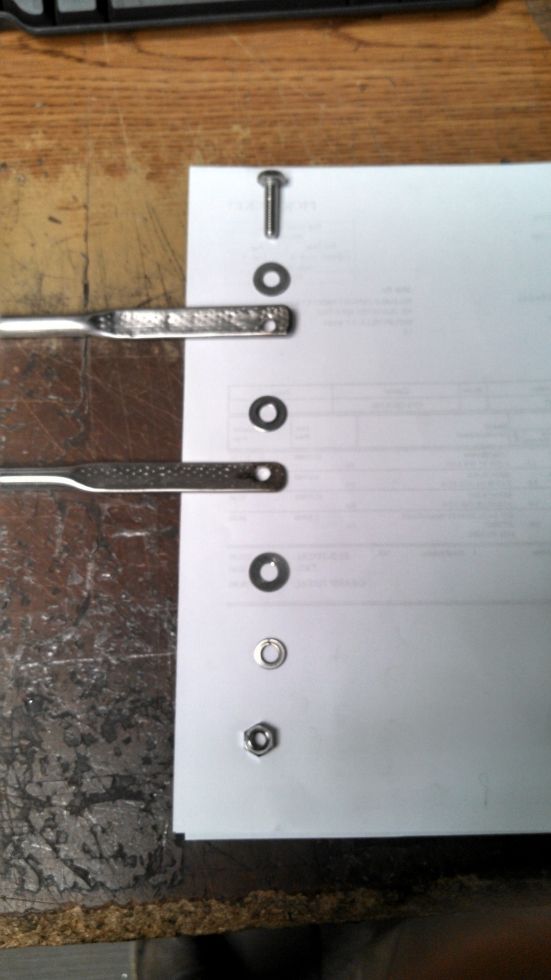
Next, I put one end, from each length, in the vise and clamped down, about 4" from the end. Then, it was on, to scavenge some nuts, bolts, and washers...
Image

Now, a pencil will nicely inside the tubing, but to keep it from sliding all the way in, back to the vise we went. Squeeze the tubing in the vise, about five inches from the end, just enough to keep the pencil from diving all the way in.
Image

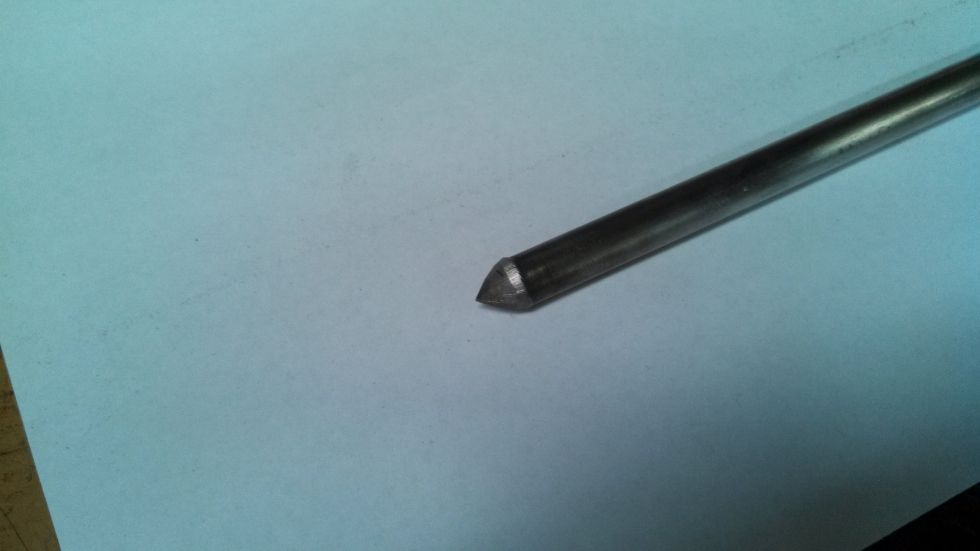
Next step, was to have my partner in crime, "The Mechanic", make the point on the other leg of the compass. Don't know exactly what he did to acheive this, so I cant comment there.
Image

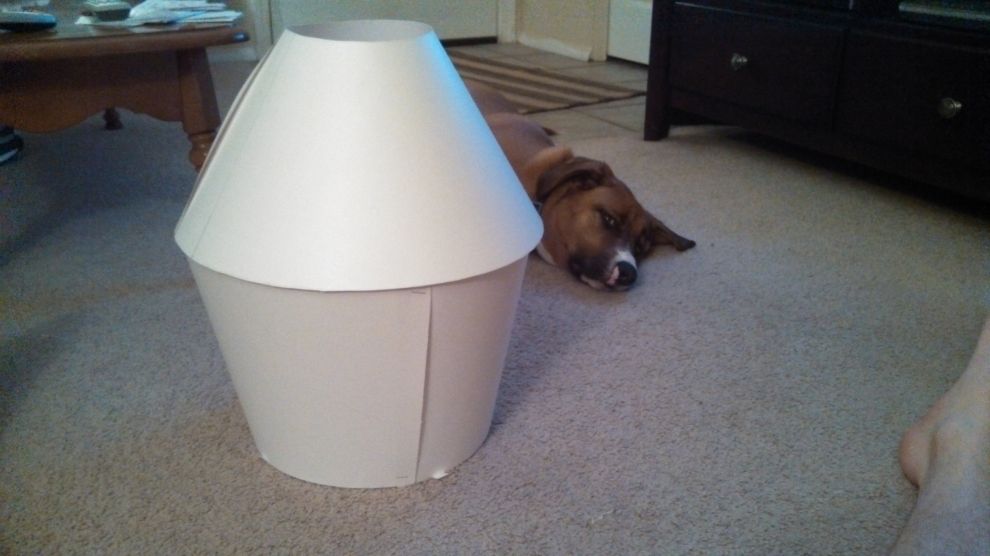
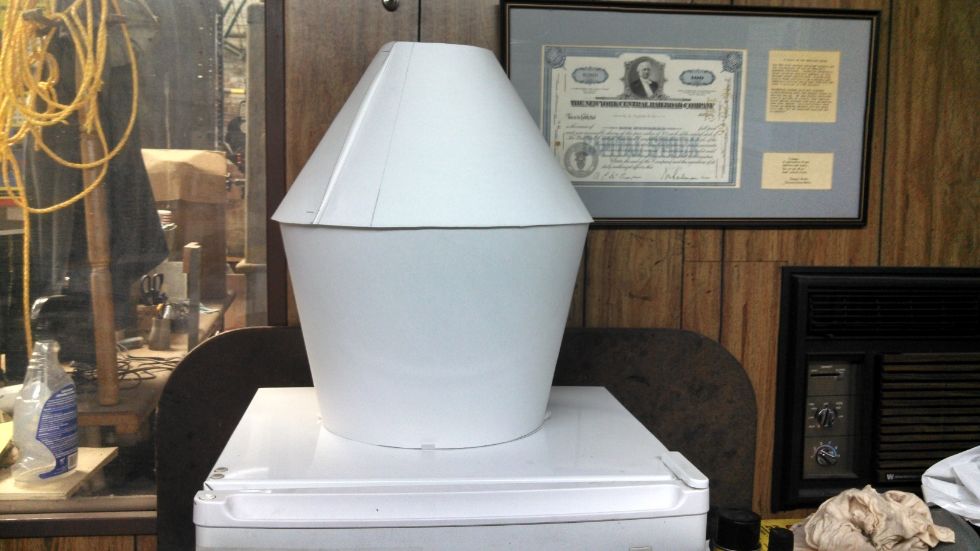
The following is a few pics of the poster board layed out on the floor, and the scale model of our boiler. It has a base of 10", a belly of 14", and a neck of 5". I will keep this thread updated, as we are close to placing our order for the copper sheeting.
Image
Image
Image
Whiskey is rays of sunshine, held together with water.
User avatar
Truckinbutch
Angel's Share
Angel's Share
Posts: 8107
Joined: Sun Feb 03, 2013 12:49 pm

Re: The KYChemist Pot Still Build... "Boiler #1"

Post by Truckinbutch »

Looks like you are well on your way . I'm impressed .
If you ain't the lead dog in the team , the scenery never changes . Ga Flatwoods made my avatar and I want to thank him for that .
Don't drink water , fish fornicate in it .
User avatar
wv_cooker
Trainee
Posts: 933
Joined: Fri Feb 22, 2013 11:48 am

Re: The KYChemist Pot Still Build... "Boiler #1"

Post by wv_cooker »

love the compass, that took some ingenuity. :D Nice work!
Dnderhead
Angel's Share
Angel's Share
Posts: 13666
Joined: Sun Dec 23, 2007 8:07 pm
Location: up north

Re: The KYChemist Pot Still Build... "Boiler #1"

Post by Dnderhead »

"you dont have a compass"
use a trammel
mash rookie
Angel's Share
Angel's Share
Posts: 2228
Joined: Tue Dec 07, 2010 8:20 am
Location: Pacific Northwest

Re: The KYChemist Pot Still Build... "Boiler #1"

Post by mash rookie »

Nice start with the mock up. You probably would have done fine with the string. I have built some large stuff quite accurately using a string. My favorite tool for large circles is a cloth type sewing tape measure and a push pin or two.

Dont forget to add lap material for your seams to your template before transferring to copper. Are you going to rivet and solder or just solder?
I love the angle. If you finish the top with a 2” ferrule and you can use your pot still head or change out to a reflux column when you want neutral
bellybuster
Master of Distillation
Posts: 4490
Joined: Tue Dec 18, 2012 5:00 pm

Re: The KYChemist Pot Still Build... "Boiler #1"

Post by bellybuster »

The dog looks impressed
User avatar
The KYChemist
Rumrunner
Posts: 733
Joined: Sat Apr 27, 2013 11:25 am
Location: The Ville

Re: The KYChemist Pot Still Build... "Boiler #1"

Post by The KYChemist »

mash rookie wrote:Dont forget to add lap material for your seams to your template before transferring to copper. Are you going to rivet and solder or just solder?
I love the angle. If you finish the top with a 2” ferrule and you can use your pot still head or change out to a reflux column when you want neutral
Lap-material was considered when drawing up my two sections. There is about half an inch at the narrow ends of each section. As you move towards the base of each section, or the belly where the two sections join, it increases considerably. Also, the over hang you see from the top piece, is intentional. That material will be formed, to the bottom half, to form a joint, if you will. We are thinking about riveting down the seams, of each truncated cone. Then solder the inside of the joint, and around the rivet heads, on the inside. We are going to do our best to leave as little visible soldering, as possible.
Whiskey is rays of sunshine, held together with water.
mash rookie
Angel's Share
Angel's Share
Posts: 2228
Joined: Tue Dec 07, 2010 8:20 am
Location: Pacific Northwest

Re: The KYChemist Pot Still Build... "Boiler #1"

Post by mash rookie »

You shouldn't have big problems with solder. There are ways to avoid that. Pottery shelf primer or other products can be painted on areas where you dont want solder to stick.

You can build without rivets by using vise grips at each end of a seam, soldering the length than soldering ends after the seam has cooled.

Here is a 100 gallon copper boiler I built with really cool rivets! They are there for looks and structure.

http://homedistiller.org/forum/viewtopi ... starting+a
User avatar
The KYChemist
Rumrunner
Posts: 733
Joined: Sat Apr 27, 2013 11:25 am
Location: The Ville

Re: The KYChemist Pot Still Build... "Boiler #1"

Post by The KYChemist »

mash rookie wrote:You shouldn't have big problems with solder.
Here is a 100 gallon copper boiler I built with really cool rivets! They are there for looks and structure.

http://homedistiller.org/forum/viewtopi ... starting+a
We figured we wouldn't have too much of a problem with the solder. We were turned off by the idea of the dove-tails, though. That is why we decided to use rivets, as well as solder. A good mix of form and function.

Now, I need some advice on the thumper. We are planning a 1" inlet tube. This will be connected to a 1/2 x 1 inch reducer, directly connected to a 1/2" tee. Connected to the "arms" of the tee will be a ring of 1/2" tubing, approx 8" in diameter. This ring will be perpendicular to the inlet tube, and horizontal to the bottom of the thumper. Drilled along the inside of the ring will be holes, forming a diffuser, of sorts. Thumper will measure 10" diameter x 10" high. Then vapor will exit through 1" diameter tube, above the liquid level, of course.

Good idea? Bad idea? Thumper volume will be around 3gals. That's a little under half the size of our still. It will more than likely start off a third of the way filled, which would be more than enough to cover the "diffuser".
Whiskey is rays of sunshine, held together with water.
User avatar
The KYChemist
Rumrunner
Posts: 733
Joined: Sat Apr 27, 2013 11:25 am
Location: The Ville

Re: The KYChemist Pot Still Build... "Boiler #1"

Post by The KYChemist »

We picked up our first piece of the puzzle, today, from where "the Mechanic" and I both work... Only cost us about $50. Gotta love the employee discount. 50 foot of 1/2".

Image
Whiskey is rays of sunshine, held together with water.
mash rookie
Angel's Share
Angel's Share
Posts: 2228
Joined: Tue Dec 07, 2010 8:20 am
Location: Pacific Northwest

Re: The KYChemist Pot Still Build... "Boiler #1"

Post by mash rookie »

I like your thumper diffuser idea. I have never run one and was waiting for the pot still, thumper guys to chime in. It sounds like a very efficient way to get as much vapor liquid contact as possible. I dont know if it is necessary or will increase performance of your thumper. I dont see any down side if the holes are large enough to avoid back pressure.

With that much 1/2" tube you could build a sweet 4-5 tube shotgun condenser with an acrylic cover. :D

How are you doing on the pot? After you roll the top I recommend annealing the lower edge before soldering the cone. After soldering, you can roll the lower edge down 1/2" with a hammer and anvil until it will fit into your concentric base for soldering. You can re-anneal as many times as necessary. Heat copper until it just starts to show color and it will be as soft as butter. For that kind of fold, keep the copper soft and try to use light hammer blows to avoid stretching it too much. Your turn will be a little wrinkled but will fit and solder well. A plastic or rawhide hammer works better than a steel.

Keep the pictures coming!

Mash Rookie
User avatar
The KYChemist
Rumrunner
Posts: 733
Joined: Sat Apr 27, 2013 11:25 am
Location: The Ville

Re: The KYChemist Pot Still Build... "Boiler #1"

Post by The KYChemist »

mash rookie wrote:I like your thumper diffuser idea. I have never run one and was waiting for the pot still, thumper guys to chime in. It sounds like a very efficient way to get as much vapor liquid contact as possible. I dont know if it is necessary or will increase performance of your thumper. I dont see any down side if the holes are large enough to avoid back pressure.
The only down side I can really see is if there would be any pukage, from the pot. Especially if there happened to be any kind of solids in the wash. We will just have to be super diligent, to make sure there are none, after we rack the wash. Also, not trying to run too much, at one time, should also help. As far as back pressure, the plan is to add as many diffuser holes, as is equal to the surface area of one circular inch, the inlet size, and then a few more for good measure. So... With the 1" inlet, about (35)3/32" holes should be adequate.

mash rookie wrote:How are you doing on the pot? After you roll the top I recommend annealing the lower edge before soldering the cone. After soldering, you can roll the lower edge down 1/2" with a hammer and anvil until it will fit into your concentric base for soldering. You can re-anneal as many times as necessary. Heat copper until it just starts to show color and it will be as soft as butter. For that kind of fold, keep the copper soft and try to use light hammer blows to avoid stretching it too much. Your turn will be a little wrinkled but will fit and solder well. A plastic or rawhide hammer works better than a steel.
I brought this paragraph to the attention of The Mechanic, as he will be doing most of that work. He highly appreciates your input, and offers a hearty thanks. I don't quite know exactly how we'll be doing it, as this is a learning process for the both of us, but will definitely keep that info in mind. He is an excellent welder, and we can both solder pipe well, but the forming and joining of flat/thin sheets will be an adventure.
mash rookie wrote:Keep the pictures coming!
You asked for it! A little more gratuitous copper-porn. The tee, by itself, will be for the thumper diffuser. The two tee's with the 90's, will be for the condensor. We are going to go with a double-helix condensor, and realize that the coils need to be wrapped in opposite directions. The inner coil will come off and connect at the 90's, and the outer coil will come off and connect at the other arms of the tee's. Since the coil we have, has an o.d. of 1/2", small lengths of 1/2" copper pipe were cut, to serve as "bushings". The longer lengths of 1/2" pipe is where our two 1" x 1/2" reducers will be connected. I may not be making a whole lot of sense right now, but it will be become apparant, as our build progresses.
Image
Whiskey is rays of sunshine, held together with water.
mash rookie
Angel's Share
Angel's Share
Posts: 2228
Joined: Tue Dec 07, 2010 8:20 am
Location: Pacific Northwest

Re: The KYChemist Pot Still Build... "Boiler #1"

Post by mash rookie »

I forgot to tell you there is an HD rule requiring your dog continue to pose with copper, (between his naps) after being introduced on page one of a post.
User avatar
The KYChemist
Rumrunner
Posts: 733
Joined: Sat Apr 27, 2013 11:25 am
Location: The Ville

Re: The KYChemist Pot Still Build... "Boiler #1"

Post by The KYChemist »

mash rookie wrote:I forgot to tell you there is an HD rule requiring your dog continue to pose with copper, (between his naps) after being introduced on page one of a post.
I will definitely keep that in mind, for future reference. :lol: Unfortunately... That pic was taken at work, and Scooter couldn't make the photo shoot in time.
Whiskey is rays of sunshine, held together with water.
User avatar
The KYChemist
Rumrunner
Posts: 733
Joined: Sat Apr 27, 2013 11:25 am
Location: The Ville

Re: The KYChemist Pot Still Build... "Boiler #1"

Post by The KYChemist »

Just a little update, on our build. We placed our order, with guttersupply.com, for our copper sheet, today. We also placed an order for 200 copper rivets, as well, since the still will be held together with a combination of these, as well as solder. All our fittings have also been received. All that is left is the actual build, once we have the Cu sheet, and rivets. I apologise for the speed in which this build is being conducted. We just didn't want anyone thinking this was a thread that was going nowhere. There will be a finished product, and lots of gratuitous copper-porn, forthcoming. Thank you for your patience.
Whiskey is rays of sunshine, held together with water.
mash rookie
Angel's Share
Angel's Share
Posts: 2228
Joined: Tue Dec 07, 2010 8:20 am
Location: Pacific Northwest

Re: The KYChemist Pot Still Build... "Boiler #1"

Post by mash rookie »

KY, if they are solid copper rivets dont forget to anneal them. Even a hand held propane torch will work. Heat until they just show color and they will be soft as butter when used. Dont forget your dog with the next pictures. :thumbup:

Tell him to smile.
User avatar
The KYChemist
Rumrunner
Posts: 733
Joined: Sat Apr 27, 2013 11:25 am
Location: The Ville

Re: The KYChemist Pot Still Build... "Boiler #1"

Post by The KYChemist »

The rivets we ordered are 3/16" head, 1/4 " long shaft, and 5/64" shaft diameter. Solid copper, button heads. They will have a usage of about 50/50 form/functionality. The plan is to clamp our pieces together, mainly the upper and lower pot walls, thumper body, and condenser body. Mark out where we want the rivets, 1" apart, and then drill holes for them. Then disassemble, clean up the holes, and get rid of any shavings, from the drilling. The Mechanic thinks shavings will possibly mess up the solder joints. Flux will then be applied to the overlapping joints, rivets set, and then soldered up. Will annealing the rivets mess up the applied flux? We are also planning on making, basically, two punches with dished heads. One for the finished side of the rivet, as a rest. The other to "clean up" the hammered side, to make it look like the finished side. We also realize, the shafts of these rivets, will probably need a little shortening, before installation.

Do you see any problems, with this process, mashrookie? Scooter will definitely be in all, if not most, future copper photos :thumbup: !
Whiskey is rays of sunshine, held together with water.
mash rookie
Angel's Share
Angel's Share
Posts: 2228
Joined: Tue Dec 07, 2010 8:20 am
Location: Pacific Northwest

Re: The KYChemist Pot Still Build... "Boiler #1"

Post by mash rookie »

After annealing they will be a little dark and scaley. A overnight soak in mild citric acid or vinegar should have them cleaned up okay. Practice with a couple of them including hammering them with and without annealing and you will see how important it is to soften them up. Extra material should not be a problem.
It sounds like you have a good plan. Take your time and build a beauty.
MR
varocketry
Rumrunner
Posts: 514
Joined: Fri Mar 22, 2013 5:15 pm
Location: somewhere not near Detroit

Re: The KYChemist Pot Still Build... "Boiler #1"

Post by varocketry »

I'm taking a Copper Forming Class and the instructor demonstrated a lap seam using a 'Jeweler's Lap Seam' where the leading edge of both sides is beveled back so the material isn't double thickness after soldering. This used thin silver solder wire with flux.

Here's his demo. But understand I planished this after soldering to smooth it out.
Test-Lap-Seam.jpg
Next my actual piece which is the body of the boiler. It is annealed, then both edges filed, use an ODD number of tabs, bend the odd numbered tabs up 45 degrees, form the annealed copper sheet into a cylinder and fit the edges together, then release the sheet and overbend it a little bit so it has spring tension to hold the pieces together. You can use some wire or something else to hold the tube together if you like. Lightly planish (hammer) the seam flat on a stake or heavy tube.

It will look like this before soldering:
Actual-Lap-Seam.jpg
-Just need something else to build. -
User avatar
The KYChemist
Rumrunner
Posts: 733
Joined: Sat Apr 27, 2013 11:25 am
Location: The Ville

Re: The KYChemist Pot Still Build... "Boiler #1"

Post by The KYChemist »

Thank you for the info, varocketry. That's some good stuff. We'll definitely keep that in consideration. We should be getting our copper in, in the next few days. Our rivets just shipped today, as well.
Whiskey is rays of sunshine, held together with water.
varocketry
Rumrunner
Posts: 514
Joined: Fri Mar 22, 2013 5:15 pm
Location: somewhere not near Detroit

Re: The KYChemist Pot Still Build... "Boiler #1"

Post by varocketry »

For a full size boiler build , I wouldn't use the jeweler's beveled lap seam as the extra thickness wouldn't be very noticeable and is more authentic to traditional copper forming. It's Surprisingly simple to form WHEN YOU ANNEAL it first.

Watching some of the YOUTUBE videos, they haven't annealed those sheets they are forming, clearly.
-Just need something else to build. -
User avatar
The KYChemist
Rumrunner
Posts: 733
Joined: Sat Apr 27, 2013 11:25 am
Location: The Ville

Re: The KYChemist Pot Still Build... "Boiler #1"

Post by The KYChemist »

So... Just a quick little update. Our sheet of copper came in on Wednesday. There are few things I've seen, as beautiful, as a new sheet of copper. I dared not even touch it with my bare hands. God forbid, the moment, we have to lay templates. Cutting, scoring, gouging... Too good for you, my dear. Seriously, though, we know it has to be done. I would love to just hang it on the wall, though. Everyone should get to see one, in real life. Still waiting on the rivets. They've been in town since the 19th at 02:11hrs, but have yet to arrive. All templates have been cut. A quick "board meeting", with "The Mechanic", to finalize the design, and its on to production. :D
Whiskey is rays of sunshine, held together with water.
User avatar
The KYChemist
Rumrunner
Posts: 733
Joined: Sat Apr 27, 2013 11:25 am
Location: The Ville

Re: The KYChemist Pot Still Build... "Boiler #1"

Post by The KYChemist »

Well... Tonight will be my sleepless night. The copper sheet is being cut. The Mechanic has a second job, where he has access to a water-jet. I have gone over all my drawings, and templates, and I'm praying all my calculations and designs are correct. Its one thing when its just your money, but when you have a partner, its a little scary. Can't wait to see what the cut pieces will look like. We should have nice, clean cut lines. In other news, I made the gasket for sealing the thumper top to the thumber body. We oversized the thumper top, and we're making a lip for the top of the tumper body. This will require a gasket of 10"i.d., and 10"3/4 o.d.. Tell me what you guys think, as this is my first attempt at one of these gaskets.

Image

Image

We were also able to get the first coil for the condenser coiled, yesterday. We have another coil to make, that will be larger, and this coil will fit inside of it. It will be coiled in the opposite direction, and the two will then be joined together with a tee at the top, and another at the bottom. The whole condenser unit will be approximately 8" in diameter, and the flake stand will be 10" in diameter with a height of 12". I believe, this is known as double helix condenser coil?

Image
Whiskey is rays of sunshine, held together with water.
User avatar
The KYChemist
Rumrunner
Posts: 733
Joined: Sat Apr 27, 2013 11:25 am
Location: The Ville

Re: The KYChemist Pot Still Build... "Boiler #1"

Post by The KYChemist »

We got our cut pieces back from the water jet, and all is good, except for the cap. I don't know what I did, but I under-measured the arc of the cap. Its the right size, but the overlap material for the seam isn't present. The lines are nice and precise. WAAYYY better than what we couldv'e done with a pair of snips. Hopefully, this should aid in overall assembly, as everything should line up precisely. The only downside is that the edges, on the side that was facing down, on the water jet, have a burr all along the edges that were cut. These cleaned up quickly and easily with a small file, during smoke breaks outside, this last weekend. Below is a photo, of preliminary forming, of the top half of the pot. The left side looks like it has a huge dent in it, but I promise, it doesn't.

Image

Here is a shot of what we used to coil our 1/2" tubing for the condensor coils. This set-up was used for the outer coil, and a smaller piece of pipe was used for the inner coil. I love my job!

Image
Whiskey is rays of sunshine, held together with water.
User avatar
guittarmaster
Swill Maker
Posts: 407
Joined: Sat Jul 24, 2010 6:51 pm
Location: Misouri

Re: The KYChemist Pot Still Build... "Boiler #1"

Post by guittarmaster »

.........:shock: and subscribed.
Keep it up! :clap:
War is Peace
Freedom is Slavery
Ignorance is Strength
User avatar
The KYChemist
Rumrunner
Posts: 733
Joined: Sat Apr 27, 2013 11:25 am
Location: The Ville

Re: The KYChemist Pot Still Build... "Boiler #1"

Post by The KYChemist »

Well... A few things have happened lately. We have finally started our build, proper. I have been forming our truncated cone pieces, gingerly, and getting them into good shape. The lyne arm is going to be the biggest PITA! The bottoms for the pot, thumper, and condensor have all been hammered into shape. With some of our leftover drop pieces, we first practiced this. We figured reliefs would possibly have to be cut. Not the case. Just go slow, and don't try and hammer it down all at once. I took it down about 10 deg first, 45 deg second, 75 deg third, then hammered it home. The wood "sandwich", as used by greasydog26, is definitely the way to go. One word of advice, put a bevel on the inside edge of the round that you will be hammering the edge around. It results in the inner radii, between bottom and side, not being so severe. Started building some other pieces as well, most notably... The thumper diffuser. Enjoy the copper-porn!

Image

This was the easiest way I could think of to scribe the inside of the ring, to keep the diffuser holes at about the same level. Pretty self explanatory.

Image

Diffuser ring, drilled out.

Image

The Mechanic, soldering up the diffuser ring. This will sit about an inch above the bottom of the thumper. I was worried the amount of holes would be inadequate. After a quick, non-scientific "blow" test, I am certain we'll be alright. Little to no resistance. Plus... Still learning how to rivet copper. The learning, is the best part about this entire process.

And thank you for the subscribe, guitamaster. we appreciate it.
Whiskey is rays of sunshine, held together with water.
MountaineerMac
Novice
Posts: 6
Joined: Wed Jun 26, 2013 10:07 pm
Location: Tennessee, Amirika

Re: The KYChemist Pot Still Build... "Boiler #1"

Post by MountaineerMac »

Man I cant wait to see the final product. You guys are doing a great job and its gonna be very professional looking.
User avatar
The KYChemist
Rumrunner
Posts: 733
Joined: Sat Apr 27, 2013 11:25 am
Location: The Ville

Re: The KYChemist Pot Still Build... "Boiler #1"

Post by The KYChemist »

As I said, in my last post of this thread, the learning is one of the best parts of this experience. Learned a little bit about fittings over this last weekend. I'm sure 99% of you will already know this, so this is for the 1% that may not. When trying to join 1/2" Cu pipe to Cu refrigeration tubing, your connector needs to be a 1/2" x 3/8" connector. This also applies to other sizes, as well. 1" Cu pipe to 1" Cu tubing, use a 1' x 7/8" connector. I had no idea about this, and actually found my answer on a HVAC forum. The Mechanic was adamant they made special connectors for this kind of thing, so we were overlooking the simplest and most obvious solution. You can see, in the pics for the diffuser, we just soldered up our tubing straight to street els. This made for wasted solder, and a PITA of a job. We ended up getting it to seal well, but it looks UGLY!. We may go back and redo it, we may not. Anyhow, I hope this info comes in handy for someone that may not know already.
Whiskey is rays of sunshine, held together with water.
User avatar
The KYChemist
Rumrunner
Posts: 733
Joined: Sat Apr 27, 2013 11:25 am
Location: The Ville

Re: The KYChemist Pot Still Build... "Boiler #1"

Post by The KYChemist »

Here is the intial mock-up for the double-helix condensor. A little adjustment, and solder, and she'll stand straight and square. As it looks now, the top 3"(approx), will be up above the coolant water, in the flake stand. Is this something I should worry about? We will have a 7 gallon resevoir(blue, rope handled tub), at least, supplying the condensor. The pump we have should be more than adequate(EcoPlus 264 GPH). As she sits now, there is approximately 30' of condensing coil. The condensor body, itself, will be 10" diameter, and 12" high.

Image

Image

Image
Whiskey is rays of sunshine, held together with water.
GatorDave
Novice
Posts: 14
Joined: Mon Jan 14, 2013 6:18 am

Re: The KYChemist Pot Still Build... "Boiler #1"

Post by GatorDave »

Wow this thing is kick-ass!!!! I can't wait to see it all finished! You gotcha another subscriber by the way. :thumbup: I applaud y'all for all of y'all's hard work! :clap: :clap:
Post Reply