The entire filling process took 12 seconds.
Now let the bending commence.
Moderator: Site Moderator


I can take some detailed photos of the rig disassembled if that helps. I'll write up some simple descriptions and dimensions. I usually build without measuring stuff. I use the TLAR method, That Looks About Right:) The bearings are the most expensive item at USD$12 each. Not the highest quality I'm sure, but for this low speed application, they were perfect. The other bits and pieces came to approx USD$30. I'm okay with the cost of the tool as I now can crank these out quite quickly for friends and family. I can't take responsibility for the majority of the design. Dixiedrifter did all the footwork in this thread.The KYChemist wrote:Nice work. After my current build, I'm looking into building one of these, as well. I would actually love to see a write up on the build of your coiling jig. That's as cool as the coil that came off of it. How much did it cost, to make?
Apparently some ketones will dissolve wax. I've tried Methyl Ethyl Ketone (MEK) and it didn't seem to touch a test piece of wax that I had. May be a moot point because the heat I used and the air I finished off with left a very clean innards. In fact, the wax I blew out has a greenish/blue tint. That tells me it cleaned some cu oxide or something.lampshade wrote:Is there a solvent for wax into which the coil could be soaked?
I'm thinking that just warming the wax will leave wax residue on the interior wall of the coil and thus reduce thermal conductivity.


+1rad14701 wrote: Nicely documented build...
Yeah, I understand that the flow doesn't have to be bathtubs of water an hour. My compulsive behaviour over this coil winding was mostly because of the challenge of working with paper thin tubing. It cannot be hand formed easily. Even my aircraft tube bender failed trying to do a ninety degree bend. I have ulterior motives as well. I can see some other applications for tube bending in my future.rad14701 wrote:Not sure how this topic eluded me until now... Seems like you're sweating a lot of details to make a reflux condenser that only needs to be able to have a 1 - 2 liter per minute flow rate...
I wind on a short length of 3/4" copper using only my bare hands and a piece of insulated Romex for spacing... Doesn't get much simpler than that...Maxximus Flavius wrote:Oh, and I get more of a kick out of building tooling than building the item
Thanks. There's as many ways to wind coils as there is ways to make alcoholTDS wrote:Reading about coils before I try mine again.
Yours looks Awesome!
Cheers!


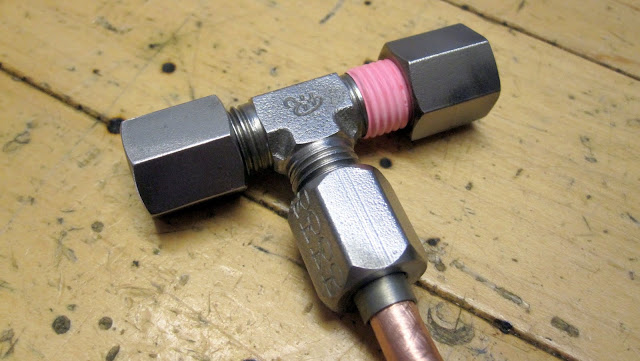


In the end, it's really just a Tee, two endcaps and a bicycle spoke.syro wrote:When i look at how you made all this, i'm starting to doubt how the hell i ever can do it myself.
Maxx, just face it, you got mad skills!Maxximus Flavius wrote:In the end, it's really just a Tee, two endcaps and a bicycle spoke.syro wrote:When i look at how you made all this, i'm starting to doubt how the hell i ever can do it myself.
50 bucks for a Ham-Let H330U!F6Hawk wrote:That's awesome, Max!! I was recently pricing some SS valves, and they were over $100... You ROCK!!


WV_Cooker, pls elaborate about YHB's valve idea.wv_cooker wrote:Nice job of using YHB's valve idea in yet another way.