Bokabob dual slant 2.5" - 3"

Vapor, Liquid or Cooling Management. Flutes, plates, etc.

Moderator: Site Moderator

ebswift
Novice
Posts: 23
Joined: Thu Jan 12, 2012 9:01 pm

Bokabob dual slant 2.5" - 3"

Post by ebswift »

I originally developed a design for a 3", but now due to lack of materials availability, I'm building it in 2.5" stainless (with about 400mm of 3" stainless at the base with an o-ring press fit - with an added flour & water seal if necessary). I came up with a design that was based on a lot of reading (the design is nothing new - just specific measurements), and theoretically I think the 2.5" can use many of the same dimensions of the 3". I know many responses go along the lines of 'build it and see how she runs', but stuff costs a fair bit of money, so hopefully I can get some feedback before I commit column dimensions. I am going to use a stainless boiler that is around 40 litres and plan on removing the wok burner from my BBQ and make a small frame for the whole rig to sit in. I have most of the parts, bits that I don't have is copper column packing (I'd really appreciate ideas on what to use here because I'll need a fair bit of packing), pipe fittings and perhaps a few other bits & pieces. There are quite clear designs for 1.5" - 2" bokabobs, so hopefully I can clarify the design for 2.5" - 3" so maybe others can use it down the track.

This is only my first post, but I think I have done as much research as I can to get the design to where it is. I'm not asking for a complete how-to, so I appreciate any tips/feedback from here before I have committed the materials. Hopefully I haven't gone too wildly wrong on measurements :).

Image
Last edited by ebswift on Tue Jan 31, 2012 12:22 pm, edited 1 time in total.
rad14701
retired
Posts: 20865
Joined: Wed Dec 19, 2007 4:46 pm
Location: New York, USA

Re: Bokabob dual slant 2.5" - 3"

Post by rad14701 »

That design needs a needle valve on the output and it would also benefit from a small product cooling liebig... Also, both plates should extend beyond the halfway point for ample overlap as well as to provide a decent collection cup volume...
Braz
Distiller
Posts: 1899
Joined: Tue Jan 05, 2010 4:38 pm
Location: Indiana, USA, Inc.

Re: Bokabob dual slant 2.5" - 3"

Post by Braz »

I wouldn't bother with the coldfinger, it just adds solder points and complicates the build. Just a double wound coil in the dimensions you have should be sufficient.
Braz
lrandall000
Novice
Posts: 57
Joined: Fri Jan 20, 2012 9:42 am

Re: Bokabob dual slant 2.5" - 3"

Post by lrandall000 »

I have a similar set up.
Beware, pushing all the air out of the cold finger can be an issue when run that direction(with mine it is near impossible). I run the water the other direction for this reason.
ebswift
Novice
Posts: 23
Joined: Thu Jan 12, 2012 9:01 pm

Re: Bokabob dual slant 2.5" - 3"

Post by ebswift »

Thanks for the tips. I've adjusted the design for the lower slant plant to go over centre and added the needle valve (now to find those cheap in Australia). The only rationale behind the cold finger while designing is it's more friendly to recirculating? I've got a small pool filter pump that should be up for it. I need to add a liebig into the design so I'll need to take a closer look at that.
NCStill
Novice
Posts: 18
Joined: Wed Jan 25, 2012 1:33 pm

Re: Bokabob dual slant 2.5" - 3"

Post by NCStill »

Your copper output tube will ned to be 1/4" not 3/8".
1/4" pipe is 3/8" outer diameter which will fit the 3/8" SS needle valve.
3/8" pipe would require 1/2" fittings.
ebswift
Novice
Posts: 23
Joined: Thu Jan 12, 2012 9:01 pm

Re: Bokabob dual slant 2.5" - 3"

Post by ebswift »

NCStill wrote:Your copper output tube will ned to be 1/4" not 3/8".
1/4" pipe is 3/8" outer diameter which will fit the 3/8" SS needle valve.
3/8" pipe would require 1/2" fittings.
That's very handy to know. I'm not buying everything up in advance pretty-much for that type of reason. Whilst I'm fairly handy in the shed I don't know anything about pipe fittings, so I'm going one step at a time, ensuring the next piece fits with the first.

I found a needle valve that looks alright at the right price - it's a shame I have to import from the states though, postage costs and delivery time is a bit of a pain, but over-all it's a component that will last a looong time.

http://www.ebay.com/itm/CII-3-8-Stainle ... 0690815307

Any further advice from anyone on whether I'll need a cold finger for recirculation for a double-wound coil using 3/8 (as Braz was suggesting)? Or should the small pool filter pump be able to push the water through?
NCStill
Novice
Posts: 18
Joined: Wed Jan 25, 2012 1:33 pm

Re: Bokabob dual slant 2.5" - 3"

Post by NCStill »

I would probably do a dual wound coil 10" in length.

Im learning alot as well, planning out my build of a 2" boka reflux.
Any SS Needle valve with 3/8 compression fittings will work for your 1/4" output tube.
ebswift
Novice
Posts: 23
Joined: Thu Jan 12, 2012 9:01 pm

Re: Bokabob dual slant 2.5" - 3"

Post by ebswift »

NCStill wrote:I would probably do a dual wound coil 10" in length.

Im learning alot as well, planning out my build of a 2" boka reflux.
Any SS Needle valve with 3/8 compression fittings will work for your 1/4" output tube.
I've read posts that say an 8" coil is overkill for a 2" column. Are there any links to discussions where people have tried and tested the difference for a larger column? I haven't found any so far.
ebswift
Novice
Posts: 23
Joined: Thu Jan 12, 2012 9:01 pm

Re: Bokabob dual slant 2.5" - 3"

Post by ebswift »

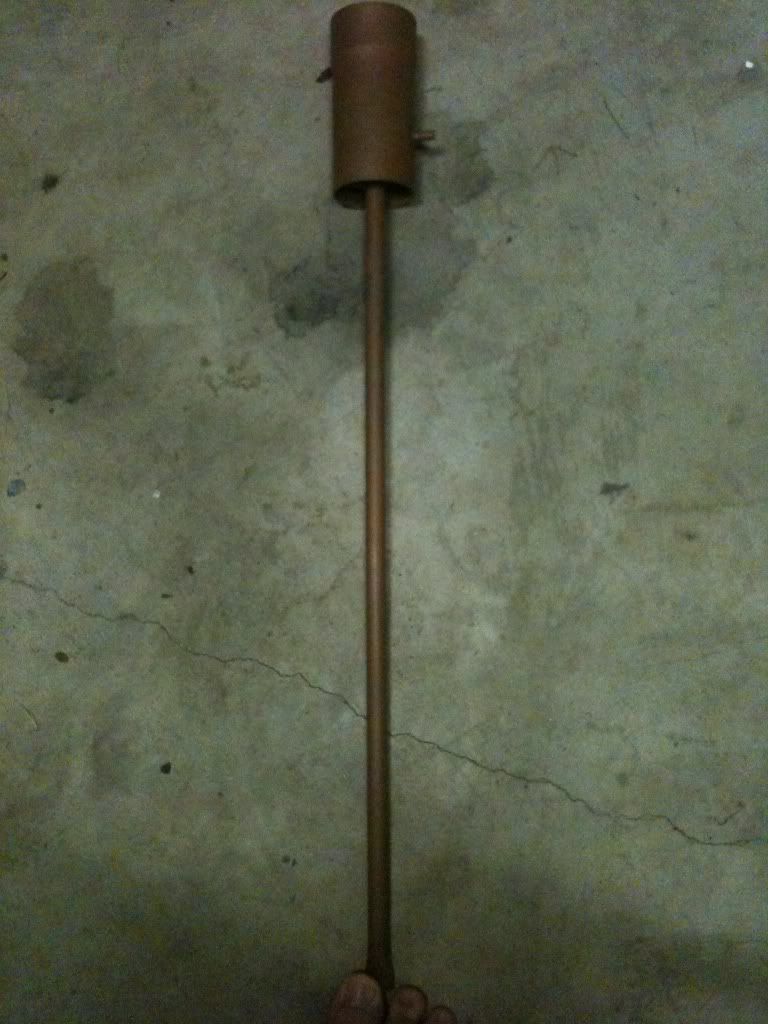
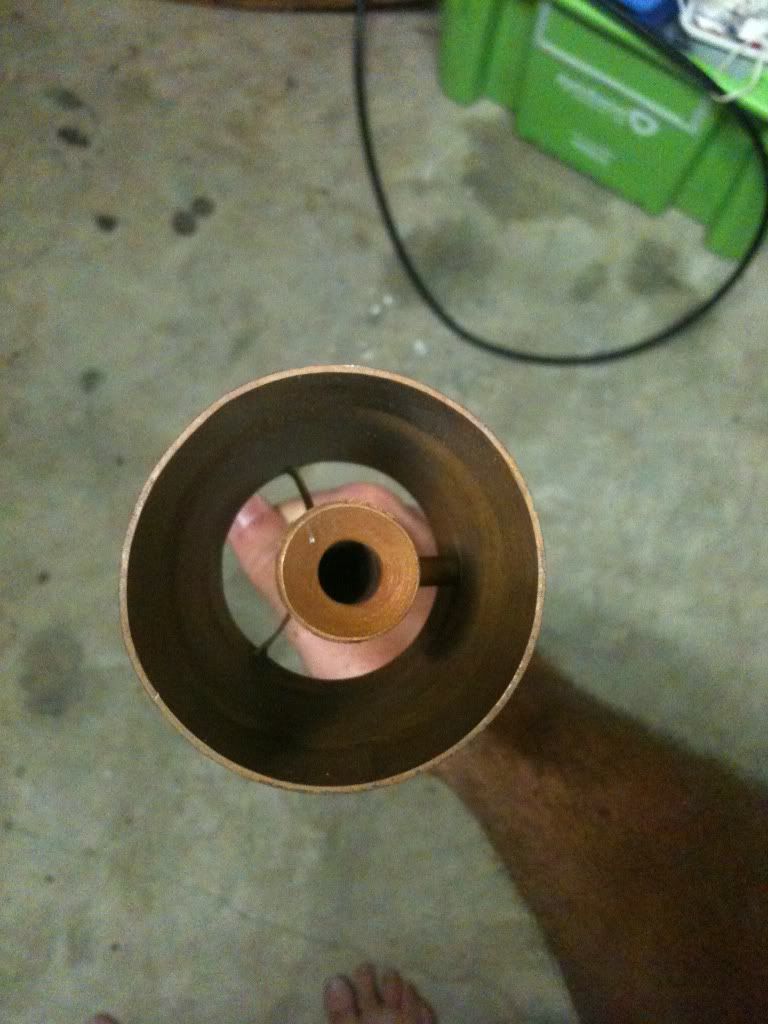
Little bit of headway so far - I now have a condenser.

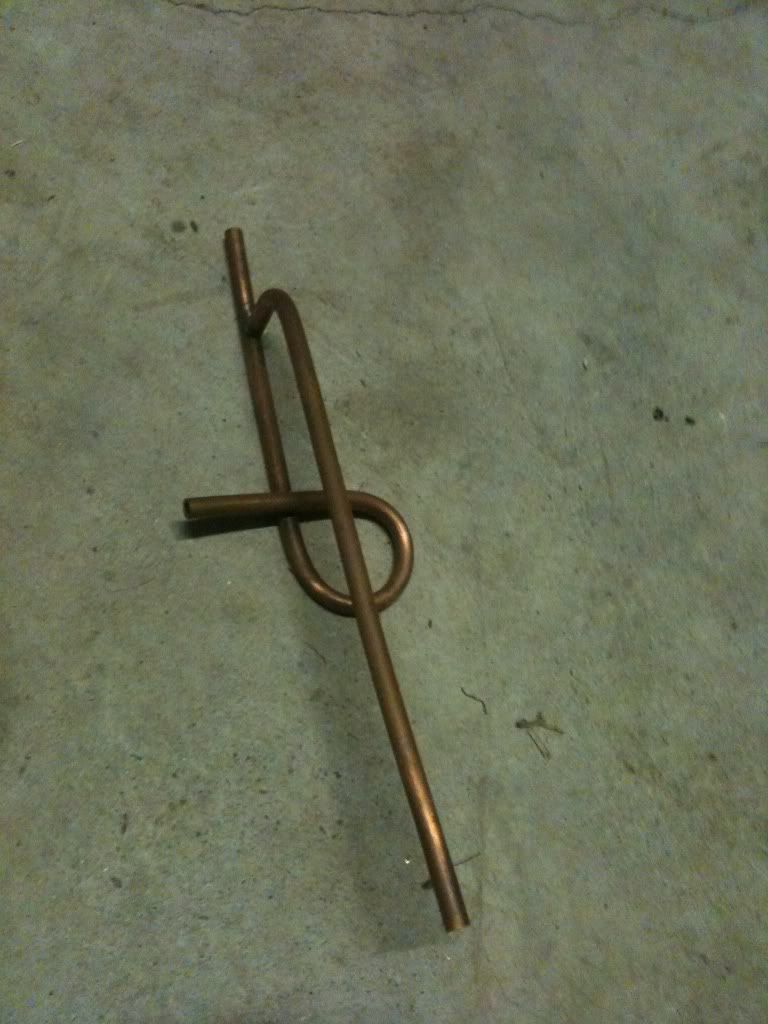
This design for the jig, while it looked pretty, self-destructed pretty quickly. First the picture hangers snapped off, then when I started forcing the issue with the whole setup, the 19mm dowel twisted to destruction. It wasn't a total waste because I still had the base:

Image

The next attempt was the 'no more Mr Nice Guy' design. I sacrificed my (cheapo) jack handle which was pretty solid, found a length of stainless as the end holder, and welded on a crap doubled-up socket for the ratchet to attach to:

Image

I filled the 3/8 copper with cooking salt (the only stuff I saw cheap in bulk) and used an old sacrificial phone USB cable as the spacer. I bought a crapload of salt but was surprised that it only used the top bit of the 2kg bag. Filling the whole 6m length was a bit tricky to do on my own - I'd recommend having a friend who can help hold the length up while you tap it. In the end I managed on my own though.

For the space between the two layers of coils I used a cardboard roll. It was difficult to remove, I soaked it overnight, then started picking it out. Then I hit it with the gurney. Then I grabbed a flat screwdriver and prized the coils apart slightly before blasting the stuck cardboard with the gurney. Bit by bit it all came out.

Image

Removing the salt was harder than it should have been. I used a gurney, and once again, having a friend on hand would make things far easier. I had to try and hold the job down whilst jamming the end of the gurney into one of the intakes, while simultaneously shielding the spray from my eyes so I could see what the hell was going on. In the end, after much gurneying and once a drip started to appear from the outlet I fitted it up to a garden hose, and about 20 minutes later it blasted through into a strong flow:

Image

It turned out reasonably straight, though slightly smaller than planned due to slight flattening. This would be difficult to factor in unless you're into making a lot of coils and can measure the flattening fairly consistently. I think I ended up with ~4-5mm gap on the column sides so we'll see how she goes. The coil itself ended up around 8 1/2" long. I went over the original plan slightly "just in case". The end cap was difficult for me to source, so as a last resort I grabbed the verniers and walked around the local shopping centre looking very suspicious measuring everything that was made out of stainless. In the end, I found a 'wool holder' that is actually a press fit for the 2 1/2 inch column. A very solid press fit at that - if I ever decide to remove the end cap when I fit it, it'll probably be a heat job. But in all honesty If I ever felt the need for a change I'd probably sell the whole thing and start again rather than trying to retain coils or anything.

Image

Image

Anyway, there's lots more to come. I have the 2.5" column fitting into the 3" (I'll use a flour/water seal here). I have the old autoclave prepared - the inner pipe is removed, the resulting hole is plugged, and I have a 3" hole ready at the other end. Next I'll weld in a stopper for the copper mesh at the base and in the 2.5" column at the top of the packing space. Then I'll make a basic frame where I can place my poached BBQ wok burner that I never use, then we'll see what next from there. There's still the liebig, coil line connections, plate insertion (nervous about welding this bit - don't want to blow internal holes in the plates, nor blob weld internally), and cleaning of all the parts used to get rid of solids that have accumulated. The pipe was from salvage, so who knows what was running through it, but I'll probably gurney it out before putting the whole unit through a cleaning run.

So far everything is 'a bit rough', but I just don't have the equipment nor availability of supplies to make a schimko job that looks like it was bought from a shop. Hopefully it'll perform though.

For reference, the 8 1/2 inch 3/8 coil wrapped around a 19mm centre with a 1mm thick cardboard spacer ended up at about 52mm OD. I didn't use a bending spring for the salt-filled pipe. All-up I ended up with about 2 1/2 - 3m of 3/8 pipe left over. Hopefully this reference might be of some use for the planning process for others.
Last edited by ebswift on Sun Feb 05, 2012 1:42 am, edited 1 time in total.
RumBrewer
Rumrunner
Posts: 604
Joined: Sat Jan 07, 2012 1:31 pm

Re: Bokabob dual slant 2.5" - 3"

Post by RumBrewer »

I've got to say that your end product was well worth the effort. That thing is a work of art!
Everything I do or say may or may not have really happened... or it may or may not be all bull shit!
Turning money into steam and likker 10 gallons at a time!
I just want Uncle Sam to be more like Uncle Jessy!
nimrod77
Novice
Posts: 77
Joined: Tue Jan 10, 2006 7:07 pm
Location: out-the-back, Australia

Re: Bokabob dual slant 2.5" - 3"

Post by nimrod77 »

looks good! As a fellow aussie I know your pain with the needle valve thing. I had the same problem. I ended up going with Riku's ARC solution to remove the ouput valve all together.

Image
Image
Image

Another problem I had was finding natural cork for making gaskets...... None of that anywhere!
Keep the pics coming!
ebswift
Novice
Posts: 23
Joined: Thu Jan 12, 2012 9:01 pm

Re: Bokabob dual slant 2.5" - 3"

Post by ebswift »

Thanks for the replies and encouragement. Well, I have the needle valve "in the mail" so hopefully I'll have that soon. The natural cork thing was something that got me too. The only rubber in my unit is behind a large inspection panel on the boiler. It was an autoclave, which operated under high temp/pressure, so I'm thinking that rubber seal would be ok for the lower temp operation of the boiler? I'll replace that out as soon as I can get my hands on natural cork, or I'll just use the flour/water seal instead.
ebswift
Novice
Posts: 23
Joined: Thu Jan 12, 2012 9:01 pm

Re: Bokabob dual slant 2.5" - 3"

Post by ebswift »

Well, it looks like I can't edit the original post which is a bugger - so here's the updated design:

Image
rad14701
retired
Posts: 20865
Joined: Wed Dec 19, 2007 4:46 pm
Location: New York, USA

Re: Bokabob dual slant 2.5" - 3"

Post by rad14701 »

ebswift, you can save some work by simply running your cooling water in the bottom of the product liebig, out the top, and into the reflux condenser... There is no need for two separate coolant circuits on a Bokakob LM reflux column... If it was a CM column then it would be worthwhile...

No need over-thinking a simple and effective design... Honestly, you can tinker with making CAD drawings and spend excess time in the shop or you can just build it and start running, which is the most fun part... I've seen experimental aircraft builders get overly consumed with over-documenting their builds and never getting their plane in the air... Git-R-Done... :thumbup:

Looking good, so far... :clap:
ebswift
Novice
Posts: 23
Joined: Thu Jan 12, 2012 9:01 pm

Re: Bokabob dual slant 2.5" - 3"

Post by ebswift »

rad14701 wrote:ebswift, you can save some work by simply running your cooling water in the bottom of the product liebig, out the top, and into the reflux condenser... There is no need for two separate coolant circuits on a Bokakob LM reflux column... If it was a CM column then it would be worthwhile...

No need over-thinking a simple and effective design... Honestly, you can tinker with making CAD drawings and spend excess time in the shop or you can just build it and start running, which is the most fun part... I've seen experimental aircraft builders get overly consumed with over-documenting their builds and never getting their plane in the air... Git-R-Done... :thumbup:

Looking good, so far... :clap:
Yep, I hear ya'. I'm well aware of the dangers of too much reflection on the design, but where there's flaws it's worth the refining. Because I have the parts availability issue, there are delays between each stage, so that lets me reflect on the next bit and refine the design without too much scope creep, radical redesigning or increased project delays. It won't be perfect by any stretch (poke poke to the 4" designers out there going for insane but drool-worthy efficiency), but I'd like to make the most of what I have on hand. The main intention of the visio design is to cement the plan so I don't start getting tempted to deviate or side-track. And, if it works, it might help by adding a complete design that isn't generally available for 2.5" - 3". Here's the updated plan taking on your advice:

Image
HookLine
retired
Posts: 5628
Joined: Sun May 13, 2007 8:38 am
Location: OzLand

Re: Bokabob dual slant 2.5" - 3"

Post by HookLine »

Nice drawing.

The 150 mm gap between the packing and the slanted plate is a waste of precious column space. 15-20 mm should be plenty.

Reverse the coolant connections on the Liebig. In the bottom, out the top.

Winding 3/8" tube into a double coil for a 2.5" column could be tricky. I had trouble reliably winding them for a 3" column. Though if you fill the tube with fine salt or sand for the wind then that might work fine.
Be safe.
Be discreet.
And have fun.
Braz
Distiller
Posts: 1899
Joined: Tue Jan 05, 2010 4:38 pm
Location: Indiana, USA, Inc.

Re: Bokabob dual slant 2.5" - 3"

Post by Braz »

The only other thing I'd suggest would be to have your takeoff tube on an angle instead of straight out and then into a vertical drop. Like this:

Image

This allows you to collect a little ways away from your boiler/heat source and might help keep an even product flow through the valve.
Braz
ebswift
Novice
Posts: 23
Joined: Thu Jan 12, 2012 9:01 pm

Re: Bokabob dual slant 2.5" - 3"

Post by ebswift »

Ok, I've implemented all the suggestions as they've come through and so here's v2.0 of the design:

Image

Note that the design doesn't show a fully angled take-off simply because it can't fit inside a small drawing, but I placed the note in there.
rad14701
retired
Posts: 20865
Joined: Wed Dec 19, 2007 4:46 pm
Location: New York, USA

Re: Bokabob dual slant 2.5" - 3"

Post by rad14701 »

ebswift, as long as you're doodling why not make that product liebig lay closer to horizontal so the liquid flow is slower as that will allow it to cool further... I have mine almost horizontal now and the spirits come out closer to proper alcometer calibration temperature... In vertical position the spirits were still steaming on the way to the collection jar...
moe fishwater
Novice
Posts: 30
Joined: Fri Jul 22, 2011 6:17 pm

Re: Bokabob dual slant 2.5" - 3"

Post by moe fishwater »

I have a question . . . when I cut the plates for the column, and I notch the return in the bottom plate . . . I need to solder the plates in place, and then bend the return notch after the plates are in place. What's the best way to do that? Thanks.
Some go to church, and think about fishing. Others go fishing and think about God. http://www.pleasantpheasant.net
Coaster
Rumrunner
Posts: 607
Joined: Fri Nov 19, 2010 1:07 pm

Re: Bokabob dual slant 2.5" - 3"

Post by Coaster »

@ moe fishwater,

You should solder the bottom plate first. To make bending the notch down a little easier suggest annealing the notch area of the plate before attempting to install the plate. After soldering the bottom plate in place take a long screwdriver or suitable tool and carefully bend the notch down. After the bottom plate is in place and the notch bent down then solder the top plate in place.

When soldering the plates in place sweat solder the plates from the outside of column pipe.

Regards,
Coaster
Usge
retired
Posts: 3243
Joined: Sat Aug 18, 2007 8:22 am

Re: Bokabob dual slant 2.5" - 3"

Post by Usge »

+1 Coaster

I used a piece of 1/4 hard copper tube to push the tang down on the bottom plate. And again, annealing it first before installing it will make that very easy to do.
ebswift
Novice
Posts: 23
Joined: Thu Jan 12, 2012 9:01 pm

Re: Bokabob dual slant 2.5" - 3"

Post by ebswift »

Some more pics, focusing on the easy stuff first. The bit that has me most worried are the pipe fittings - every time I go looking for something I get weirded-out looks. It's interesting how they're all complaining about people buying online, yet aren't interested in offering any kind of service when you're trying to fit things together that aren't bog-standard plumbing fittings. Most businesses can get parts overnight, but would rather see the back of you than simply offer up some sales advice. I'll still buy local wherever possible, but it's hard when you don't even know precisely what you want.

My father in law had a trolley built for a gurney that saw its last legs, and it ended up being the most awkward addition to my shed - you just can't place the thing out of the way. I had visions of cutting it into pieces to throw into the metal pile, but fortunately it was still there when I needed something to mount my boiler on. As it turned out, it is pretty-much the perfect mobile platform. I devised a slide-in, lock-down arrangement so once in place the boiler can't go anywhere. The boiler has the feet welded on, so once lifted out it can be set down upright (though not terribly stable, but enough just to stand out of the way). The whole thing comes apart in seconds.

Image

To provide heat, I poached the side burner that I never use from my bbq, sliced up the old autoclave paneling to suit the new gas setup, and got it to all fit onto the side of that trolley. It even has the starter button off to the side :D. I was worried about welding this thin stuff, but the mig took it in its stride. I didn't weld it all along, just threw in a few spots.

Image

This gives a better view of the lock down tensioner. The opposide side has a pin that slides up and under so it can't lift out while this tensioner is tightened up.

Image

Here is a preview of the column setup. It doesn't have any plates, no packing and doesn't have the condenser added yet. From ground to top, the whole thing is about 8' 4" tall which is probably a tad larger than I originally set out to do, but it matches the plan. The column height is a few inches over, so I need to decide whether to chop those inches or make them into extra packing height. You can also see in this pic that I added handles to the boiler. It was difficult to move around and install into the trolley without handles.

Image

Once the gas was hooked up, I decided it was time to give the old autoclave a good boil with some baking powder. The inspection plate bolted to the side was letting out some steam so I think I'll use a flour seal there. It did take a couple of hours to reach 99 degrees celsius, but for the first hour or so I had the 3" hole at the top uncovered, so a lot of heat was escaping. The time should be shorter with the heat kept in - the heating did speed up when I restricted the hole somewhat. It was fairly breezy at the time, so I figured that was a good variable to throw in for the test too. The boil test was with the boiler filled with roughly 36 litres of water, and I guessed it would take another 4 to take it to the brim - so I'd probably rate this thing at 35-36 litres to have some air space between the top of the boiler and the column. One important thing I need to consider is how I am going to fill the boiler - this depends how easy it will be to remove the packing from the lower column section - if that is easy, then I can just pour down the lower column section, but if the packing is stuck somewhat, then I might need to think about adding some kind of filler cap.
Last edited by ebswift on Mon Feb 20, 2012 7:25 pm, edited 1 time in total.
Braz
Distiller
Posts: 1899
Joined: Tue Jan 05, 2010 4:38 pm
Location: Indiana, USA, Inc.

Re: Bokabob dual slant 2.5" - 3"

Post by Braz »

Nice, creative re-purposing of materials.

You are going to want to add a filler cap. It will be a lot easier to siphon or pour your wash into the boiler than trying to dump it down the pipe.
Braz
ebswift
Novice
Posts: 23
Joined: Thu Jan 12, 2012 9:01 pm

Re: Bokabob dual slant 2.5" - 3"

Post by ebswift »

This is taking some time to put together. I have welded some male connectors to the needle valve and have some collets for connections to the pipe. I tested the needle valve and it works beautifully, enabling a nice controlled drip.

I chopped an empty spray can at 30 degrees as a template for marking the angled plate lines - it slides over the 2 1/2" column so I can easily draw the cut line around it. So, on the home stretch I think.

I haven't bought the copper packing yet, but that leads me to the next question. Realistically, how much copper packing is needed to remove the sulphides? Can a mixture of stainless and copper packing be used? I'm looking at the cost of the copper packing, and it looks like it would cost maybe 300 bucks for my column for the 1.5m of packing I have planned. So, that got me thinking - the surface area of a copper column filled with stainless packing vs equivalent copper surface area in a stainless column using copper packing. I don't want to spend $300 only to discover that it's gross overkill on the copper side of things.

I'm also thinking about chopping some smaller copper pieces to throw into the stainless boiler - any thoughts on that as a helper for eliminating the sulphides? I want a great result and won't skimp on the extra copper packing if that is what's needed for my setup.

BTW, I tried some home made stuff last night that was apparently around 85% purity when brewed and mixed to 40% with a rum flavouring. It was damned nice and very drinkable. I'm assuming it was charcoal filterd too. So, if I can achieve anywhere near the 95% I'm aiming for, I think I'll be a very happy chappy.
Coaster
Rumrunner
Posts: 607
Joined: Fri Nov 19, 2010 1:07 pm

Re: Bokabob dual slant 2.5" - 3"

Post by Coaster »

@ ebswift,

Closely reviewing the picture posted in your Sun Feb 19, 2012 3:14AM posting I am prompted to question if your boiler is actually manufactured from Stainless Steel. One of the properties of Stainless Steel is that it doesn’t rust. In the posted picture there appears to be iron oxide oxidation ‘rust’ all over surface of your boiler. Also where the top and bottom end caps are welded those mechanical welds do not appear to be the type of welds that are made on something that is manufactured from Stainless Steel. Sorry to say your boiler doesn’t look like it is manufacture from Stainless Steel.

Regards,
Coaster
ebswift
Novice
Posts: 23
Joined: Thu Jan 12, 2012 9:01 pm

Re: Bokabob dual slant 2.5" - 3"

Post by ebswift »

@Coaster, I'm no metals expert, but even a half-keg that I was contemplating on using developed some surface rust internally. The area where I cut and ground the top hole doesn't have any signs of rust yet, even after being exposed to moisture, so I'd say it is stainless. I'm thinking it's more the grade of this particular stainless that will show some rust. Also, the autoclave was sold as scrap stainless.

With a good scrubbing with a stainless scourer between boiling the surface rust should quickly and easily scrub away.
RumBrewer
Rumrunner
Posts: 604
Joined: Sat Jan 07, 2012 1:31 pm

Re: Bokabob dual slant 2.5" - 3"

Post by RumBrewer »

ebswift wrote:'d say it is stainless. I'm thinking it's more the grade of this particular stainless that will show some rust. Also, the autoclave was sold as scrap stainless..
Does a magnet stick to it?
That's not a fool proof trick, because some grades of stainless will stick to a magnet, but not usually.
Everything I do or say may or may not have really happened... or it may or may not be all bull shit!
Turning money into steam and likker 10 gallons at a time!
I just want Uncle Sam to be more like Uncle Jessy!
Post Reply