Maxx's Bok

Many like to post about a first successful ferment (or first all grain mash), or first still built/bought or first good run of the still. Tell us about all of these great times here.
Pics are VERY welcome, we drool over pretty copper 8)

Moderator: Site Moderator

Maxximus Flavius
Swill Maker
Posts: 164
Joined: Wed May 15, 2013 6:01 am
Location: south west Canadia

Maxx's Bok

Post by Maxximus Flavius »

My new build is coming along nicely. I found a nice heavy bottom SS stock pot for almost no money ($34). There was a whole selection with minor cosmetic flaws. It's supposed to be 5 gallons. That's good enough for me as this is going to be a very small scale, hobby endeavour. I found some stainless spring clips that hold the anti-puking dome in place.
Image

The bowl that I sourced needed to be stabilized on the pot with these supports.
ImageImage

Once clipped down, the seal is quite tight. I either lucked out with a very round pot/bowl or the spring clips are doing their job. I drilled a small hole in the top of the bowl and boiled some water to check for vapour leaks. I got an impressive steam jet and no other leakage.
Image

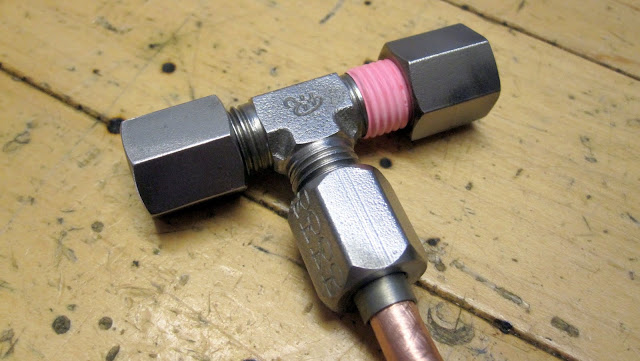
I used my "circle cutter of death" to cut out a stabilizing ring for the column connection. The ring will be soldered to the fitting and the whole assembly will be bolted to the bowl.
Image

I'm looking forward to winding the coil. I usually build jigs or tools for my various projects. There's enough information on this site that I won't have re-invent the wheel... too much :)
http://bit.ly/Maxxs_Bok
shining since 2013
Boda Getta
Distiller
Posts: 1279
Joined: Wed Apr 20, 2011 12:39 pm

Re: Maxx's Bok

Post by Boda Getta »

Even if you saw no leaks on your test boil, I recommend you use some type of safe gasket between your pot and top.

BG
gonagin58
Novice
Posts: 57
Joined: Sun Jan 27, 2013 8:14 am

Re: Maxx's Bok

Post by gonagin58 »

Very nice, Looks real clean.
Maxximus Flavius
Swill Maker
Posts: 164
Joined: Wed May 15, 2013 6:01 am
Location: south west Canadia

Re: Maxx's Bok

Post by Maxximus Flavius »

boda getta wrote:Even if you saw no leaks on your test boil, I recommend you use some type of safe gasket between your pot and top.

BG
Yeah, just to make sure, I'm going to run some Teflon tape around the edge. I can't make it too tight as the clips are quite tight already. I've been bit twice now on my thumb joint when I've released them. Oh well, I put a little bit of blood into everything I do.
http://bit.ly/Maxxs_Bok
shining since 2013
Pyewacket
Swill Maker
Posts: 416
Joined: Sat Jun 30, 2012 5:49 pm
Location: PAC NW

Re: Maxx's Bok

Post by Pyewacket »

Nice work. Love the clamps and the way you put it all together.
Maxximus Flavius
Swill Maker
Posts: 164
Joined: Wed May 15, 2013 6:01 am
Location: south west Canadia

Re: Maxx's Bok

Post by Maxximus Flavius »

I did the first soldering on the column fitting. I`ve never had a chance to work on a joint this big, or use silver solder before. It worked out pretty good. The joint interface was a friction fit. I soldered from the bottom side. I was surprised at the amount of heat it took. Everything was well cleaned and smeared with acid paste. When I flipped it over after it flowed and cooled, I was pleased to see a nice little fillet all the way around the fitting. The wide ring bolted to the flimsy bowl is rigid enough now. I haven`t decided whether to peen the remaining lip of the fitting over on the bottom side for extra strength.
ImageImage
http://bit.ly/Maxxs_Bok
shining since 2013
bellybuster
Master of Distillation
Posts: 4490
Joined: Tue Dec 18, 2012 5:00 pm

Re: Maxx's Bok

Post by bellybuster »

very nice work!! Gonna be a beaut!
Maxximus Flavius
Swill Maker
Posts: 164
Joined: Wed May 15, 2013 6:01 am
Location: south west Canadia

Re: Maxx's Bok

Post by Maxximus Flavius »

bellybuster wrote:very nice work!! Gonna be a beaut!
Hey thanks. I have some aircraft building in my background and we have a saying that if it looks good, it'll fly good :D
http://bit.ly/Maxxs_Bok
shining since 2013
Maxximus Flavius
Swill Maker
Posts: 164
Joined: Wed May 15, 2013 6:01 am
Location: south west Canadia

Re: Maxx's Bok-yeah it's tall!

Post by Maxximus Flavius »

Column is cut and dry fitted. Sure is tall. I'm glad I've spent the extra money on fittings to make it easily teardownable. The condenser/product take off portion will screw on to the boiler for "pot" mode. I'm happy with the rigidity of the column attach flange. Seems stable.
Image
http://bit.ly/Maxxs_Bok
shining since 2013
Maxximus Flavius
Swill Maker
Posts: 164
Joined: Wed May 15, 2013 6:01 am
Location: south west Canadia

Re: Maxx's Bok

Post by Maxximus Flavius »

Ahhh, life and drinking got in the way of working on my Bokokob. I had played around a little with bending the very thin walled (aprox .6mm/.025") copper tubing I sourced at Lowe's for the condenser. Very little success. I am hesitant to use salt and want to keep the spring tube bender use at a minimum. I had an old frying pan with paraffin wax that I use for lubing my bicycle chains and had a brainwave. I poured melted wax into a short crimped piece of tube and then crimped that opening. After cooling, I hose clamped it to a 1/2" pipe and just hand twisted it around.
Image

You can see the solid wax after I sawed the crimped ends off.
Image

I heated it with a torch and the wax ran out. I blew air through it as well. Not sure how effective that will be on longer lengths.
Image

Closer inspection shows the degree of flattening. I'll test the back pressure when complete. This may just be an experiment/opportunity for learning.
Image
http://bit.ly/Maxxs_Bok
shining since 2013
User avatar
Husker
retired
Posts: 5031
Joined: Thu Aug 17, 2006 1:04 pm

Re: Maxx's Bok

Post by Husker »

If it is a single run coil, the wax will be easy to get out, no matter what. The coil will have a downslope. Just heat with a torch and the wax will run out the end. On a double coil, it will be harder to get it all, and you DO pretty much have to get it all out. a little film of wax, will melt, drop down to the low point later, and likely clog the condenser.

A very interesting way of doing it. AS LONG AS you can actually get all that wax out.
Hillbilly Rebel: Unless you are one of the people on this site who are legalling distilling, keep a low profile, don't tell, don't sell.
Maxximus Flavius
Swill Maker
Posts: 164
Joined: Wed May 15, 2013 6:01 am
Location: south west Canadia

Re: Maxx's Bok

Post by Maxximus Flavius »

Husker wrote:If it is a single run coil, the wax will be easy to get out, no matter what. The coil will have a downslope. Just heat with a torch and the wax will run out the end. On a double coil, it will be harder to get it all, and you DO pretty much have to get it all out. a little film of wax, will melt, drop down to the low point later, and likely clog the condenser.

A very interesting way of doing it. AS LONG AS you can actually get all that wax out.
I'm planning on a double coil. My mental picture sees the entire finished coil with the in/out ports facing straight down in the kitchen oven. The wax should run out both tubes. That's what I'm thinking anyway. As long as there's no low spot.

Apologies to dixiedrifter for using his photo.
Image
http://bit.ly/Maxxs_Bok
shining since 2013
Maxximus Flavius
Swill Maker
Posts: 164
Joined: Wed May 15, 2013 6:01 am
Location: south west Canadia

Re: Maxx's Bok

Post by Maxximus Flavius »

After my initial experiments with bending copper tube filled with parafin wax, I decided to go big. I filled the entire 25' coil with wax using my shop vacuum. I had to make an adapter out of a threaded ABS plug that fit my vacuum hose perfectly. I used a length of clear vinyl tube as an indicator for shutting the vacuum off.
Image

The entire filling process took 12 seconds.


Now let the bending commence.
http://bit.ly/Maxxs_Bok
shining since 2013
Maxximus Flavius
Swill Maker
Posts: 164
Joined: Wed May 15, 2013 6:01 am
Location: south west Canadia

Re: Maxx's Bok

Post by Maxximus Flavius »

My coil forming fixture is complete.
Image

I made a little ramp to facilitate the transition to the outer coil.
Image

A simple guide to space the coils.
Image

I test twisted another short piece to make sure I'm on the right track.
Image

And the tube deformation is acceptable.
Image

Now for the real job of forming the condenser.
http://bit.ly/Maxxs_Bok
shining since 2013
User avatar
The KYChemist
Rumrunner
Posts: 733
Joined: Sat Apr 27, 2013 11:25 am
Location: The Ville

Re: Maxx's Bok

Post by The KYChemist »

Nice work. After my current build, I'm looking into building one of these, as well. I would actually love to see a write up on the build of your coiling jig. That's as cool as the coil that came off of it. How much did it cost, to make?
Whiskey is rays of sunshine, held together with water.
Maxximus Flavius
Swill Maker
Posts: 164
Joined: Wed May 15, 2013 6:01 am
Location: south west Canadia

Re: Maxx's Bok

Post by Maxximus Flavius »

Very few times in my life do I nail something the first time. I'm highly trainable though. This site has done it's job. My first coil is a success with just very minor flaws. I wound the first coil without springs.
Image

I wrapped it in cardboard until I had a O.D. of 1.45". I expected some crush on the cardboard and some slight deformation on the tube. I want to space both coils evenly in the 2" home that they're going to live in.
Image

And the finished coil/condenser. I was able to grab a piece of the cardboard tube with a needle nosed vicegrips. A slight counter clockwise twist of the outer coil opened it up enough that the cardboard just slipped out.
Image

The forming is very accurate.
Image
Image

I've successfully evacuated the parafin wax and done some flow tests. At 60 psi line pressure, it flows at just under 6 liters a minute. I calculate that I have about 17'-18' in the condenser after measuring the piece I had left and the test pieces I did. I flowed the 25' coil before I started and it flowed at 7 liters/minute. Am I happy? Yah mon! I've got video of the bending, wax removal and the flow tests. Working off an under powered netbook, it's a work-in-progress.
http://bit.ly/Maxxs_Bok
shining since 2013
Maxximus Flavius
Swill Maker
Posts: 164
Joined: Wed May 15, 2013 6:01 am
Location: south west Canadia

Re: Maxx's Bok

Post by Maxximus Flavius »

The KYChemist wrote:Nice work. After my current build, I'm looking into building one of these, as well. I would actually love to see a write up on the build of your coiling jig. That's as cool as the coil that came off of it. How much did it cost, to make?
I can take some detailed photos of the rig disassembled if that helps. I'll write up some simple descriptions and dimensions. I usually build without measuring stuff. I use the TLAR method, That Looks About Right:) The bearings are the most expensive item at USD$12 each. Not the highest quality I'm sure, but for this low speed application, they were perfect. The other bits and pieces came to approx USD$30. I'm okay with the cost of the tool as I now can crank these out quite quickly for friends and family. I can't take responsibility for the majority of the design. Dixiedrifter did all the footwork in this thread.
http://homedistiller.org/forum/viewtopi ... 4#p6800773
http://bit.ly/Maxxs_Bok
shining since 2013
lampshade
Rumrunner
Posts: 541
Joined: Tue Jan 24, 2012 3:19 pm
Location: Southern California

Re: Maxx's Bok

Post by lampshade »

Is there a solvent for wax into which the coil could be soaked?

I'm thinking that just warming the wax will leave wax residue on the interior wall of the coil and thus reduce thermal conductivity.
In Flanders fields the poppies blow * Between the crosses, row on row, * We are the Dead. Short days ago * We lived, felt dawn, saw sunset glow, * Loved and were loved, and now we lie * In Flanders fields. -- from a WWI poem
Maxximus Flavius
Swill Maker
Posts: 164
Joined: Wed May 15, 2013 6:01 am
Location: south west Canadia

Re: Maxx's Bok

Post by Maxximus Flavius »

lampshade wrote:Is there a solvent for wax into which the coil could be soaked?

I'm thinking that just warming the wax will leave wax residue on the interior wall of the coil and thus reduce thermal conductivity.
Apparently some ketones will dissolve wax. I've tried Methyl Ethyl Ketone (MEK) and it didn't seem to touch a test piece of wax that I had. May be a moot point because the heat I used and the air I finished off with left a very clean innards. In fact, the wax I blew out has a greenish/blue tint. That tells me it cleaned some cu oxide or something.

I'm not to concerned about heat transfer as the .6 mm tube wall I used is very thin and shouldn't be a problem.
http://bit.ly/Maxxs_Bok
shining since 2013
Maxximus Flavius
Swill Maker
Posts: 164
Joined: Wed May 15, 2013 6:01 am
Location: south west Canadia

Re: Maxx's Bok

Post by Maxximus Flavius »

A short video on the winding and then cleaning the wax out of my condenser. Followed by the flow test.


and the end cap soldered on.
Image

and the place it will live from now on...
Image
http://bit.ly/Maxxs_Bok
shining since 2013
Maxximus Flavius
Swill Maker
Posts: 164
Joined: Wed May 15, 2013 6:01 am
Location: south west Canadia

Re: Maxx's Bok

Post by Maxximus Flavius »

I've got the slanted plates cut and fitted in the head. Just need to solder them in and bend the little tab down.
Image

I was pondering in how to install a temperature port. Came up with this. I had a stainless 1/4" tube fitting that I sawed on a angle to match the plates. My belt sander top roller is the same diameter as the column. I profiled the fitting for a close fit. Using soldering info from this site, I tinned and stuck it on to a test piece. I drilled a hole that is the same size as the temp prob in a tube cap.
Image

A couple wraps of teflon tape and the cap is tightened on to the fitting.
Image

You can see a little ring of teflon squished out. I seems to be a good fit.
Image
http://bit.ly/Maxxs_Bok
shining since 2013
rad14701
retired
Posts: 20865
Joined: Wed Dec 19, 2007 4:46 pm
Location: New York, USA

Re: Maxx's Bok

Post by rad14701 »

Not sure how this topic eluded me until now... Seems like you're sweating a lot of details to make a reflux condenser that only needs to be able to have a 1 - 2 liter per minute flow rate...

Here are some guidelines for those attempting to wind a coil... The more air gap between the coils the greater the possibility of flattening, so keeping the air gap less than the diameter of the tube helps... I go with 1/8" - 1/4" air gap for 1/4" annealed copper... Wind slowly with your hands and you can have success without flattening when using a mandrel at least 3x the diameter of the copper, which is the industry standard minimum...

Nicely documented build... :thumbup: It takes me longer to take pictures than to do builds... :shifty:
lampshade
Rumrunner
Posts: 541
Joined: Tue Jan 24, 2012 3:19 pm
Location: Southern California

Re: Maxx's Bok

Post by lampshade »

rad14701 wrote: Nicely documented build... :thumbup:
+1
In Flanders fields the poppies blow * Between the crosses, row on row, * We are the Dead. Short days ago * We lived, felt dawn, saw sunset glow, * Loved and were loved, and now we lie * In Flanders fields. -- from a WWI poem
Maxximus Flavius
Swill Maker
Posts: 164
Joined: Wed May 15, 2013 6:01 am
Location: south west Canadia

Re: Maxx's Bok

Post by Maxximus Flavius »

rad14701 wrote:Not sure how this topic eluded me until now... Seems like you're sweating a lot of details to make a reflux condenser that only needs to be able to have a 1 - 2 liter per minute flow rate...
Yeah, I understand that the flow doesn't have to be bathtubs of water an hour. My compulsive behaviour over this coil winding was mostly because of the challenge of working with paper thin tubing. It cannot be hand formed easily. Even my aircraft tube bender failed trying to do a ninety degree bend. I have ulterior motives as well. I can see some other applications for tube bending in my future.

On the plus side, I eventually plan on running the condenser with a small pond or fountain pump. The less back pressure the easier it will be on the pump. Oh, and I get more of a kick out of building tooling than building the item :lol:
http://bit.ly/Maxxs_Bok
shining since 2013
rad14701
retired
Posts: 20865
Joined: Wed Dec 19, 2007 4:46 pm
Location: New York, USA

Re: Maxx's Bok

Post by rad14701 »

Maxximus Flavius wrote:Oh, and I get more of a kick out of building tooling than building the item :lol:
I wind on a short length of 3/4" copper using only my bare hands and a piece of insulated Romex for spacing... Doesn't get much simpler than that...
TDS
Rumrunner
Posts: 548
Joined: Thu Jun 27, 2013 1:07 pm

Re: Maxx's Bok

Post by TDS »

Reading about coils before I try mine again.
Yours looks Awesome!
Cheers!
"You know, you can just buy that stuff right up the road" he said.
I just smiled, and said quietly, "No you can't".
Maxximus Flavius
Swill Maker
Posts: 164
Joined: Wed May 15, 2013 6:01 am
Location: south west Canadia

Re: Maxx's Bok

Post by Maxximus Flavius »

TDS wrote:Reading about coils before I try mine again.
Yours looks Awesome!
Cheers!
Thanks. There's as many ways to wind coils as there is ways to make alcohol :D
http://bit.ly/Maxxs_Bok
shining since 2013
Maxximus Flavius
Swill Maker
Posts: 164
Joined: Wed May 15, 2013 6:01 am
Location: south west Canadia

Needle valve time

Post by Maxximus Flavius »

I'm as reluctant as anyone to spend big money on a stainless steel needle valve. Using a suggestion from this site about bicycle spokes, I got to thinking. Stainless tube fittings can be sourced somewhat easily. So I located two caps, a branch tee and tube nut and sleeve. I drilled a .067" (#51) in one cap and a .078" (#47) in the other one. I spun a short piece of spoke against my belt sander to profile a point. Here's the pieces before soldering and assembly.
Image

I silver soldered the "needle" cap while the valve was assembled to keep alignment.
Image

Here's the drippy end in the full reflux poslition.
Image

Teflon tape as a cap seal and good to go. This will need to replaced periodically.
Image

I made a test rig to test the valve. A re-purposed disposable potato salad container, some aircraft fittings and isopropyl alcohol. No, I will not use the anodized fittings in my build :ewink: I think I'll solder another cap on the drip end with the open end out so I can easily attach an extension tube. The beauty of this assembly is how easy it comes apart. When I run it in pot mode, I can just pull the outlet cap off for unrestricted flow. Or just pull the valve off all together.
Image

And here's the proof of concept video...
http://bit.ly/Maxxs_Bok
shining since 2013
TDS
Rumrunner
Posts: 548
Joined: Thu Jun 27, 2013 1:07 pm

Re: Maxx's Bok

Post by TDS »

Looks awesome. Having no skills myself, I am enjoying watching you.
I just plunked down for a 3/8 ss valve myself.
Yeah, damn pricey. There's another guy made one with a bicycle spoke.
Around here somewhere. I'm building too, but my whole head will unclamp.
I'm buying a lot of prefab stuff because like I said,
No skills in that dept.
You obviously has them.
Looking Good.
Cheers!
:twisted:

Edit - I guess you already saw that thread too.
"You know, you can just buy that stuff right up the road" he said.
I just smiled, and said quietly, "No you can't".
Maxximus Flavius
Swill Maker
Posts: 164
Joined: Wed May 15, 2013 6:01 am
Location: south west Canadia

More needle valve stuff

Post by Maxximus Flavius »

I decided to glue two caps together sooner than later so I can attach any length or shape of outflow tube. The second cap has a hole drilled a couple of times larger than the needle valve hole. A tube to tube union has to be used. I carefully filed and polished the joint so it's invisible Here's how it looks laid out.
Image

And kinda how it will look in place.
Image

I saved myself some $100 by spending a couple of hours where I should pay myself $50/hour :(
http://bit.ly/Maxxs_Bok
shining since 2013
Post Reply